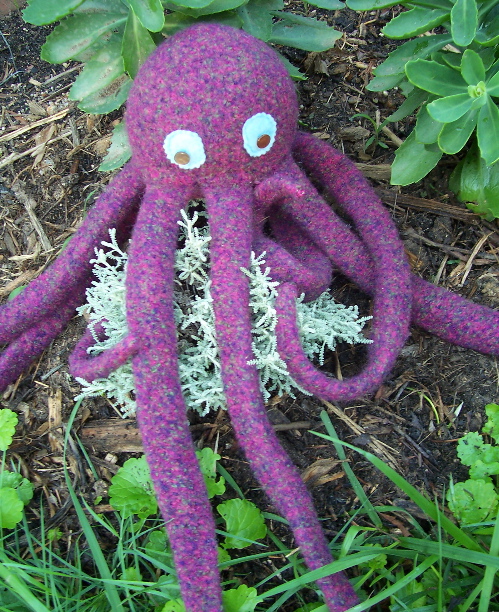
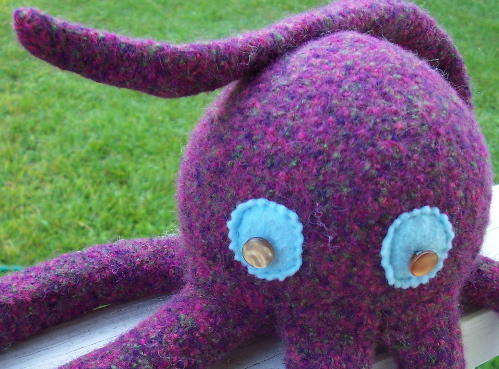
My grandfather had a real soft spot for octopi. Every story my grandfather told us inevitably contained an octopus, even if it was just a walk-on character. Maybe because of him, I have always loved octopi, with their many legs, their pacifist ink-blot self-defense system, and their crafty ways. This felted octopus was named in honor of my grandfather George, who always loved a new toy. I hope you have as much fun making it as I did!
update: Now available as a free Ravelry download!
size: one size
materials
- 2 skeins Cascade Quatro (shown in color #9440) 100g/220yd, 100% wool
- size 10 needles (US) - one set of DPN's and one 16" circular
- size J crochet hook
- tapestry needle
- sewing needle
- stitch markers in multiple colors
- polyester fiberfill or other fluffy stuffing
- small amount of scrap or craft felt in contrasting color, and matching sewing thread
- sewing thread to match the main-color yarn
- two 3/8-inch buttons
- pinking shears
construction
First you will knit the body, which is basically a big ball knit in the round, with the bottom left open. Once the body is knitted, you will knit 8 legs, and then using a crochet hook, sew them onto the body, leaving them open towards the inside for stuffing. Then you'll pick up the remaining cast-on stitches along the leg tops, again knitting in the round, to knit the underside of the octopus. You'll leave a big hole for stuffing but knit a flap to cover it, which will be sewn down after felting and stuffing is done.
Finishing will consist of cutting two eyes out of contrasting felt and sewing them down, then sewing on buttons to complete the eyes. Once the octopus is stuffed, you'll sew down the stuffing portal - and that's it!
knit the body
Using DPN's, CO 6 st. Divide evenly across 3 needles to knit in round. PM and join to knit in the round.
R1: Knit
R2: Kfb of every st (6 st inc, 12 st total)
R3 (and all odd rnds): Knit
R4: *Kfb, K1. Rep from * to end. (18 st).
R6: *Kfb, K2. Rep from * to end. (24 st).
R8: *Kfb, K3. Rep from * to end. (30 st)
Continue in this manner, inc 6 st on every other rnd until there are 78 st on your needles. You can switch from DPN's to the circular needle once you have enough stitches.
K 10 rnds even.
Dec R1: *SSK, K11. Rep from * to end - 6 st dec.
R 2: Knit
R3: *SSK, K10. Rep from * to end. 66 st rem.
R4: Knit. 66 st rem.
R5: Knit, dec a total of 2 st this rnd, spaced evenly. 64 st rem.
R6: BO loosely.
knit the legs
Using DPN's, CO 16. PM to K in rnd.
K in rnd until leg measures 12" long, then begin to taper.
Dec rnd 1: K to last 3 st, SSK, K1.
K 3 rows.
Dec rnd 2: K to last 3 st, SSK, K1.
Continue dec 1 st on every 4th row until 9 st rem.
At this point you can move all st onto one DPN to knit the rest of the leg as an I-cord.
Now dec every 3rd row until 4 st rem. Cut the yarn, thread the tail through the 4 rem st and pull tight. Make a discreet knot and thread the tail into the inside of the leg to finish.
Make 8 legs.
attaching the legs to the body
You will use the crochet hook to sew the leg openings to the body opening. Holding right sides together, SC 8 st across each leg onto 8 BO body st. You are leaving 8 leg st free, so that the leg still opens (opening towards the inside of the octopus body) once it's sewn on.
Repeat for each leg until all 8 legs are attached, spread evenly around the body opening.
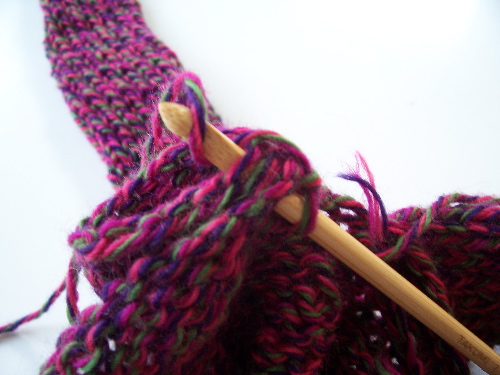
using a crochet hook to attach the legs - remember, right sides together!
knitting the underside
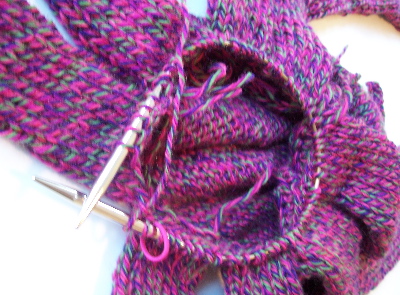
Turn the octopus over so that it's resting on its head with the 8 legs spread out in a halo around it, with the underside facing up. Using the circular needle, pick up and knit the 8 rem CO st from each leg, all around the edge of the body. When you finish, you will have 64 st on your needle, as shown in in the picture below. PM and join to K in the round.
R1: Knit.
R2: Dec 4 st, evenly spaced. As you do this, place 5 more markers (a different color from your first marker) around the body, so that there are 12 st between each marker. 60 st rem.
R3: *K2tog, K to 2 st before M, SSK, slip M. Rep from * to end. 12 st dec.
R4: Knit
Repeat rows 3 and 4 until 24 st rem.
You have finished knitting the body and will now leave a portal on the bottom for stuffing, with a round flap to cover it.
stuffing portal
Loosely BO 18 st. K the remaining 6 st.
Using the backwards loop method, CO 24 st. Join these 24 to the 6 st on the body and PM to knit in rnd. 30 st total.
R1: Knit.
R2: *K2tog, K1, SSK. Repeat from * to end. 18 st rem.
R3: Knit
R4: *K2tog, SSK. Repeat from * to end. K2tog. 6 st rem.
Cut an 8-inch tail of yarn and thread through rem st, pull tight. Knot and weave in tail end, trim.
Sew up any large gaps as needed.
Weave in all loose ends and trim.
felting
Place the octopus into a pillowcase and tie the end. Felt it in your washing machine.
I threw in a a couple of bath towels to add agitation, and a tiny dash of liquid soap. On hot water, run the washer for two 10-min cycles, stopping it each time before the spin cycle.
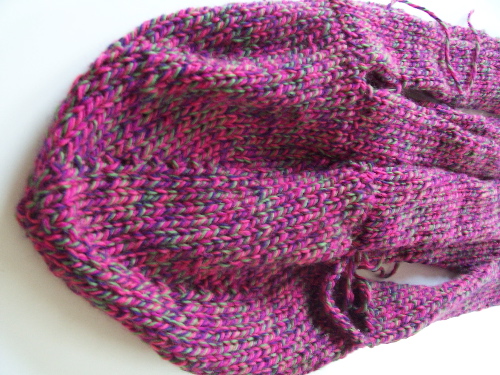
here's george's body before felting
Once you take the octopus out of the washer, remove it from the pillowcase, and don't be shy about pulling, pushing and tugging it into shape. Use the blunt end of a straight knitting needle to open up the insides of the legs for stuffing (they will have fused together somewhat in the wash).
Stuff the body well with plastic bags, shaping it as you want it, and leave it to dry ast least overnight. Once the octopus is completely dry, move on to the finishing touches.
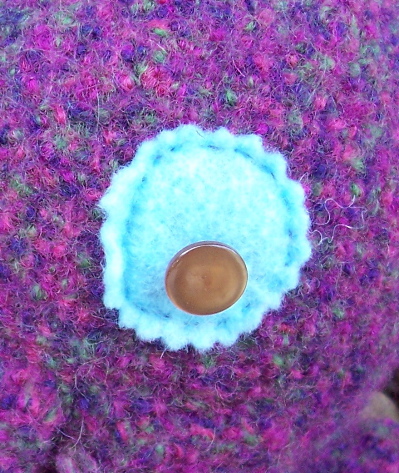
eyes
To make the eyes, use a pencil and trace a quarter (or other small circular object) onto the craft felt. Cut out the circle using your pinking shears to create a zig-zag edge all the way around. Pin eyes into place and then carefully sew them on, being careful to make small, neat stitches (unlike mine), because your stitches will show.
Sew buttons into place to complete the eyes.
stuffing & finishing
Use polyester fiberfill (or your favorite stuffing material) to stuff the octopus, beginning with the legs. Use very small bits and stuff them in gently, shaping as you go.
Stuff each leg gently and loosely - tightly-stuffed legs will stick out like the octopus has been electrocuted, and you want them to flop around nicely.
* Optional: You could add wire to each leg to make them poseable. Do not use pipe-cleaners -- they are not strong enough to hold felted legs in shape!
Now stuff the head firmly, making sure that all the nooks and crannies are well-stuffed. Shape the head as you stuff. Once you think you have enough stuffing in there, use your fist to tightly cram it all into place, and then tightly stuff the hollow you just made with your fist.
Once the head is firmly stuffed, sew down the stuffing-portal using a needle & matching sewing thread.
You're all done! Hug and squeeze to your heart's content.
i want a crabcake
important notice: This is a free pattern and you are welcome to use it for all the non-commercial purposes you like. However, you may not reproduce this pattern to sell, and you may not sell what you make with it. You may donate what you make with it to charity, and you may use it for charity fundraisers only if 100% of the proceeds are donated to the charity (and by charity I don't mean your kid's college fund). Thanks for understanding!
Oh, my. I am in love. Totally, completely and utterly smitten. I might have just inked myself. (hee hee)
ReplyDeleteI'm SO picking up some needles for this one!
Oh he's ace! Why did you decide to felt him first? I wonder what he would have looked like kept as knit?
ReplyDeleteHe is so cute!
ReplyDeleteSoooo #@$@ing adorable!
ReplyDeleteI'm thinking about having a baby, just so we can convince you to make one of those for us!
george is so cute. i would love to hear one of your grandfather's octopus stories. happy friday f.pea! xo
ReplyDeleteno. really. So adorable. Have a good weekend ms pea! and george
ReplyDeleteVery cool -- thank you so much!!
ReplyDeleteGeorge is super cute!
ReplyDeletetoo cute! (but waaaaaay too complicated for this girl. damn.)
ReplyDeleteWoo hoo! So awesome! Mind if I link?
ReplyDeleteGeorge is very charming. So cute!
ReplyDeleteGreat pattern!
ReplyDeleteHooray!
ReplyDeleteMy daughter wants a pink octopus and my son wants a green one. This is perfect.
Thanks so much for this pattern. My son and his wife have a pet octopus. Karen
ReplyDeletewhat do you mean start to decrease on the legs. one stitch? 5? 40? >.>
ReplyDeleteLovely octopus! Thanks so much.
ReplyDelete