Tuesday, September 10, 2013

sizing up - you can do it!

How to get the size you want for a sweater knit in the round, a.k.a. pattern schmattern! Updated 9/25/13 with an important math correction!

I get lots of emails and comments from knitters asking me to please add size X to a particular pattern so that they can knit one to fit their grandson / neighbor's child / oversized dog / My Buddy doll. I may or may not agree that the design in question will work well for the size requested, but here's the thing... you don't have to listen to me! And also, who wants to wait around on a free pattern designer with a day job and little kids to get around to it anyway? You can do it yourself!

Learning how to size a pattern to fit the intended wearer is a really important skill for any knitter. You may be someone who falls somewhere in between the American Craft Yarn Council's idea of what a Medium and a Large are, but you still want your sweater to fit like it was made for you! You may have a baby who wears a size 4T. You may have a middle-schooler who's still in toddler sizes. That doesn't mean that they can't have garments that fit well.

For those of us who knit in the round, the oracle to consult is Barbara Walker's Knitting from the Top (For garments knit flat, the lovely knitter's reference book Stitch & Bitch Nation by Debbie Stoller has a great guide to customizing patterns to fit you better). But here's a basic how-to guide that will help you size any of my top-down sweater patterns to fit your intended wearer.

Step One: Measure the Wearer

This is such a bummer, right?!? Because you wanted the sweater to be a surprise. You wanted it to be something they never expected. Well, you can't make it a surprise and make it fit well. You have to pick one. And they will be surprised by the finished product, anyway - they will never have expected something so awesome. So here are the three basic measurements you will need:

1. The chest circumference. This is the most important! Every sweater size is based on this measurement. Get the person's torso naked (or just lightly clothed) and take an accurate measurement around the widest part of the chest. How loose do you want the sweater to fit? Most sizing guides assume 2 inches of ease, but if you want the Marilyn Monroe look, by all means don't add any ease.

2. The sleeve length. Measure from the person's armpit to their wrist. Or if you want short sleeves or 3/4 sleeves, measure to the point where you want the sleeve to end.

3. The back length. Measure from the neckline to the point at which you want the sweater to end. Is this a cropped sweater that just makes it to the waist? A tunic that lands mid-thigh? Find out how long that really is on the person who's going to be wearing it.

Get super advanced pointers on how to measure accurately from the American Craft Yarn Council.

OK, so now you have your measurements!

Step Two: Adjust the sweater's circumference

Warning: This is the part with a lot of paying attention and math and stuff.

Okay now, before you even go knitting, for heaven's sake knit a swatch and make sure your gauge is correct. I can't say this emphatically enough: Get the right gauge. Get the right gauge. Get the right gauge. If you haven't learned this the hard way yet, with much wailing and gnashing of teeth, please let me save you from such a hideous fate, and just knit a swatch to check your gauge.

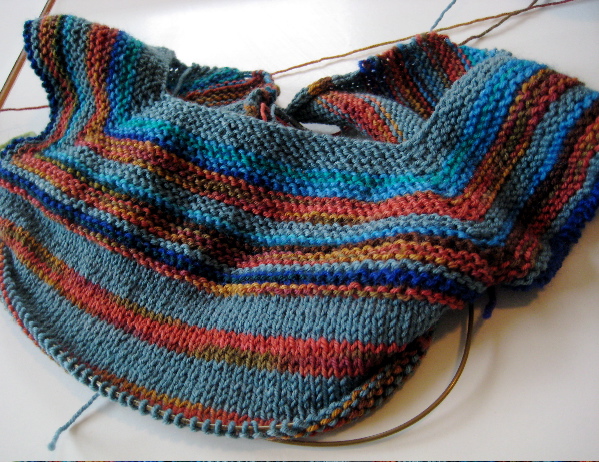
So you've got gauge and you've cast on all the stitches starting at the neckline, and you're working your way down towards the chest, increasing on every other row as instructed. You're going to come to a really important point in the early development of this sweater, the point at which you divide for the sleeves. It looks like this:


Before you go separating out those sleeves, it's time for a little math. Very basic math, don't worry. But get a calculator out anyway.

Count up all the stitches in the front and back sections of the sweater (that's all the stitches on your needle, minus the two sleeve sections). Now you have a number of stitches. Let's just say it's 100. Now there are a few other stitches you need to think about.

  • How many stitches will be added on at each underarm when the sleeve sections are separated out? You need to add those in as well. Let's say there are 5 on each side. So now we have 110 stitches. 
  • And finally, will we be adding on any extra stitches in the front center? Say, for a button band? You may need to read to the end of the pattern to figure this one out. If so, add those in too. Important math note: If it's a button band, that probably means that you're going to be picking up selvedge stitches and knitting the band perpendicular to the direction of the sweater body stitches. If that's the case, don't add in the total number of button band rows. Add 3/4 of them. Let's say you'll be adding on a button band later, and that it's 8 rows wide. 3/4 of 8 is 6 stitches. So our grand total is 100 + 5 + 5 + 6 = 116.

Are you confused yet? This really is the hardest part, I promise.

Here's where your all-important gauge comes in. Just for the sake of this exercise, let's say we're knitting a sweater with a stitch gauge of 4 stitches to the inch. Divide your total 116 stitches by the gauge, 4 stitches/inch, and you get 29 inches. Is 29 inches the chest circumference you need? No?? Well, now here's where we do the adapting.

Let's say you need a chest circumference of 31 inches. That means you need to hit the pause button on dividing for those sleeves, and keep on knitting and increasing until you have enough stitches to get you to a 31-inch chest circumference. Just how many stitches is that? Well...

31 inches x 4 stitches to the inch = 124 stitches. From 124, subtract HALF of the underarm stitches, and then divide by two. 124 - 5 = 119 stitches. Now divide your answer by two = 59.5. SHAZAM! You will need 59.5 stitches in the back section. Well, okay let's call it 60. So keep on increasing until you have 60 stitches in the back section. Then divide for the sleeves as directed. Yawn, that wasn't so hard, was it?

WAIT A SECOND! What if I get an odd number, and I have an even number of stitches in the back section! What will I do????

Don't worry about it. Just increase to the next round number and call it close enough.

Step 3: Make the sweater body long enough for the wearer.

Nuf said.

Step 4: Make the sleeves long enough for the wearer.

Also self-explanatory.

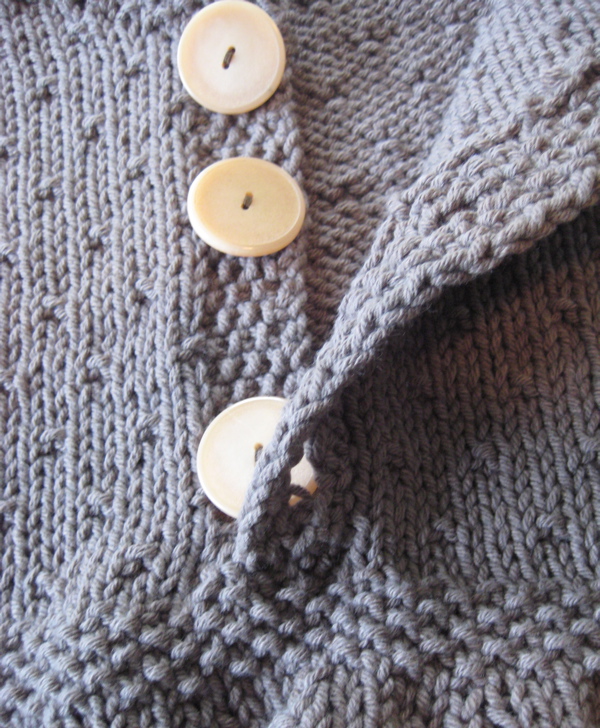
This Lopi sweater fits me nicely thanks to my handy-dandy calculator!

So if I've posted a pattern and you don't see the size you want, you could wait around for me while I finish cleaning up from dinner, checking email and packing the kids' lunches for tomorrow, or you could just size it up yourself! Once you know how to do this, you'll be amazed at how you stop having to abide by the limits of the knitting patterns you like.
Tuesday, August 27, 2013

what will I be?

Because I haven't wanted to admit it to myself, I haven't really said anything about this before: Arthritis is hurting my hands and I can't knit much anymore.

If you don't knit (or crochet, or carve wooden decoys, or hand-quilt or something), this probably doesn't sound like such earth-shattering news.

I'm 38 years old. I was diagnosed with arthritis around the time I turned 30, but I think I've had it since adolescence. It's in all my joints, but it seems to concentrate on certain joints at certain times.

Since having Baby #2 just about a year ago, the arthritis has been concentrating on my hands. Some days the finger joints ache terribly and keep me awake at night. Some days they just feel tired, like your legs will after a long day of walking.

There's lots of good and bad advice out there about arthritis remedies. I've lived with this for a while now, so I've tried lots of things (other than the prescription drugs, in which I have no interest). Some work. Fish oil helps me a lot. Eating less dairy and sugar help a lot. Other things haven't helped me much.

Last winter I made myself a beautiful Lopi sweater that felt very much like a swan song. I knit it from beautiful, undyed, handspun yarn that I'd brought home from Vermont years ago and saved for a very special project. Though my hands ached and I could only knit one row some nights, I kept pushing through it, because I hardly ever make anything for myself, because I really really wanted to make this sweater, and because in the back of my mind I suspected this might be my final knitting project.

Since then I haven't quit entirely. I've made a couple of little baby gifts. Small things that don't take too long, even when you can only knit one or two rows at a time.

I hope that this is temporary. I hope that this is a period of the arthritis focusing on my hands, and that with enough fish oil and diet modification and targeted yoga the pain will mostly disappear from my hands, perhaps go torment some other joints and humble me in some new way I had not imagined.

In the mean time, I read. I devour books. I inhabit other worlds, where my hands fall away along with all my other disappointments and I am only consciousness - perhaps someone else's - and new stories constantly unfold. Thank God for books.

My Great Aunt Ruth was a voracious reader. My mother told me that Ruth was also an accomplished seamstress, and that she had the most beautiful handwriting, but by the time I knew her, Ruth's hands were curled into tight claws and her poor finger joints were swollen knobs that gave her no peace. She always sent birthday cards, and you never had to read the signature to know who had written such gnarled-looking letters.

I don't remember ever hearing her complain about what she could not do, though clearly she had had to give up many of the things that had once made her who she believed herself to be. I knew her as kind, insightful, gentle, meticulous and always elegant. She always wore a stylish blouse and a jaunty scarf or necklace, even for the most mundane weekday cups of tea with my grandmother.

I think about Aunt Ruth's hands a lot and wonder whether mine will someday be like hers, whether I will have to give up knitting and sewing, writing, drawing and planting tiny lettuce seeds in perfect rows in my garden. Or will I just leave my hands behind, the way I do when I'm engrossed in a really good novel, leave my whole body behind and be first and foremost a consciousness, a sentient being whose physical shortcomings (and physical abilities, for that matter) are no more relevant than the whine of a mosquito in one's ear?

For a long time I didn't say anything about this out loud, or even to myself much, because it was just too sad. Who am I, without the being able to make things?

But you know, we go through many metamorphoses in our lives. I have gone from child to adult, from unattached to lawfully wed, and from individual to Mother, whose own heart walks around outside her body in the shape of two growing little girls. I have gone from daughter-who-takes-her-incredible-father-for-granted, to woman-without-a-father. One day all these will change again. Some of these future lives I am terrified to contemplate. Some will bring more joy than I can imagine now. I'd always thought knitting would be at hand throughout. Perhaps not.

I will be here, I myself. You too, will be yourself still. That's all I really know for sure.

Monday, February 25, 2013

the neglectful gardener

I was thinking recently in the shower (where I do most of my thinking) that I am really an expert in being a sucky gardener. I love gardening, but really I should be in jail for vegetable neglect. If I wrote a book about gardening, it would be very, very short. Basically, blog post length. So, here it is. My gardening book. Enjoy!

The Neglectful Gardener: 
Growing Fresh, Organic Veggies in Spite of Yourself
by fawn pea, mediocre knitter and sucky gardener

This year was the first time I've ever had a successful winter garden, and I'm feeling pretty full of myself about it. By "successful," I mean that there's something alive and edible out there. It's a modest success, but certainly the best I've ever had. My chest gets all puffed up when I look out the window in February and see things we could eat for dinner growing in the raised beds. I believe that this modest harvest entitles me to call myself an Expert and write breezy blog posts on gardening.

So, if you want to be modestly successful and somewhat puffed up like me, I encourage you to read on to discover the secrets of successful sucky vegetable gardening. Everything I know is contained right here. Really, everything. So... here are the secrets of being a good Neglectful Gardener:

1. Make friends with really good gardeners.

There are people out there who can grow stuff like artichokes and peaches in their gardens. They know how to keep tomatoes from getting blossom end rot, and they never seem to have trouble with powdery mildew. Make friends with these people. They like to swap seeds. They like to trade stories. They will teach you everything you need to know, or failing that, they will probably have a lot of extra zuchinni to share.

2. Chat up the lady at the farmer's market who sells plants.

I know the lady at the farmer's market who sells plants, because I am very bad at growing things from seed. Every year I read the charming stories of heirloom beans and peppers and melons in the seed catalogs and fantasize wildly about the bounteous, sepia-tinted harvest soon to be filling the kitchen of my not-too-distant future. Then I forget about my seedlings. They all dry out (PATHETIC) or get eaten by caterpillars (DEPRESSING), or just never sprout in the first place (WHY???).

At this point, I used to be very tempted to go to the hardware store for cheap flats of vegetable starts. Unfortunately those industrial vegetables tend to be coddled, weak and poorly-adapted to local conditions. Instead, the lady at the farmer's market has plants that, while a bit more expensive, will actually survive neglectful gardening techniques and thrive in local conditions, putting the "cheap" vegetables to shame. Also, she knows everything there is to know about gardening. She will steer you right.

3. Make compost.

This is the easiest, most basic thing to do for your garden. Feed the dirt. Get a cute little compost bucket for your kitchen counter, and put those eggshells and veggie scraps to work for you. Steal your neighbors' leaf bags from the curb every fall and throw those in, too. And grass clippings... hoo boy!  Most garden plants strip out nutrients and life from the soil. Compost puts it back in. Compost is an absolute requirement. Some cities with composting programs (like Raleigh) let you buy a huge load of compost for next to nothing. Make compost. Make compost. Make compost.

4. Feed the bugs.

Oh my goodness bugs love gardens. They love them! Everything they want to eat is right there! Free for the taking! But we cannot put poisons on our vegetables to kill the bugs, because that is very stupid. Poisons. On our food. Stupid. So you have to feed the bugs to other bugs (and birds and toads). Grow other stuff besides vegetables. Create some habitat. Get some wildflowers going in there. Bushy things. Things with flowers. Habitat is your friend.

5. Grow stuff in the sun.

This may seem totally obvious, but I have seen a lot of people make garden beds in shady or semi-shady spots in their yard and then act all mystified when their tomato plants never make any tomatoes (okay, I have been one of those mystified people). Vegetables need a lot of sun. Don't try to grow them in the shade.

6. Make raised beds

The soil in your backyard, if it hasn't been amended with several years' worth of compost, is probably pretty barren. It may also be rocky, 90% clay (like mine), and contaminated with who-knows-what. Was your neighborhood built on old farmland that was regularly sprayed with arsenic-based pesticides? Did the previous homeowner nuke the grass regularly with Weed'n'Feed? Have lead paint chips landed all over the ground at some point? Don't know the answer to all of these questions? Building raised beds lets you start from scratch with fresh, unadulterated, compost-filled soil. They can be as simple or as elaborate as you want them to be. Just avoid treated lumber. Yes, it lasts a long time, but it also leaches horrible chemicals into your raised beds. Strong, rot-resistant woods like cedar are a much better choice. Or try recycled-plastic "lumber."

7. Pick it and eat it!

If you think it's depressing to throw away a big old container of mixed salad greens from the store because they wilted before you got a chance to eat them, imagine how horrible it is to watch beautiful food that you sweated and toiled to grow yourself rot or dry out or go to seed because you waited around too long to pick it and eat it. There just aren't enough synonyms for "tragic." Case in point: One week in January I had three adorable little white snowball heads of cauliflower in my garden. I remember fondling them and thinking what a delicious dinner they would make when they got really big and impressive. The following week it was 65 degrees and all the caterpillars woke up, and now all I have left are three cauliflower skeletons. Don't fondle the produce and make empty promises. Just pick it and eat it.

Well, I hope you've enjoyed my little foray into the world of garden advice-giving. That will probably be the grand total of it, so maybe read it a second time if it seemed kind of short. Does the sum total of your gardening knowledge fit into a comment? Do share!