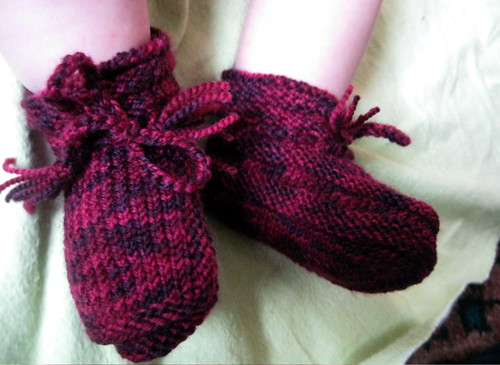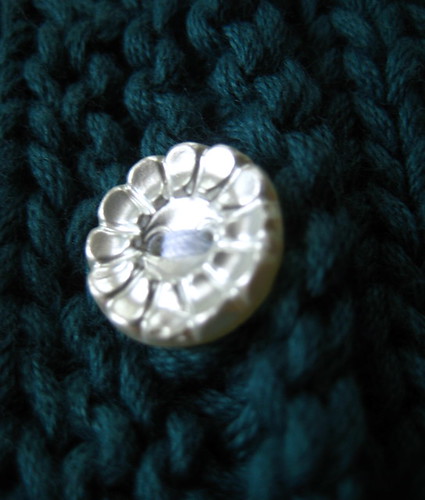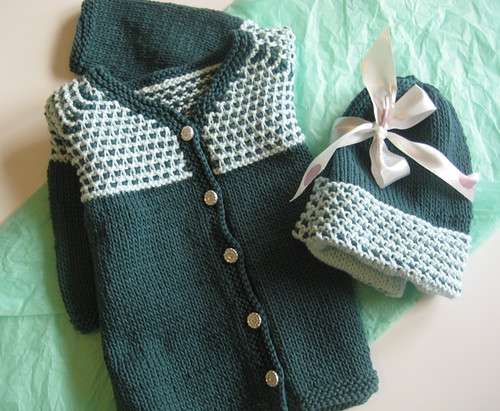
Time for some fall knitting! This baby jacket and hat set uses an old-fashioned looking stitch pattern for an elegant look in a relatively simple pattern. Suitable for a boy or girl, the Bumpy Jacket uses organic cotton and is knit all in one piece for quick finishing. Use some vintage buttons for the perfect touch.
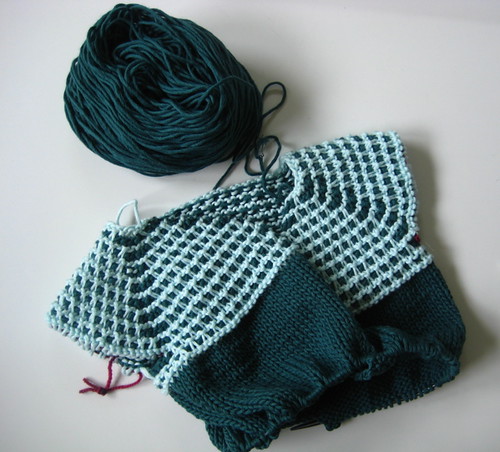
I called it "Bumpy" both because the stitch pattern has a bumpy surface, but also because it got off to a bumpy start. One of the mistakes I made was making the sleeve increases on the wrong side, but it actually looked pretty good with the stitch pattern and became a design feature. Once it got going, the jacket came together very quickly and was a pleasure to knit. Have fun making this sweet set as a special shower gift, or for your little one.
bumpy jacketsize0-6 mos (6-12 mos, 18 mos, 2 yrs, 4 yrs)
materialsBlue Sky Alpacas Skinny Dyed Cotton, 150 yd / 137 m / 50 g per skein
Color A: 1 skein [shown in #301, Glacier]
Color B: 2 (2, 3, 3, 4) skeins [shown in #308, Mallard]
US size 5 needles, DPN and circular (or size to get gauge)
US size 3 needles, DPN and circular (or size to get gauge)
five 1/2-inch buttons
stitch markers
tapestry needle
sewing needle & thread
gauge22 stitches / 28 rows / 4 inches in stockinette stitch on larger needles
measurementschest circumference: 20 (21, 22, 25, 27) inches
back length: 10.5 (11.5, 13.5, 14.5, 16) inches
sleeve length: 6 (6.5, 7.5, 8.5, 10.5) inches
waffle check stitch pattern (even # of stitches) – 2 waysknit flat:Row 1 (WS): Color A: Knit
Row 2 (RS): Color B: *Slip 1 wyib, K1. Repeat from * to end.
Row 3: Color B: *K1, Slip 1 wyif. Repeat from * to end.
Row 4: Color A: Knit.
Row 5: Color A: Knit.
Row 6: Color B: *K1, Slip 1 wyib. Repeat from * to end.
Row 7: Color B: *Slip 1 wyif, K1. Repeat from * to end.
Row 8: Color A: Knit
knit in the round:Row 1: Color A: Purl.
Row 2: Color B: *Slip 1 wyib, K1. Repeat from * to end.
Row 3: Color B: *Slip 1 wyib, P1. Repeat from * to end.
Row 4: Color A: Knit.
Row 5: Color A: Purl.
Row 6: Color B: *K1, Slip 1 wyib. Repeat from * to end.
Row 7: Color B: *P1, Slip 1 wyib. Repeat from * to end.
Row 8: Color A: Knit
 note
noteI strongly recommend knitting a swatch of the waffle check stitch pattern before you start, just to get the hang of it. It is quite simple, and once you’ve knit a couple of rounds of this pattern, it will become quite natural. You’ll be able to knit the sweater without having to read charts or refer to the instructions over and over. But since you have to knit it both flat and in the round, it pays to understand the stitch pattern before you begin working it in the sweater.
another noteFor those who are familiar with sweaters knit top-down, this pattern is a bit quirky in that you will do the increases along the seams on the wrong side (rather than the right side, which is more common). I know it seems weird. I messed up while first designing this sweater, but I liked how it looked and decided to keep it.
 cast on at the neckline
Using color A and larger circular needles, cast on as follows:
CO 2, PM, CO 6 (8, 8, 10, 10), PM, CO 20 (24, 24, 26, 28), PM, CO 6 (8, 8, 10, 10), PM, CO 2. You will have 34 (44, 44, 50, 52) st on your needle.
With row 1, you will also begin row 1 of the stitch pattern (following the instructions for knitting flat). You will start the stitch pattern over again in each section between the markers, in order to maintain the pattern across the increases at the shoulder seams (see this tutorial for a detailed explanation of this technique). You will never work the pattern on the stitch before or after each marker – these are the seam stitches. On right sides, simply knit the seam stitches and then start your pattern over. On wrong sides, work the increases as directed on the seam stitches, and then start your pattern over.
Row 1: *Kfb, K to 1 st before M, Kfb, slip M. Repeat from * to end. Kfb of last stitch. (10 st inc).
Row 2: Patt to end. [Here’s how to do this: Color B: *Slip 1 wyib, K1. Repeat from * to 1 st before next M. K1, slip M, K1. *Slip 1 wyib, K1. Repeat from * to 1 st before next M. Get it? Just start the stitch pattern over again in each section.
Row 3: *Kfb, Patt to 1 st before M, Kfb, slip M. Repeat from * to end. Kfb of last stitch. (10 st inc).
Row 4: Patt to end.
Continue in this manner, increasing 10 st on every WS row, and continuing the waffle check pattern, until you have 32 (40, 40, 44, 48) st between the back markers.
Next WS row, do not increase on the first and last stitches – you will increase only 8 stitches on this row. Continue increasing 8 st on every WS row until you have 50 (58, 60, 68, 76) st between the back markers.
divide for sleevesNext RS row: Patt across the first section until you get to the first marker.
Place the stitches from the left shoulder section (between the first and second markers) onto a stitch holder or piece of scrap yarn.
CO 4 st across the gap and join to the back section.
Patt across to the third marker.
Place the stitches from the right shoulder section (between the third and fourth markers) onto a stitch holder or piece of scrap yarn.
CO 4 st across the gap and join to the last section. Patt to end.
You will have 104 (120, 124, 140, 156) st on your needle.
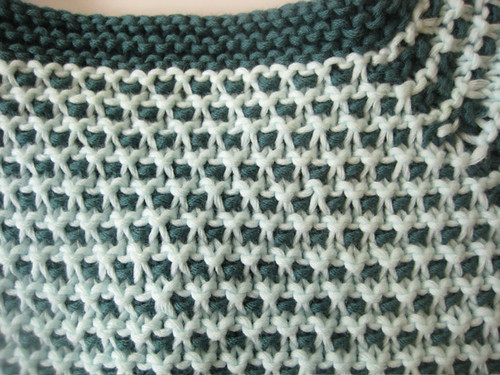 complete body
You will no longer be increasing on the WS rows. Simply carry the stitch pattern uninterrupted all the way around the garment as follows: K1, patt to 1 st before end, K1.
Work one full patt repeat for as many rows as that requires, ending with Row 1 of the stitch pattern.
Change to Color B and stockinette stitch (K all RS rows, P all WS rows).
Continue until the garment measures 10 (11, 13, 14, 15.5) inches from the back neck, ending on a RS row.
Change to smaller needles, and work 4 rows of garter stitch (K every row).
BO loosely.
sleevesPlace the held stitches from the first sleeve onto the larger DPNs. Using the appropriate color yarn for this point in the stitch pattern, pick up the four cast-on stitches from the underarm and place a marker. This marks the start of the round.
Work as many pattern rows as you did in the sweater body after dividing for the sleeves (be sure that you are following the instructions to knit the stitch pattern in the round – it is different from how you worked the body stitches!).
Change to Color B and stockinette stitch (in the round, knit every row).
Decrease row: K1, SSK, K to 3 st before marker, K2tog, K1. 2 st decreased.
Knit 4 rows even.
Continue in this manner, decreasing 2 st on every 5th round, until 30 (32, 32, 38, 40) st rem.
Knit even until the sleeve measures 5.5 (6, 7, 8.75, 9.25) inches from underarm.
Change to smaller DPNs. Work 4 rows in garter st (P 1 row, K 1 row).
BO loosely. Work the second sleeve.
button band / collarBefore you begin, use safety pins or stitch markers to mark the placement of your buttonholes along the right front selvedge of the sweater. Place the top button 1/2 inch below the start of the neckline. Place the bottom button 1 inch up from the bottom edge of the garment, and then space the remaining buttons evenly between them.
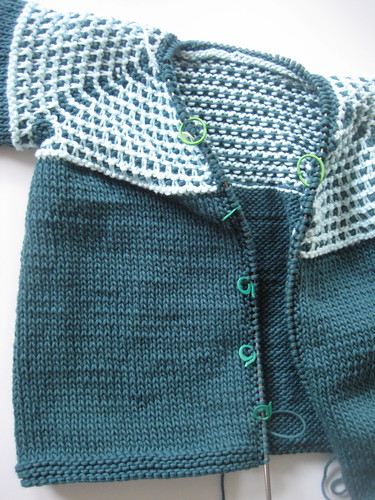
Using the smaller circular needle and Color B, begin at the bottom right corner of the sweater front. Pick up and knit 3 out of every 4 stitches up the right front until you get to the point where the neckline angles in. Place a marker. Continue picking up 3 out of 4 selvedge st until you get to the cast on row. Pick up the 2 right front st, the 6 (8, 8, 10, 10) right shoulder st, the 20 (24, 24, 26, 28) back st, the 6 (8, 8, 10, 10) left shoulder st, and the 2 left front st. Then continue down the left neck picking up 3 out of 4 selvedge st. When you get to the point where the neckline ends, place a marker and continue down the left front, picking up 3 out of 4 selvedge st to the bottom left corner.
Row 1: Knit.
Row 2: K to 1 st before the first marker, Kfb, slip marker, Kfb. K to 1 st before the second marker, Kfb, slip marker, Kfb. K to end. You are using these double increases to create a neat mitred corner at the neckline.
Row 3: (make buttonholes): Knit until you reach the point where you would like each buttonhole to be placed. For each buttonhole, YO, K2tog. K to end.
Row 4: Knit.
Row 5: BO loosely.
finishingSew buttons on very firmly.
Weave in ends.
variationUse Color A for the body instead of Color B (you would need less than one skein of Color B to complete the garment in any size).
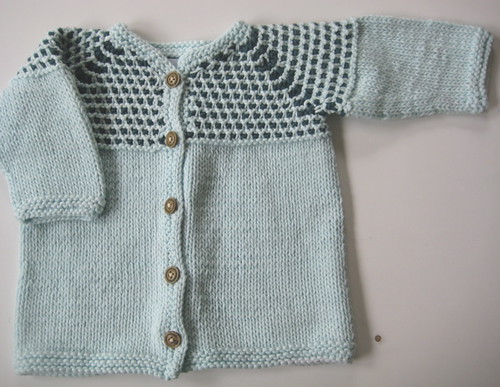 variation in color A - see how the hat looks here
bumpy hat

size
0-6 mos (6-12 mos, 18 mos, 2 yrs, 4 yrs)
materials
Blue Sky Alpacas Skinny Dyed Cotton
Color A: 1 skein (for the 2 smallest sizes, sweater leftovers are enough)
Color B: 1 skein
size 5 needles, DPN and 16” circular (or size to get gauge)
stitch markers
tapestry needle
measurements
head circumference: 14 (15.5, 16, 16.5, 18) inches
a note on sizing
The waffle check pattern is based on garter stitch, which is not very stretchy. If your baby has a big noggin like mine does, you may want to go up a size (see measurements, above).
inner casing
In Color A, cast on loosely 78 (86, 88, 92, 100) stitches. Place marker and knit in the round in st st until section measures 1.75 (1.75, 1.75, 2.25, 2.25) inches from cast on edge.
Next row: K2, YO, K to 2 st before marker, YO, K2.
Next row: Knit across, increasing 0 (0, 2, 2, 2) st evenly as you go. You will have 80 (88, 92, 96, 104) stitches on your needle.
brim
Next row: Change to waffle check stitch pattern (be sure to follow the directions for knitting in the round). Knit 2.5 (2.5, 2.5, 4, 4) full repeats of the stitch pattern.
crown
Next row: Change to color B and st st. Work 1 round even.
Next row: Decrease 2 (2, 4, 4, 4) st evenly across this round.
Continue knitting in st st until hat measures 5 (5, 6, 6.5, 7.25) inches from the beginning of the waffle check pattern.
For the two smallest sizes, knit 1 round, decreasing 2 stitches this round, evenly spaced.
decreasing for the crown
Dec rnd 1: *K2, K2 tog. Repeat from * to end.
Knit 1 round even.
Dec rnd 2: *K1, K2 tog. Repeat from * to end.
Knit 1 round even.
Dec rnd 3: *K2 tog. Repeat from * to end.
Repeat this last dec round until 5 stitches remain. Cut the yarn, pull the tail through the remaining stitches and fasten securely on the inside of the hat.
finishing
Turn hat inside-out. Fold up the inner casing so that the first row of the waffle check pattern serves as the turning ridge. Sew into place, taking care that your sewing yarn does not show through on the right side.
Weave in loose ends.
important notice: This is a free pattern and you are welcome to use it for all the non-commercial purposes you like. However, you may not reproduce this pattern to sell, and you may not sell what you make with it. You may donate what you make with it to charity, and you may use it for charity fundraisers only if 100% of the proceeds are donated to the charity (and by charity I don't mean your kid's college fund). Thanks for understanding!