Because I haven't wanted to admit it to myself, I haven't really said anything about this before: Arthritis is hurting my hands and I can't knit much anymore.
If you don't knit (or crochet, or carve wooden decoys, or hand-quilt or something), this probably doesn't sound like such earth-shattering news.
I'm 38 years old. I was diagnosed with arthritis around the time I turned 30, but I think I've had it since adolescence. It's in all my joints, but it seems to concentrate on certain joints at certain times.
Since having Baby #2 just about a year ago, the arthritis has been concentrating on my hands. Some days the finger joints ache terribly and keep me awake at night. Some days they just feel tired, like your legs will after a long day of walking.
There's lots of good and bad advice out there about arthritis remedies. I've lived with this for a while now, so I've tried lots of things (other than the prescription drugs, in which I have no interest). Some work. Fish oil helps me a lot. Eating less dairy and sugar help a lot. Other things haven't helped me much.
Last winter I made myself a beautiful Lopi sweater that felt very much like a swan song. I knit it from beautiful, undyed, handspun yarn that I'd brought home from Vermont years ago and saved for a very special project. Though my hands ached and I could only knit one row some nights, I kept pushing through it, because I hardly ever make anything for myself, because I really really wanted to make this sweater, and because in the back of my mind I suspected this might be my final knitting project.
Since then I haven't quit entirely. I've made a couple of little baby gifts. Small things that don't take too long, even when you can only knit one or two rows at a time.
I hope that this is temporary. I hope that this is a period of the arthritis focusing on my hands, and that with enough fish oil and diet modification and targeted yoga the pain will mostly disappear from my hands, perhaps go torment some other joints and humble me in some new way I had not imagined.
In the mean time, I read. I devour books. I inhabit other worlds, where my hands fall away along with all my other disappointments and I am only consciousness - perhaps someone else's - and new stories constantly unfold. Thank God for books.
My Great Aunt Ruth was a voracious reader. My mother told me that Ruth was also an accomplished seamstress, and that she had the most beautiful handwriting, but by the time I knew her, Ruth's hands were curled into tight claws and her poor finger joints were swollen knobs that gave her no peace. She always sent birthday cards, and you never had to read the signature to know who had written such gnarled-looking letters.
I don't remember ever hearing her complain about what she could not do, though clearly she had had to give up many of the things that had once made her who she believed herself to be. I knew her as kind, insightful, gentle, meticulous and always elegant. She always wore a stylish blouse and a jaunty scarf or necklace, even for the most mundane weekday cups of tea with my grandmother.
I think about Aunt Ruth's hands a lot and wonder whether mine will someday be like hers, whether I will have to give up knitting and sewing, writing, drawing and planting tiny lettuce seeds in perfect rows in my garden. Or will I just leave my hands behind, the way I do when I'm engrossed in a really good novel, leave my whole body behind and be first and foremost a consciousness, a sentient being whose physical shortcomings (and physical abilities, for that matter) are no more relevant than the whine of a mosquito in one's ear?
For a long time I didn't say anything about this out loud, or even to myself much, because it was just too sad. Who am I, without the being able to make things?
But you know, we go through many metamorphoses in our lives. I have gone from child to adult, from unattached to lawfully wed, and from individual to Mother, whose own heart walks around outside her body in the shape of two growing little girls. I have gone from daughter-who-takes-her-incredible-father-for-granted, to woman-without-a-father. One day all these will change again. Some of these future lives I am terrified to contemplate. Some will bring more joy than I can imagine now. I'd always thought knitting would be at hand throughout. Perhaps not.
I will be here, I myself. You too, will be yourself still. That's all I really know for sure.
Tuesday, August 27, 2013
Monday, February 25, 2013
the neglectful gardener
I was thinking recently in the shower (where I do most of my thinking) that I am really an expert in being a sucky gardener. I love gardening, but really I should be in jail for vegetable neglect. If I wrote a book about gardening, it would be very, very short. Basically, blog post length. So, here it is. My gardening book. Enjoy!
The Neglectful Gardener:
Growing Fresh, Organic Veggies in Spite of Yourself
by fawn pea, mediocre knitter and sucky gardener
This year was the first time I've ever had a successful winter garden, and I'm feeling pretty full of myself about it. By "successful," I mean that there's something alive and edible out there. It's a modest success, but certainly the best I've ever had. My chest gets all puffed up when I look out the window in February and see things we could eat for dinner growing in the raised beds. I believe that this modest harvest entitles me to call myself an Expert and write breezy blog posts on gardening.
So, if you want to be modestly successful and somewhat puffed up like me, I encourage you to read on to discover the secrets of successful sucky vegetable gardening. Everything I know is contained right here. Really, everything. So... here are the secrets of being a good Neglectful Gardener:
1. Make friends with really good gardeners.
There are people out there who can grow stuff like artichokes and peaches in their gardens. They know how to keep tomatoes from getting blossom end rot, and they never seem to have trouble with powdery mildew. Make friends with these people. They like to swap seeds. They like to trade stories. They will teach you everything you need to know, or failing that, they will probably have a lot of extra zuchinni to share.
2. Chat up the lady at the farmer's market who sells plants.
I know the lady at the farmer's market who sells plants, because I am very bad at growing things from seed. Every year I read the charming stories of heirloom beans and peppers and melons in the seed catalogs and fantasize wildly about the bounteous, sepia-tinted harvest soon to be filling the kitchen of my not-too-distant future. Then I forget about my seedlings. They all dry out (PATHETIC) or get eaten by caterpillars (DEPRESSING), or just never sprout in the first place (WHY???).
At this point, I used to be very tempted to go to the hardware store for cheap flats of vegetable starts. Unfortunately those industrial vegetables tend to be coddled, weak and poorly-adapted to local conditions. Instead, the lady at the farmer's market has plants that, while a bit more expensive, will actually survive neglectful gardening techniques and thrive in local conditions, putting the "cheap" vegetables to shame. Also, she knows everything there is to know about gardening. She will steer you right.
3. Make compost.
This is the easiest, most basic thing to do for your garden. Feed the dirt. Get a cute little compost bucket for your kitchen counter, and put those eggshells and veggie scraps to work for you. Steal your neighbors' leaf bags from the curb every fall and throw those in, too. And grass clippings... hoo boy! Most garden plants strip out nutrients and life from the soil. Compost puts it back in. Compost is an absolute requirement. Some cities with composting programs (like Raleigh) let you buy a huge load of compost for next to nothing. Make compost. Make compost. Make compost.
4. Feed the bugs.
Oh my goodness bugs love gardens. They love them! Everything they want to eat is right there! Free for the taking! But we cannot put poisons on our vegetables to kill the bugs, because that is very stupid. Poisons. On our food. Stupid. So you have to feed the bugs to other bugs (and birds and toads). Grow other stuff besides vegetables. Create some habitat. Get some wildflowers going in there. Bushy things. Things with flowers. Habitat is your friend.
5. Grow stuff in the sun.
This may seem totally obvious, but I have seen a lot of people make garden beds in shady or semi-shady spots in their yard and then act all mystified when their tomato plants never make any tomatoes (okay, I have been one of those mystified people). Vegetables need a lot of sun. Don't try to grow them in the shade.
6. Make raised beds
The soil in your backyard, if it hasn't been amended with several years' worth of compost, is probably pretty barren. It may also be rocky, 90% clay (like mine), and contaminated with who-knows-what. Was your neighborhood built on old farmland that was regularly sprayed with arsenic-based pesticides? Did the previous homeowner nuke the grass regularly with Weed'n'Feed? Have lead paint chips landed all over the ground at some point? Don't know the answer to all of these questions? Building raised beds lets you start from scratch with fresh, unadulterated, compost-filled soil. They can be as simple or as elaborate as you want them to be. Just avoid treated lumber. Yes, it lasts a long time, but it also leaches horrible chemicals into your raised beds. Strong, rot-resistant woods like cedar are a much better choice. Or try recycled-plastic "lumber."
7. Pick it and eat it!
If you think it's depressing to throw away a big old container of mixed salad greens from the store because they wilted before you got a chance to eat them, imagine how horrible it is to watch beautiful food that you sweated and toiled to grow yourself rot or dry out or go to seed because you waited around too long to pick it and eat it. There just aren't enough synonyms for "tragic." Case in point: One week in January I had three adorable little white snowball heads of cauliflower in my garden. I remember fondling them and thinking what a delicious dinner they would make when they got really big and impressive. The following week it was 65 degrees and all the caterpillars woke up, and now all I have left are three cauliflower skeletons. Don't fondle the produce and make empty promises. Just pick it and eat it.
Well, I hope you've enjoyed my little foray into the world of garden advice-giving. That will probably be the grand total of it, so maybe read it a second time if it seemed kind of short. Does the sum total of your gardening knowledge fit into a comment? Do share!
The Neglectful Gardener:
Growing Fresh, Organic Veggies in Spite of Yourself
by fawn pea, mediocre knitter and sucky gardener
This year was the first time I've ever had a successful winter garden, and I'm feeling pretty full of myself about it. By "successful," I mean that there's something alive and edible out there. It's a modest success, but certainly the best I've ever had. My chest gets all puffed up when I look out the window in February and see things we could eat for dinner growing in the raised beds. I believe that this modest harvest entitles me to call myself an Expert and write breezy blog posts on gardening.
So, if you want to be modestly successful and somewhat puffed up like me, I encourage you to read on to discover the secrets of successful sucky vegetable gardening. Everything I know is contained right here. Really, everything. So... here are the secrets of being a good Neglectful Gardener:
1. Make friends with really good gardeners.
There are people out there who can grow stuff like artichokes and peaches in their gardens. They know how to keep tomatoes from getting blossom end rot, and they never seem to have trouble with powdery mildew. Make friends with these people. They like to swap seeds. They like to trade stories. They will teach you everything you need to know, or failing that, they will probably have a lot of extra zuchinni to share.
2. Chat up the lady at the farmer's market who sells plants.
I know the lady at the farmer's market who sells plants, because I am very bad at growing things from seed. Every year I read the charming stories of heirloom beans and peppers and melons in the seed catalogs and fantasize wildly about the bounteous, sepia-tinted harvest soon to be filling the kitchen of my not-too-distant future. Then I forget about my seedlings. They all dry out (PATHETIC) or get eaten by caterpillars (DEPRESSING), or just never sprout in the first place (WHY???).
At this point, I used to be very tempted to go to the hardware store for cheap flats of vegetable starts. Unfortunately those industrial vegetables tend to be coddled, weak and poorly-adapted to local conditions. Instead, the lady at the farmer's market has plants that, while a bit more expensive, will actually survive neglectful gardening techniques and thrive in local conditions, putting the "cheap" vegetables to shame. Also, she knows everything there is to know about gardening. She will steer you right.
3. Make compost.
This is the easiest, most basic thing to do for your garden. Feed the dirt. Get a cute little compost bucket for your kitchen counter, and put those eggshells and veggie scraps to work for you. Steal your neighbors' leaf bags from the curb every fall and throw those in, too. And grass clippings... hoo boy! Most garden plants strip out nutrients and life from the soil. Compost puts it back in. Compost is an absolute requirement. Some cities with composting programs (like Raleigh) let you buy a huge load of compost for next to nothing. Make compost. Make compost. Make compost.
4. Feed the bugs.
Oh my goodness bugs love gardens. They love them! Everything they want to eat is right there! Free for the taking! But we cannot put poisons on our vegetables to kill the bugs, because that is very stupid. Poisons. On our food. Stupid. So you have to feed the bugs to other bugs (and birds and toads). Grow other stuff besides vegetables. Create some habitat. Get some wildflowers going in there. Bushy things. Things with flowers. Habitat is your friend.
5. Grow stuff in the sun.
This may seem totally obvious, but I have seen a lot of people make garden beds in shady or semi-shady spots in their yard and then act all mystified when their tomato plants never make any tomatoes (okay, I have been one of those mystified people). Vegetables need a lot of sun. Don't try to grow them in the shade.
6. Make raised beds
The soil in your backyard, if it hasn't been amended with several years' worth of compost, is probably pretty barren. It may also be rocky, 90% clay (like mine), and contaminated with who-knows-what. Was your neighborhood built on old farmland that was regularly sprayed with arsenic-based pesticides? Did the previous homeowner nuke the grass regularly with Weed'n'Feed? Have lead paint chips landed all over the ground at some point? Don't know the answer to all of these questions? Building raised beds lets you start from scratch with fresh, unadulterated, compost-filled soil. They can be as simple or as elaborate as you want them to be. Just avoid treated lumber. Yes, it lasts a long time, but it also leaches horrible chemicals into your raised beds. Strong, rot-resistant woods like cedar are a much better choice. Or try recycled-plastic "lumber."
7. Pick it and eat it!
If you think it's depressing to throw away a big old container of mixed salad greens from the store because they wilted before you got a chance to eat them, imagine how horrible it is to watch beautiful food that you sweated and toiled to grow yourself rot or dry out or go to seed because you waited around too long to pick it and eat it. There just aren't enough synonyms for "tragic." Case in point: One week in January I had three adorable little white snowball heads of cauliflower in my garden. I remember fondling them and thinking what a delicious dinner they would make when they got really big and impressive. The following week it was 65 degrees and all the caterpillars woke up, and now all I have left are three cauliflower skeletons. Don't fondle the produce and make empty promises. Just pick it and eat it.
Well, I hope you've enjoyed my little foray into the world of garden advice-giving. That will probably be the grand total of it, so maybe read it a second time if it seemed kind of short. Does the sum total of your gardening knowledge fit into a comment? Do share!
Monday, December 24, 2012
merry everything!
Friends, I hope you're snuggled up someplace with a warm cup of tea, a pile of knitting or a good book, and making merry with those you love. Perhaps you're even lucky enough to have a cat on your lap!
See you in the New Year!
Tuesday, December 04, 2012
unchristmasing
I'm not really up for Christmas this year.
This will be the first Christmas without my Dad. He was a big kid at heart, and he was the keeper of all our family holiday traditions, from the Chinese almond cookies to the Nat King Cole Christmas album. The thought of trying to celebrate this holiday without him makes me absolutely miserable.
My mom and sister are wisely just opting out. They're going to take a long weekend away, and then lay low on the holiday itself. We've decided on no gifts, except for the kiddos.
I wish I could do the same, but the other 3/4 of my household very much want to celebrate Christmas, and as one of them is 3-1/2 years old, it seems we don't have much choice in the matter.
So I have to grin and bear it, I guess. But with a newborn baby in the house, nobody seems to be expecting much of me, and so I think I will be able to live up to their expectations quite well.
My goal is: Spend no money. I can't go crazy on hand-made crafts without spending money. I can't put pressure on myself to decorate the house festively, or bake amazing things, without spending money. The truth is, I don't want to do these things. So for the folks I absolutely must exchange gifts with, they're getting something from the Use What You Have stash. The Ghost of Christmas Present predicts a lot of little felted items coming from me this year. And I'm halfway through a pair of EZ Mocassin Socks, so someone will get those. And I think that's going to be the extent of it. Thank goodness I still enjoy knitting, with or without a holiday attached to it.
Thursday, November 08, 2012
late fall
But Nature is glorious around us right now, so I will take her on those terms and be grateful.
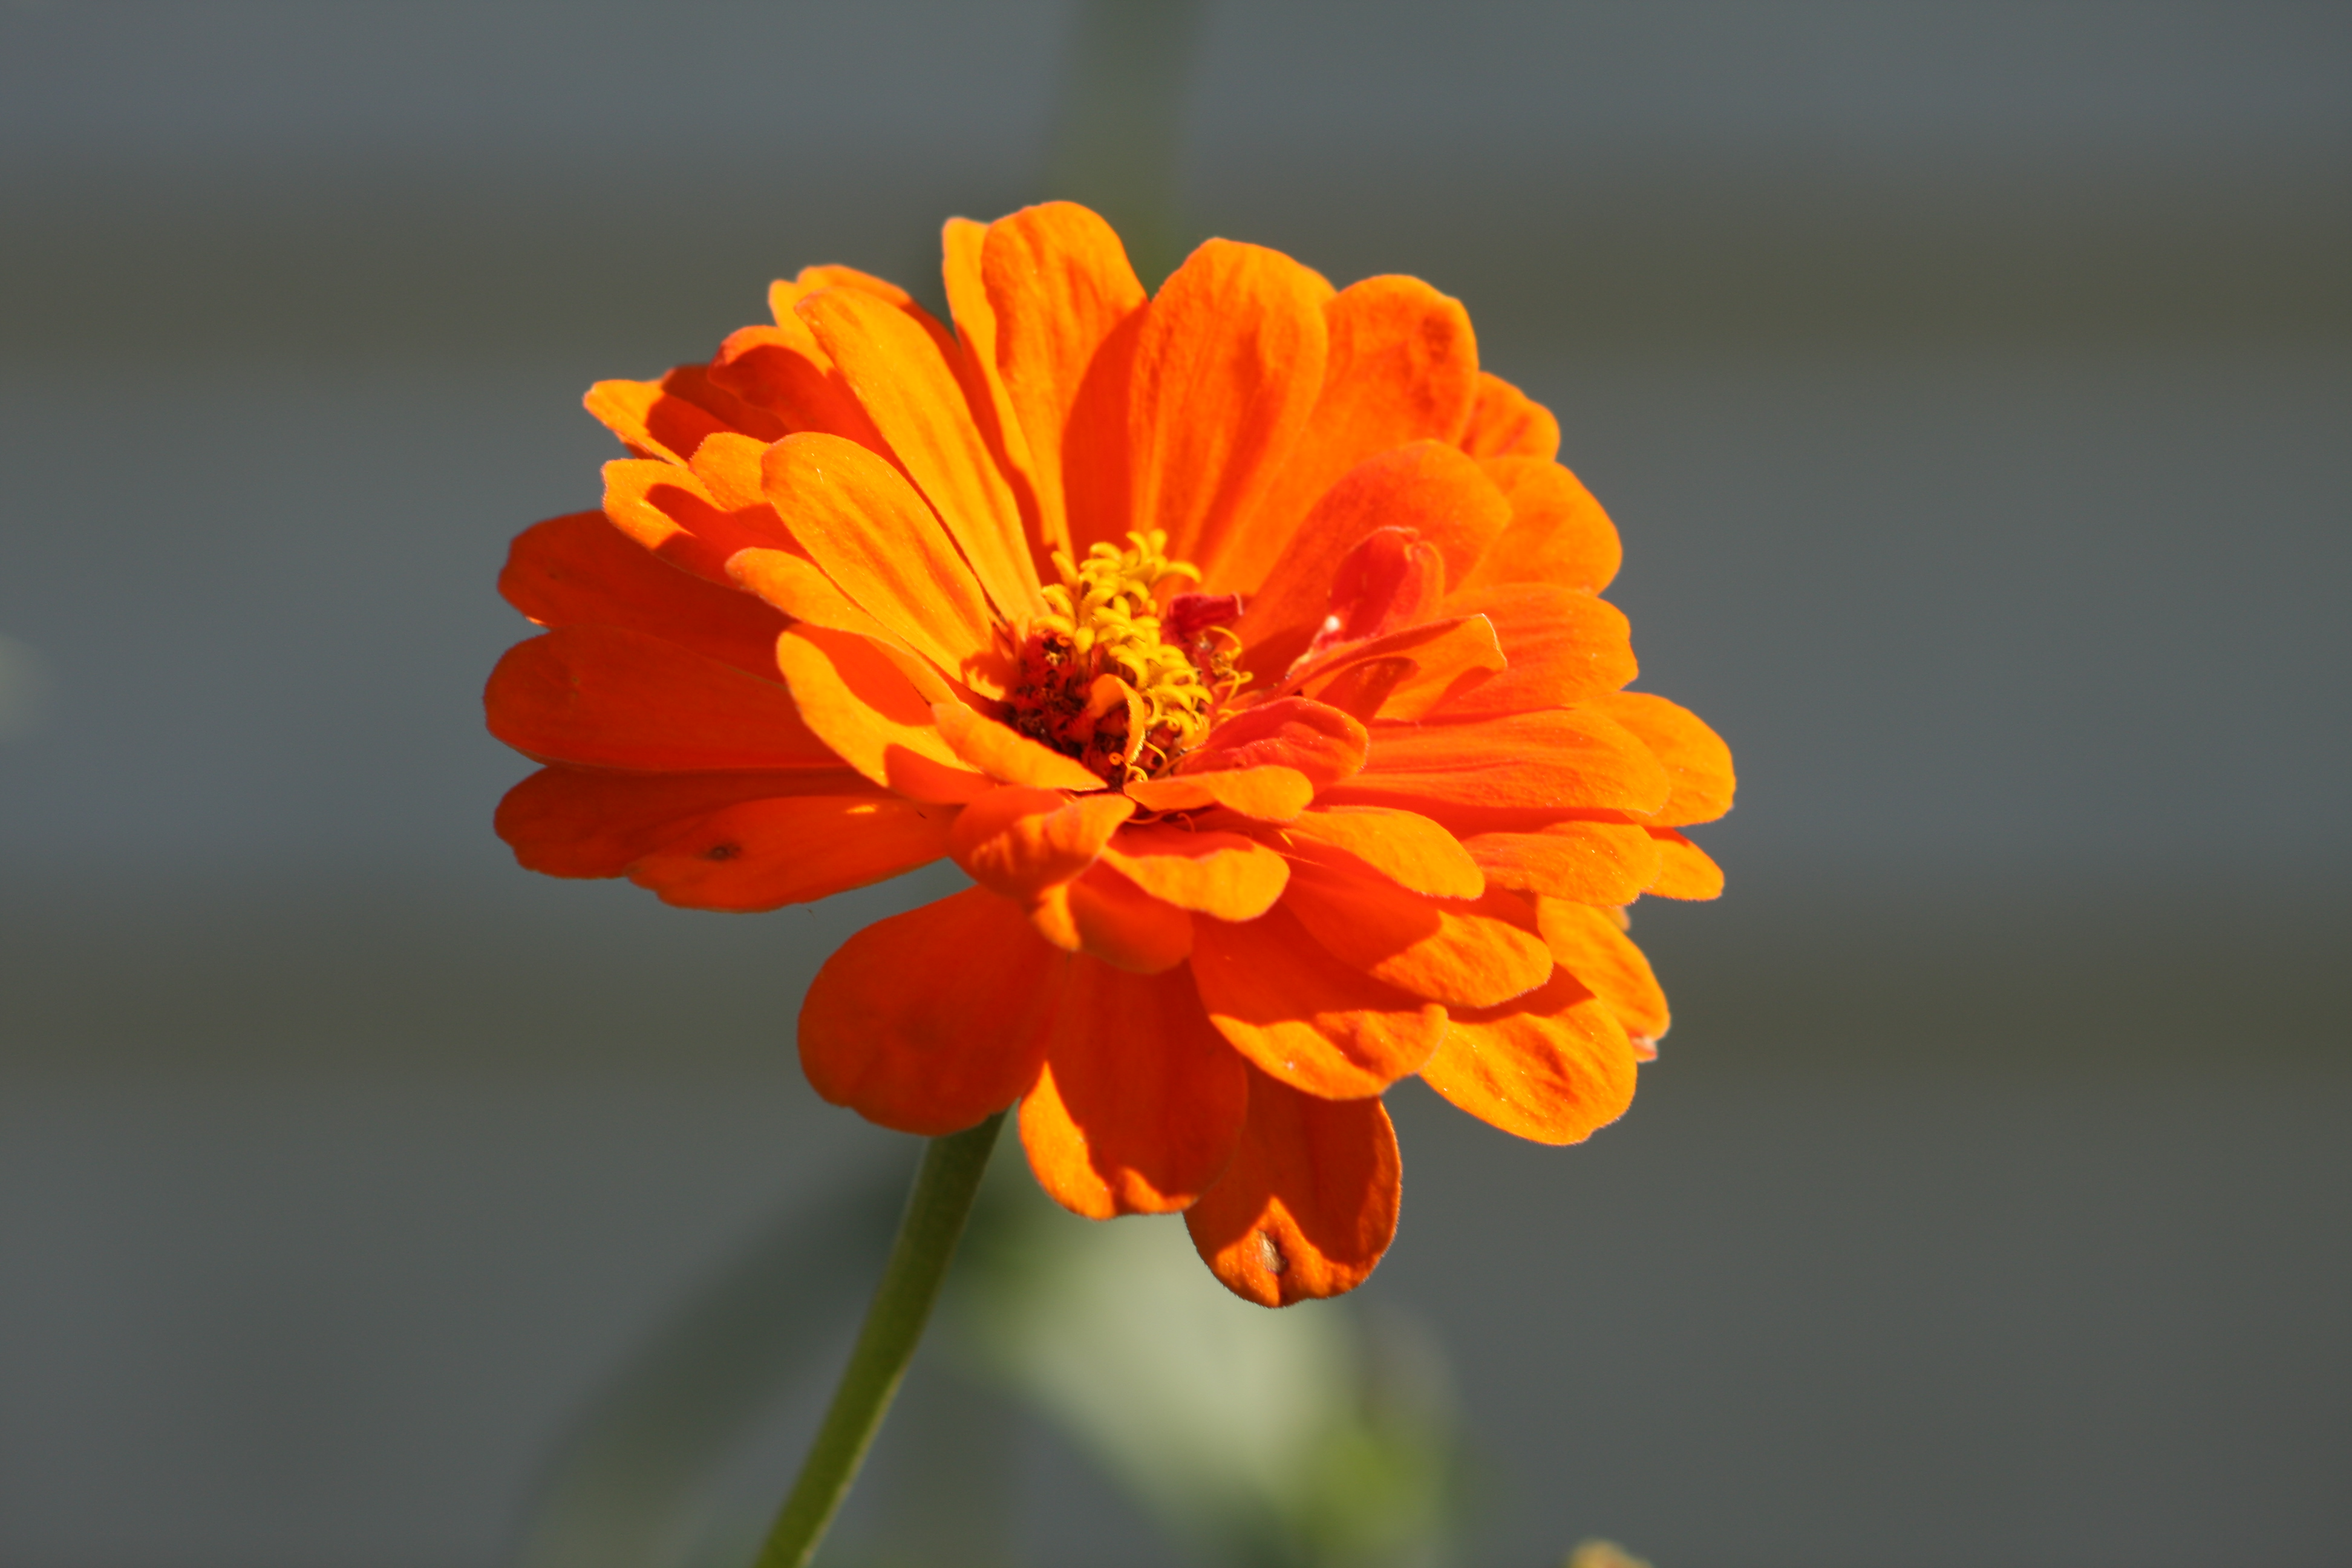
The other day HWWLLB cut down all the faded, raggedy-looking summer flowers from our front yard - mostly zinnias and gomphrena - and stuffed them into the yard waste bin. The Little Pea took the nicest of them to school for their flower-arranging activity. We've got several this-might-be-the-last-bouquet bouquets of salvia and asters all over the place. Every time I pick a green pepper or a stalk of basil, I say a little thank-you for the harvest, in the recognition that this might be the last of it.
At the same time, the greens and lettuce are sweetening with every cold night. Now that it's generally too cold for insects, I don't have to worry about the caterpillars munching on my baby broccoli and cauliflower plants. All I have to do is pull the occasional weed and fantasize about the delicious meals they will make soon. We have enough fresh salad greens for a much larger family, and a nice selection of dark leafy greens to round out any meal.
I'm awful at cleaning out the garden. I cling to the memory of the summer bounty, even if it is a hazy memory of what I wanted it to be, rather than a clear picture what it actually was. Once the stalks are spent and the disheveled vines are everywhere, you could forget that the cucumbers never produced or the squash were all mutilated by vine borers. It was a glorious summer garden. Now it's spent. I hate clearing away the debris afterwards, even though I know it would mean fewer disappointments next year from over-wintering marauders.
Right now my eye is on the leafy green things, wondering which of them will be sweet and tasty and abundant enough to grace our Thanksgiving table. There will be plenty of mustard greens, Chinese cabbage, Russian kale and red sails lettuce. The tatsoi will be my own little treasure that I keep just for myself (and the Little Pea), my very favorite green and one that I never seem to be able to grow very much of. In the freezer are two big tubs of roasted pumpkin, the surprise harvest from the volunteer pie pumpkin plant that came up in the middle of a vegetable bed and braved the vine borers to give us several adorable, perfectly round, bright orange pumpkins.
Surprises, disappointments, bitter and sweet. I'm giving thanks for a little garden that helps me ride out life's storms every season.
Friday, October 12, 2012
free pattern friday :: apiary jumper
Yarn
suggestions: Malabrigo RÃos, Brooks Farm Solana, Creatively Dyed Yarn Woodbrook,
or Lorna’s Laces Shepherd Worsted. The dress shown was knit in Malabrigo RÃos
in color #103, Archangel.
sizes:
12-18 mos (2-3 years, 4-5 years, 6-7 years)
measurements:
12-18 mos size: chest circumference: 20 inches. overall length: 16 inches.
2-3 years size: chest circumference: 24 inches. overall length: 18
inches.
4-5 years size: chest circumference: 26 inches. overall length:
19.5 inches.
6-7 years size: chest circumference: 28 inches. overall length: 21
inches.
materials:
Malabrigo RÃos, 2 (2, 3, 3)
skeins
Size 8 (US) circular
needle, 24 inches
Size 6 (US) circular
needle, any length
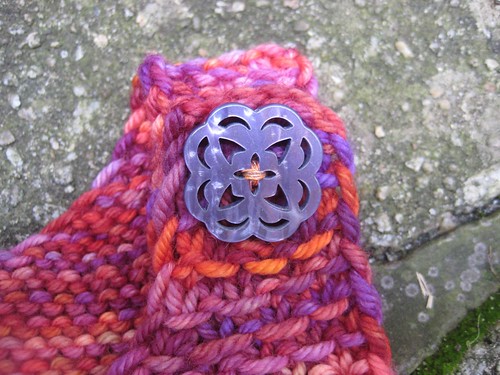
2 buttons, about 1-1/8 to 1-3/8
inches / 28 to 34mm
Tapestry needle
Sewing needle
Sewing thread to match
gauge: 20 stitches / 4 inches on size 6 needles in
stockinette stitch
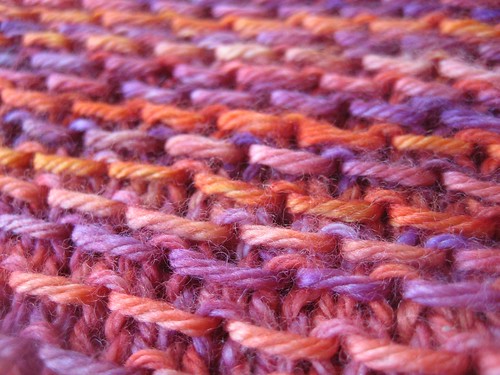
slipped honeycomb stitch
work over an odd number of
stitches
R1 (RS): Knit
R2 (WS): K1, *Slip 1 with
yarn in back, K1. Repeat from * to end.
R3: Knit
R4: K1, *K1, Slip 1 with
yarn in back. Repeat from * to end.
You will begin this dress
at the lower edge and knit in the round on circular needles.
Note to the purl-averse:
The first 14 rounds are based on garter stitch, so if you’re one of those
people who can’t stand purling, knit the first 14 rounds flat and sew them up
later.
Using larger needles, cast
on 125 (151, 163, 175) stitches, place a stitch marker, and join to knit in the
round. Knit the first 6 rounds in garter stitch (alternating knit and purl
rounds).
Round 7: K1. Knit, wrapping
three times for each stitch, to end.
Round 8: Purl, dropping all
the extra wraps.
Knit 6 more rounds in
garter stitch.
Change to stockinette
stitch. Continue knitting in the round until dress measures 9 (10, 10, 11)
inches from cast-on edge.
Decrease for bodice:
Change to smaller needles. *Knit
7, work a centered double decrease. Repeat from * to end. As you come to the
last 5 (2, 3, 5) stitches, K2tog, K to end. 100 (120, 130, 140) st remain.
Centered double
decrease:
Slip 2 stitches together knitwise. K1. Pass the slipped stitches over the knit stitch. 2 stitches decreased.
You will now divide the
front and the back of the dress, and knit each side of the bodice flat in
Slipped Honeycomb stitch. Just hold the back half of the dress on scrap yarn
while you work the front.
Front:
R1: K 51 (61, 65, 71) place
the remaining 49 (59, 65, 69) stitches on scrap yarn to hold. Turn, work row 2
of Slipped Honeycomb stitch.
Continue knitting this
section in the stitch pattern for 2 (2, 3.5, 3.5) inches.
Make armholes
Note: Through
the rest of the bodice and the straps, you will begin every row with a
slipped stitch, with the yarn held in front (WYIF). This creates a very tidy,
even edge for any garter stitch-based stitch pattern and eliminates the need
for a border to be picked up & knit or sewn on later.
Note also:
Throughout the remainder of the bodice, you will continue to work the honeycomb
stitch pattern as established. Because of decreases at many row ends, you will
sometimes need to work row 2 instead of row 4 of the honeycomb stitch, or
vice-versa. The important thing is to keep the slipped stitches staggered as
established when you began working the pattern – this is easy to follow with
your eye.
Decrease row (RS): Slip 1
WYIF, SSK, SSK, K to the last 5 stitches. K2tog, K2tog, K1 (4 st decreased).
Next row (WS): Slip 1 WYIF,
K to end (maintaining pattern).
Repeat the last two rows 2
(4, 4, 5) more times, until 37 (41, 45, 47) stitches remain on the needles.
Sizes 12-18 mos, 4-5 years:
Next RS row: Slip 1 WYIF,
SSK, K to last 3 stitches. K2tog, K1. (2 st decreased)
35, (41, 43, 47) st remain.
Continue working in patt
until the bodice section measures 3.5 (3.5, 5, 5) inches.
Work neckline:
* *You will still slip the
first stitch of every row (RS and WS) with yarn held in front!**
Next RS row: K16, BO 3 (9,
11, 15), K16.
Right front:
Keeping the first section
on a holder, work the second section of 16 stitches, maintaining the honeycomb
stitch pattern and the first stitch slipped every row.
WS: Knit in patt to end of
row (neckline).
RS: Slip 1 WYIF, SSK, SSK,
patt to end. (2 st dec).
WS: Turn, patt to end of
row (neckline).
Repeat these last 2 rows
til 10 stitches remain.
Next RS row: Slip 1 WYIF,
SSK, patt to end. 9 stitches remain.
Continue working these 9 st
in honeycomb stitch pattern for 3 more rows.
Next RS row, work
buttonhole: K3, BO 3, K3.
Turn, patt 3, cast on 3 st
using backwards loop cast on, patt 3.
Work 2 more rows in patt.
RS: Bind off all stitches
as follows: Slip 1 WYIF, SSK, BO all stitches to last 3, K2tog, BO.
Left front:
Join yarn to held stitches
at the neckline to work the left side.
WS: Knit in patt to end of
row.
RS: Slip 1 WYIF, patt to
last 5 stitches, K2tog, K2tog, K1.
You will work the left
front just as you did for the right, but working your neckline-edge decreases
as K2tog’s (as instructed for previous 2 rows).
Work buttonhole and bind
off as you did for the right front.
Back:
Join yarn and work the back
as you did for the front, right up through the armholes. Work the armhole
decreases until 35, (41, 43, 47) st remain.
When the back bodice
measures 4.5 (4.5, 6, 6) inches, work the back neckline exactly as you did the
front.
However, once 9 stitches
remain on each side, do not work a buttonhole.
Instead, work these 9 st in
patt until each shoulder strap measures 3.5 (4, 4.5, 5) inches from the point
where you separated out the two sides. Bind off on the RS, using decreases to
shape the ends just as you did on the front side.
Finishing:
Sew up the sides below the
armhole.
Weave in all ends.
Button placement:
Wash and block the garment before sewing on buttons. Try the dress
on the intended recipient if you possibly can, using safety pins to mark where
you want the buttons to go. If you can’t try it on the child first, the default
setting is to sew on the buttons such that the finished armholes measure about 5
(6, 6, 6.5) inches. Stretch the straps gently as you measure, since these
straps will stretch a bit lengthwise during wear.
If the dress is to be given
as a gift, wind a generous length of sewing yarn around a small card and
present it with the dress, so that the buttons may be moved down the strap as
the child grows (you may wish to offer to provide this service to the
recipient’s parent, since many people today are unfamiliar with domestic arts
like button-sewing).
Tuesday, October 09, 2012
new free pattern coming friday!
One thing about being at home with a new baby: I have time for knitting.
Not for sitting in a cozy chair for hours with yarn, This American Life and a cup of tea knitting, but for ten minutes snatched here and there. That's certainly enough time to make progress on hats, socks, mittens and baby gear.
Anyway, I've been working on a hat for the Little Bee to serve as her Halloween costume. Based on the available yarn in my stash, she is going to be a fish. I'm having fun adapting this little bonnet pattern into a fishy-looking headpiece. Hopefully it will be worth the effort!
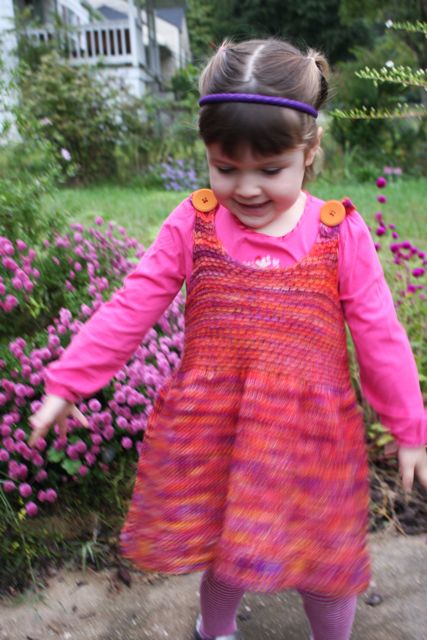
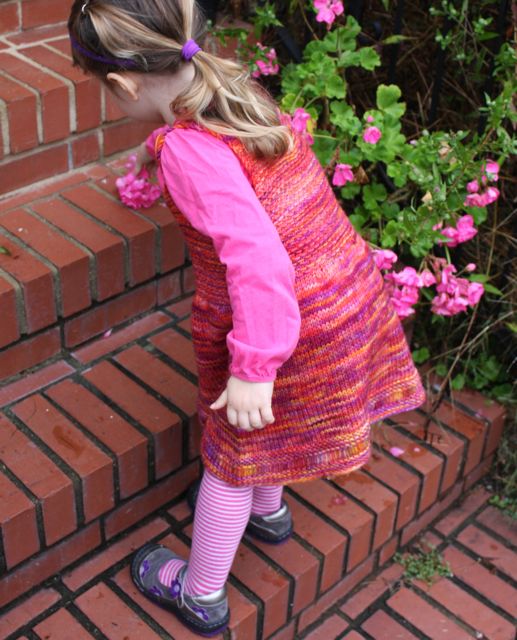
And some truly amazing news: I have a new Free Pattern Friday coming! I designed and knit this dress (pictured above) for the Pea and for our friend Vee months ago, and have been way behind on silly things like sewing on buttons and proofreading the pattern... but it's finally just about ready! Just need to add photos to the pattern.
Subscribe to:
Posts (Atom)