Not too long ago, I noticed that you don't see too many top-down sweater patterns knitted in stitches other than stockinette, garter stitch, or maybe seed stitch if they're getting fancy. Why don't we ever see a fisherman's rib, or some simple lace in a top-down sweater, for example?
My theory about this is that it seems too hard to keep up the stitch pattern, when you keep increasing stitches along the raglan seams every other row. Hm. I started puzzling over how one would carry the stitch pattern across those pesky ever-growing seams. Could it work? I decided to consult The Oracle (also known as Barbara Walker's classic book
Knitting from the Top).
The answer is an emphatic yes, and though I didn't quite understand Walker's explanation, her hints were good, and eventually I found my way. So here's what I learned. You can use this technique to design your own garments, or to adapt an existing pattern for a top-down garment that was written in stockinette stitch, and make it fancy.
There are a couple of important things to know.
First of all, you don't actually carry the pattern across the raglan seams. You start the stitch pattern over afresh
after each raglan seam. This flash of insight made the whole thing work for me. The rest is just logistics.
But a second, and really important point, choose your stitch pattern carefully. Choose a stitch pattern with relatively few stitches in the repeat. A 14-stitch repeat won't look very good. A 3- to 5-stitch repeat will work just fine.
Let's use a sample pattern and walk through how to do this, step by step. We'll make a simple top-down baby's cardigan, except we're going to dispense with the plain stockinette stitch, and knit it up in a pretty stitch called "elongated rib check."
Elongated Rib Check (multiple of 4 st)
Rows 1-6: * P2, K2; Repeat from * to end.
Rows 7-12: *K2, P2; Repeat from * to end.
Here are the original directions for casting on (these should be familiar if you've ever knitted a top-down cardigan):
Beginning at neck edge with a 24 in. circular needle, cast on 2 st, place marker, cast on 10 st, place marker, cast on 16 st, place marker, cast on 10 st, place marker, cast on 2 st. You will have 40 st.Odd rows: Kfb, *Knit to 1 st before M, Kfb, slip M. Repeat from * to end, Kfb the final stitch (inc 10 st total). Even rows: Purl across.Repeat these two rows until there are 22 st between the back markers. At the end of this last increase row, cast on to the end of the needle 3 st.Next row: Purl to end, cast on 3 st to the end of the needle.Continue increasing as before, except without increasing on the first and last stitch of every row (inc 8 st every odd row). Here's the step-by-step to transforming this top-down stockinette sweater to a top-down sweater with our chosen stitch pattern:
1. Supplies. You will need lots of stitch markers in 2 different colors (color A and color B).
2. Take notes. Keep notes on how you modify the pattern so that you'll be able to adapt as you go along.
3. Knit a swatch. This is no joke! You need to knit a nice big gauge swatch in order to a) learn the stitch pattern and get comfortable with it; and b) check your gauge, since it is very likely to be different from the sweater's stated gauge in stockinette stitch. You may need to adjust your needle size accordingly.
4. Casting on: As you cast on, you may need to modify the number of stitches in each section in order to accommodate the stitch pattern. Since the stitch pattern in our example is a multiple of 4, each section should contain a multiple of 4 st, plus 2 (one for each increase stitch).
If the front sections are just a stitch or two each, as in our
sample pattern, adding too many stitches will mess up your sizing. In this case, you will just ignore those sections for now, and do not begin the stitch pattern until you've knitted enough increase rows that there are enough stitches in the section for one pattern repeat + 2 extra stitches. So for our example:
CO 2, Place marker A, CO 10, place marker A,
CO 18, place marker A, CO 10, place marker A, CO 2. You will have 42 st. Make a note of the fact that you modified the instructions to have 2 extra stitches between the back 2 markers.
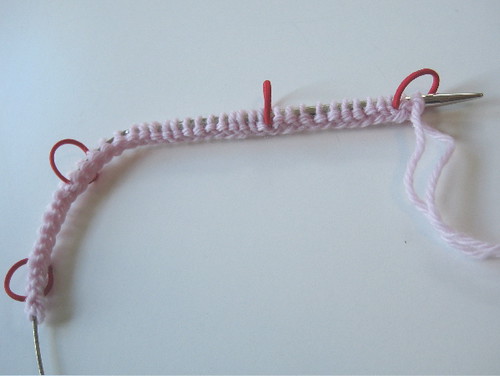 after casting on - looks just like any old top-down sweater.
5. Knitting in the stitch pattern. As you knit along, you'll start the pattern row over in each section. But you also need to differentiate between the stitches that are used only for increasing, and the stitches that can actually be knit in the stitch pattern. So as you knit row 1, you'll add a second set of markers,
Marker B.
Row 1: Kfb, place marker B, Kfb, slip marker A, *Kfb, place marker B, patt to 1 st before next marker A, place marker B, Kfb, slip marker A. Repeat from * to final marker A. Kfb, place marker B, Kfb of last stitch.
Row 2: Purl to marker B, *Purl to marker A, purl to marker B, patt to the next marker B. Repeat from * to final marker B. Purl to end.
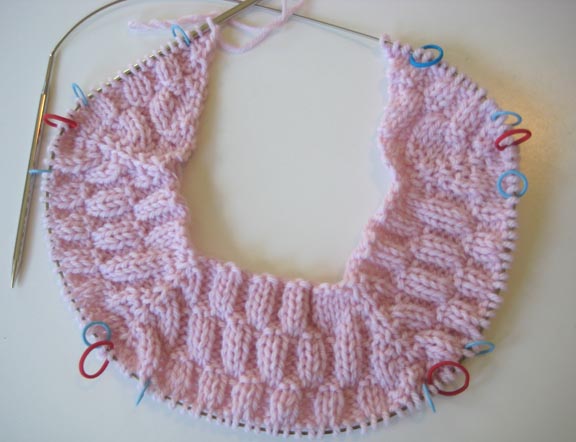
 after row 1 - 2 sets of stitch markers (A is red; B is blue)6. Maintaining the pattern as the sweater grows.
 On every increase row, you'll gain more stockinette stitches in the little sections between marker B and marker A. Once there are enough of them, you can add them to the pattern section by moving the marker. In this case, you will need 5 stockinette stitches (a multiple of 4 + 1). Once there are 5 stitches between marker A and marker B, on the next increase row, carry the stitch pattern through those 4 stockinette stitches, moving the stitch marker 4 places and leaving one stockinette stitch behind for the increase.
 7. The front edges.
 In every top-down sweater, there's a point when you stop increasing on the first and last stitch of every row, and you cast on a few stitches at the needle tips to make the front edges meet, across the low point of the neckline. This is the final part of the
sample pattern, above. This is the final adaptation you'll have to make. Our
sample pattern says to cast on 3 stitches. You should cast on as many stitches as it takes to complete a pattern repeat, as close to the recommended number as possible.
So if you have, say, 20 stitches in your first and last sections (NOT counting the stockinette stitches between marker B and marker A), you would cast on 4 for a total of 24 stitches, which is a multiple of 4.
If you're making a crew-neck rather than a cardigan, you'd be joining the front edges here. In that case, cast on the correct number of stitches to make the stitch pattern flow correctly from one side to the other when joined, sticking as close to the recommended number of cast-on stitches as you can.
From this point, there's nothing else special that you need to do - just continue the sweater as directed, taking any of your modifications into account when stitch totals are given, and transforming the little growing pockets of stockinette stitch between your markers into fancy-stitch as they pile up.
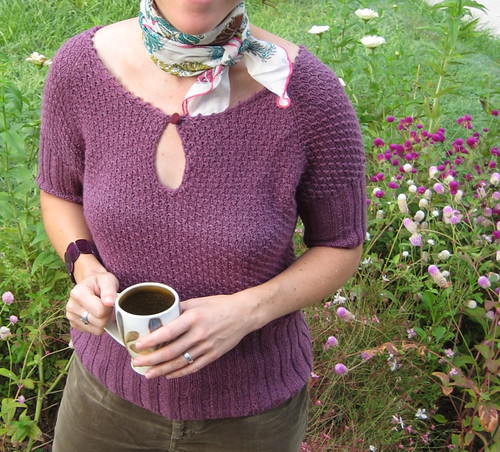
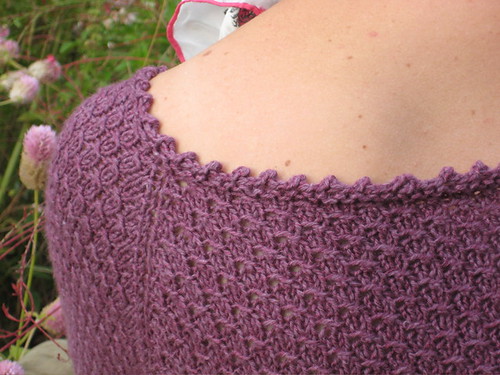
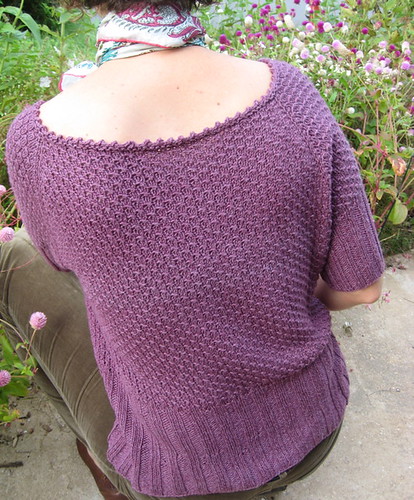
I know it might sound weird to have these areas of stockinette stitch breaking up your stitch pattern, but in a finished garment you really don't see it. I used this technique in the
Plum Blouse that I finished recently -
here's a close-up of the shoulder seam. If you were to use a stitch pattern that required a 18-stitch repeat, it would definitely not work. But for stitch patterns that use a 3 to 5-stitch repeat, this is a great way to make a simple top-down design a lot more interesting.