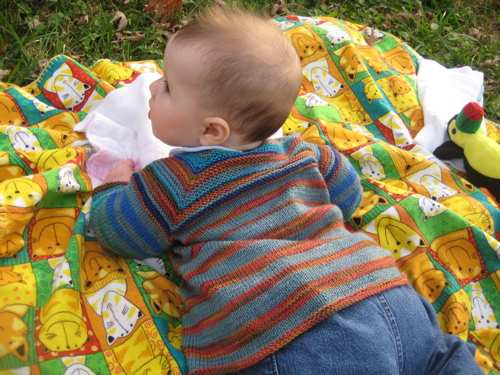
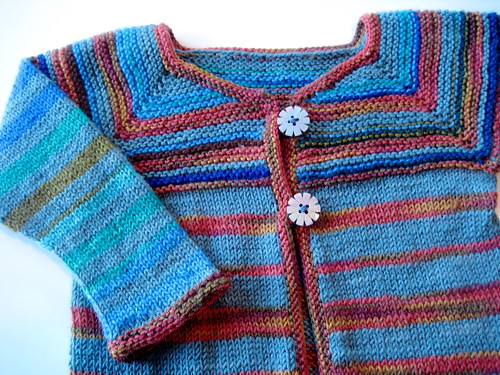
This baby jacket is a great way to use up leftover sock yarn and make a fun little sweater at the same time. This pattern uses three different leftover yarns – one is a solid, one is variegated, and one is self-striping. You can mix yours up however you like. I also varied the width of my stripes as I knitted – make yours as varied or as regular as you like (you don’t have to follow the charts provided below). You can hardly go wrong! Just make sure that your sock yarns are all the same weight and fiber content (more or less). Using superwash yarn is a good idea to keep this little garment easy-care.
[Revised 2.25.09 to add one increase row to body]materialsleftover sock yarn in 3 colors
color A (solid) – up to 200 yd (shown: Tess Super Sock & Baby)
color B (self-striping) – up to 50 yd (shown: Regia Kaffe Fassett Landscape in color “Caribbean”)
color C (variegated) – up to 50 yd (shown: Lorna’s Laces Shepherd Sock Multi in color “Gold Hill”)
size 2 /3.0mm needles (circular and DPN)
size 1 /2.5mm needles (circular)
size 1 crochet hook (2.35 mm)
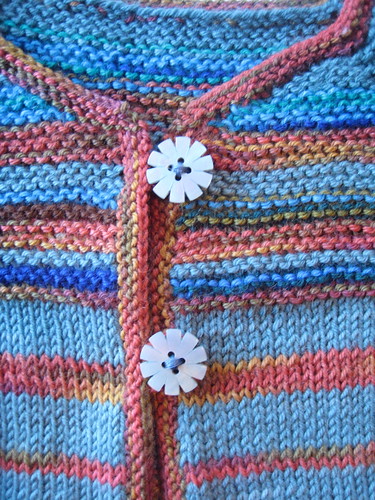
2 buttons (3/4 inch)
sewing needle & thread
tapestry needle
gauge: 7 stitches and 9 rows / inch
size: 0-6 (6-12, 12-18, 24) months
finished measurements:chest circumference: 18.5 (19, 20.5, 21.5) inches
back waist length: 10 (11, 11.5, 12) inches
sleeve: 6.5 (7.5, 8, 8.5) inches
stripe patterns(as shown in photos – make yours however you like!)
color key: yoke stripes
:
 body stripes:
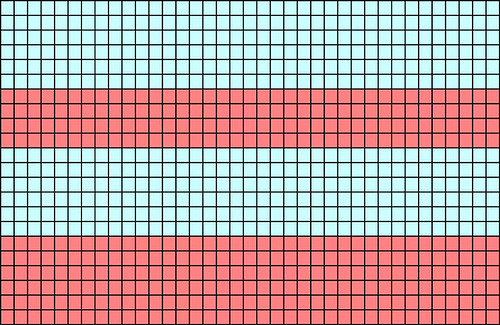 sleeve stripes:
 knitting instructions
Using larger needles and color A, CO 2 (3, 3, 4), PM, CO 16 (17, 17, 18), PM, CO 24 (28, 30, 32), PM, CO 16 (17, 17, 18), PM, CO 2 (3, 3, 4).
You will have cast on a total of 60 (68, 70, 76) st.
Row 1: Kfb of first stitch, * K to 1 st before marker, Kfb, slip marker, Kfb. Repeat from * to final stitch. Kfb of final stitch. (10 st inc.)
Row 2: Knit across.
Repeat these last 2 rows until you have 34 (38, 40, 44) st between the back markers.
Next row: *K to 1 st before marker, Kfb, slip marker, Kfb. Repeat from * to final stitch. CO 1 (2, 3, 1) stitches to tip of needle.
Next row: Knit across. CO 1 (2, 3, 1) stitches to tip of needle. You will have 120 (130, 134, 146) st total.
Next row: Work as for previous increase row, without adding the cast on to the end. (8 stitches inc.)
Next row: Knit across.
Repeat these last 2 rows until you have 60 (62, 66, 70) st between the back markers.
divide for sleevesK to first marker, remove marker, place shoulder st on a length of scrap yarn.
CO 6 (7, 7, 7) st to tip of needle, remove next marker, join to back stitches.
K to next marker, remove marker, place shoulder st on a length of scrap yarn.
CO 6 (7, 7, 7) st to tip of needle, remove next marker, join to remaining front stitches.
K to end.
Complete your color repeat in garter stitch.
Change to color A and stockinette stitch, knitting the body in varying stripes of colors A and C until the body measures 9.75 (10.75, 11.25, 11.75) inches. Change to color C and knit 4 rows in garter stitch. BO.
sleevesPlace the held stitches onto your DPN’s. Using the correct color to maintain your color repeat from the body stitches, pick up and knit the 6 (7, 7, 7) armpit stitches you cast on when dividing for sleeves. Place marker.
You will complete your color repeat in garter stitch, just as you did for the body. This time, when you change to stockinette stitch, you’ll be knitting in alternating rows of colors A and B, starting with color A.
At the same time:
K 3 rows.
Decrease row: K1, SSK, K to last 3 stitches, K2tog, K1. (2 st dec).
Next three rows: Knit.
Continue in this manner, decreasing 2 stitches on every fourth round until 40 (42, 44, 48) stitches remain. Do not decrease any further.
Knit until sleeve measures 6.25 (7.25, 7.75, 8.25) inches.
Change to color C, K 4 rows in garter stitch. BO loosely.
 button bands
Using smaller needles and color C, pick up 3 out of every 4 stitches along the right front selvedge (about 70, 78, 82, 86 stitches).
Knit 3 more rows in garter stitch. BO.
Repeat for left side.
collarStarting at the right front, using color C and smaller needles, pick up and knit the collar stitches.
Pick up and knit 14 (16, 17, 18) stitches from the right front, 16 (17, 17, 18) stitches from the right shoulder, 24 (28, 30, 32) stitches across the back, 16 (17, 17, 18) stitches from the left shoulder, and 14 (16, 17, 18) stitches from the left front.
Turn work, K 3 more rows in garter stitch.
Final row: K2tog, bind off all stitches until 2 st rem, SSK, BO.
buttonsSew first button onto right side of button band, 1/2 inch down from neck line. Sew second button 2 inches below first button (measuring from centers of buttons).
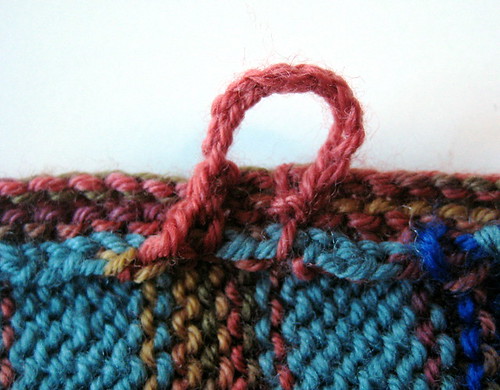
button loopsUsing crochet hook and color C, attach the yarn to the left button band on the wrong side of the sweater, being sure to place the loop where it will line up with the first button.
Make a chain of 11 ch with your crochet hook (or the proper length to fit your button). Attach chain to back side of button band, secure and weave in ends.
Repeat for the second loop, lining up with the second button.
 finishing
Weave in loose ends. Block sweater into shape.
important notice: This is a free pattern and you are welcome to use it for all the non-commercial purposes you like. However, you may not reproduce this pattern to sell, and you may not sell what you make with it. You may donate what you make with it to charity, and you may use it for charity fundraisers only if 100% of the proceeds are donated to the charity (and by charity I don't mean your kid's college fund). Thanks for understanding!
 Just a quick note to say that if you're knitting the scrappy cardi, I posted a minor revision this morning.