Yarn
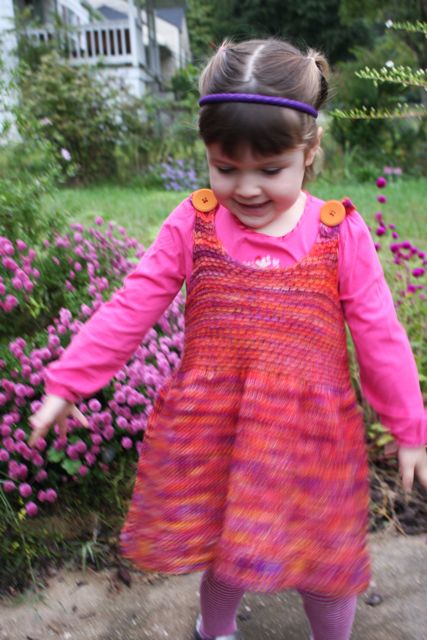
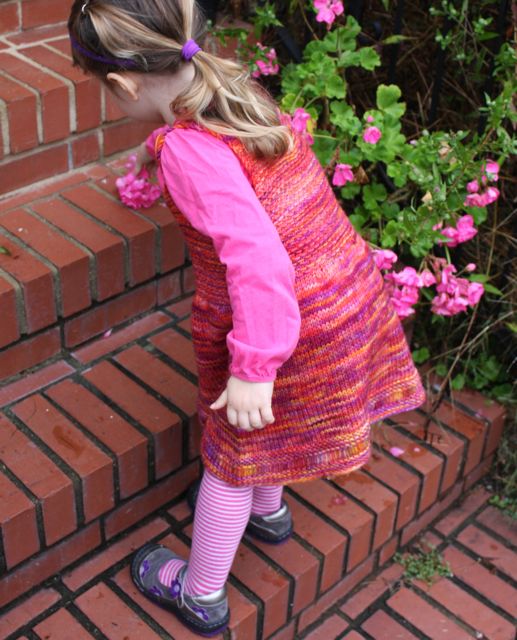
suggestions: Malabrigo Ríos, Brooks Farm Solana, Creatively Dyed Yarn Woodbrook,
or Lorna’s Laces Shepherd Worsted. The dress shown was knit in Malabrigo Ríos
in color #103, Archangel.
sizes:
12-18 mos (2-3 years, 4-5 years, 6-7 years)
measurements:
12-18 mos size: chest circumference: 20 inches. overall length: 16 inches.
2-3 years size: chest circumference: 24 inches. overall length: 18
inches.
4-5 years size: chest circumference: 26 inches. overall length:
19.5 inches.
6-7 years size: chest circumference: 28 inches. overall length: 21
inches.
materials:
Malabrigo Ríos, 2 (2, 3, 3)
skeins
Size 8 (US) circular
needle, 24 inches
Size 6 (US) circular
needle, any length
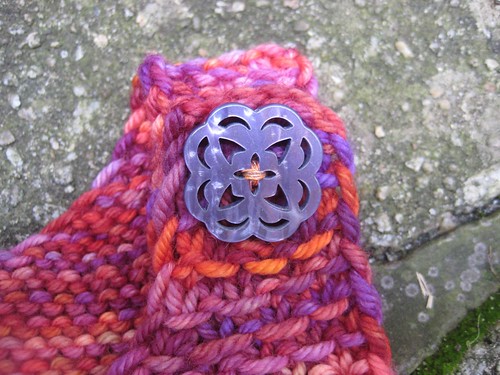
2 buttons, about 1-1/8 to 1-3/8
inches / 28 to 34mm
Tapestry needle
Sewing needle
Sewing thread to match
gauge: 20 stitches / 4 inches on size 6 needles in
stockinette stitch
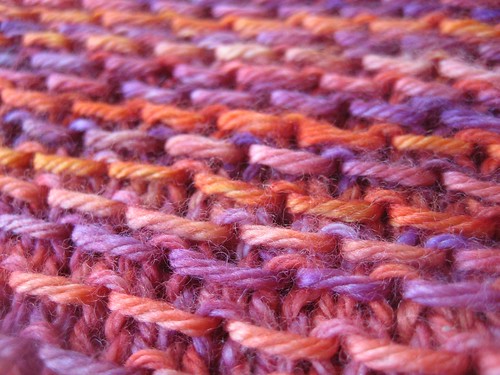
slipped honeycomb stitch
work over an odd number of
stitches
R1 (RS): Knit
R2 (WS): K1, *Slip 1 with
yarn in back, K1. Repeat from * to end.
R3: Knit
R4: K1, *K1, Slip 1 with
yarn in back. Repeat from * to end.
You will begin this dress
at the lower edge and knit in the round on circular needles.
Note to the purl-averse:
The first 14 rounds are based on garter stitch, so if you’re one of those
people who can’t stand purling, knit the first 14 rounds flat and sew them up
later.
Using larger needles, cast
on 125 (151, 163, 175) stitches, place a stitch marker, and join to knit in the
round. Knit the first 6 rounds in garter stitch (alternating knit and purl
rounds).
Round 7: K1. Knit, wrapping
three times for each stitch, to end.
Round 8: Purl, dropping all
the extra wraps.
Knit 6 more rounds in
garter stitch.
Change to stockinette
stitch. Continue knitting in the round until dress measures 9 (10, 10, 11)
inches from cast-on edge.
Decrease for bodice:
Change to smaller needles. *Knit
7, work a centered double decrease. Repeat from * to end. As you come to the
last 5 (2, 3, 5) stitches, K2tog, K to end. 100 (120, 130, 140) st remain.
Centered double
decrease:
Slip 2 stitches together knitwise. K1. Pass the slipped stitches over the knit stitch. 2 stitches decreased.
Slip 2 stitches together knitwise. K1. Pass the slipped stitches over the knit stitch. 2 stitches decreased.
You will now divide the
front and the back of the dress, and knit each side of the bodice flat in
Slipped Honeycomb stitch. Just hold the back half of the dress on scrap yarn
while you work the front.
Front:
R1: K 51 (61, 65, 71) place
the remaining 49 (59, 65, 69) stitches on scrap yarn to hold. Turn, work row 2
of Slipped Honeycomb stitch.
Continue knitting this
section in the stitch pattern for 2 (2, 3.5, 3.5) inches.
Make armholes
Note: Through
the rest of the bodice and the straps, you will begin every row with a
slipped stitch, with the yarn held in front (WYIF). This creates a very tidy,
even edge for any garter stitch-based stitch pattern and eliminates the need
for a border to be picked up & knit or sewn on later.
Note also:
Throughout the remainder of the bodice, you will continue to work the honeycomb
stitch pattern as established. Because of decreases at many row ends, you will
sometimes need to work row 2 instead of row 4 of the honeycomb stitch, or
vice-versa. The important thing is to keep the slipped stitches staggered as
established when you began working the pattern – this is easy to follow with
your eye.
Decrease row (RS): Slip 1
WYIF, SSK, SSK, K to the last 5 stitches. K2tog, K2tog, K1 (4 st decreased).
Next row (WS): Slip 1 WYIF,
K to end (maintaining pattern).
Repeat the last two rows 2
(4, 4, 5) more times, until 37 (41, 45, 47) stitches remain on the needles.
Sizes 12-18 mos, 4-5 years:
Next RS row: Slip 1 WYIF,
SSK, K to last 3 stitches. K2tog, K1. (2 st decreased)
35, (41, 43, 47) st remain.
Continue working in patt
until the bodice section measures 3.5 (3.5, 5, 5) inches.
Work neckline:
* *You will still slip the
first stitch of every row (RS and WS) with yarn held in front!**
Next RS row: K16, BO 3 (9,
11, 15), K16.
Right front:
Keeping the first section
on a holder, work the second section of 16 stitches, maintaining the honeycomb
stitch pattern and the first stitch slipped every row.
WS: Knit in patt to end of
row (neckline).
RS: Slip 1 WYIF, SSK, SSK,
patt to end. (2 st dec).
WS: Turn, patt to end of
row (neckline).
Repeat these last 2 rows
til 10 stitches remain.
Next RS row: Slip 1 WYIF,
SSK, patt to end. 9 stitches remain.
Continue working these 9 st
in honeycomb stitch pattern for 3 more rows.
Next RS row, work
buttonhole: K3, BO 3, K3.
Turn, patt 3, cast on 3 st
using backwards loop cast on, patt 3.
Work 2 more rows in patt.
RS: Bind off all stitches
as follows: Slip 1 WYIF, SSK, BO all stitches to last 3, K2tog, BO.
Left front:
Join yarn to held stitches
at the neckline to work the left side.
WS: Knit in patt to end of
row.
RS: Slip 1 WYIF, patt to
last 5 stitches, K2tog, K2tog, K1.
You will work the left
front just as you did for the right, but working your neckline-edge decreases
as K2tog’s (as instructed for previous 2 rows).
Work buttonhole and bind
off as you did for the right front.
Back:
Join yarn and work the back
as you did for the front, right up through the armholes. Work the armhole
decreases until 35, (41, 43, 47) st remain.
When the back bodice
measures 4.5 (4.5, 6, 6) inches, work the back neckline exactly as you did the
front.
However, once 9 stitches
remain on each side, do not work a buttonhole.
Instead, work these 9 st in
patt until each shoulder strap measures 3.5 (4, 4.5, 5) inches from the point
where you separated out the two sides. Bind off on the RS, using decreases to
shape the ends just as you did on the front side.
Finishing:
Sew up the sides below the
armhole.
Weave in all ends.
Button placement:
Wash and block the garment before sewing on buttons. Try the dress
on the intended recipient if you possibly can, using safety pins to mark where
you want the buttons to go. If you can’t try it on the child first, the default
setting is to sew on the buttons such that the finished armholes measure about 5
(6, 6, 6.5) inches. Stretch the straps gently as you measure, since these
straps will stretch a bit lengthwise during wear.
If the dress is to be given
as a gift, wind a generous length of sewing yarn around a small card and
present it with the dress, so that the buttons may be moved down the strap as
the child grows (you may wish to offer to provide this service to the
recipient’s parent, since many people today are unfamiliar with domestic arts
like button-sewing).
