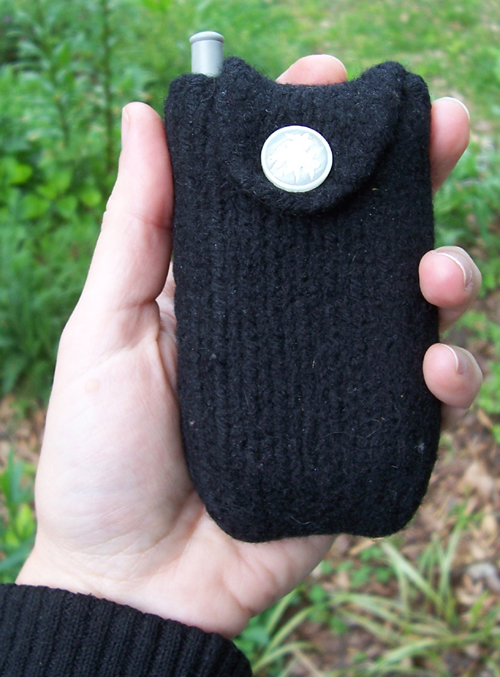
 Besides keeping your phone warm on cold days, this little pouch will keep it from getting nicks & scratches in your bag, and protects it from shock when you drop it on the pavement as I seem to do at least once a week. You can easily adapt the pattern to make cases for your iPod, Blackberry, or whatever other space-aged gadgets you've got that need an old-fashioned cozy. Make it with or without the caller ID window.
Sizes: One Size
Materials:
- Cascade 220 (about 1/4 skein ) - this is the best felting yarn in all the land, but be careful not to get the Superwash - it won't felt!
- US size 9 knitting needles
- one 5/8" Button
- Tapestry needle
 Knitting the pouch:
CO 16 st
K in stockinette st until piece measures 12 inches.
Next RS row: BO 2, K to end.
Next WS row: BO 2, P to end. (12 st rem)
K 2 more rows in st st.
(Dec row A) Next RS row: K 2 tog, K to last 2 st, SSK (10 st rem)
K 3 more rows in st st.
Next RS row, repeat dec row. (8 st rem)
P 1 row.
Next RS row: K 4, YO, K2tog, K to end
WS row: P4, P2tog, P to end. (7 st rem)
RS row: Repeat dec row A. (5 st rem)
WS row: P2tog, P1, P2tog.
BO 3 rem st. Weave in loose end.
It's not totally necessary, but this would be a good time to block the piece and let it dry flat - this will make it easier to sew up.
Fold the piece (K side out) so that it makes a pocket, as shown in the picture. Line up the cast-on edge with the top corners where you did the BO rows. Sew the sides. You now have a little pouch to felt!
 Felting:
If you have never felted before, it probably wouldn't hurt to read about it some on the internet before doing it yourself. Knitty has a great tutorial in this article. But it's easy and won't hurt a bit, I promise.
Stick the item to be felted into a pillowcase and tie the pillowcase top in a knot. This step is really important if you are felting more than one item of different colors at the same time - the lint of the other item will felt itself into your fabric (but you might like the effect, so don't let me tell you what to do).
Okay, put your item into the washer along with a pair of jeans or a towel or something to add weight and agitation. Use a tiny amount of gentle soap, turn the temp up to hot, and run a 10 minute wash cycle. Stop the washer before it gets to the final spin, and check your item. You will really need to tug on it to get it into any semblance of the right shape. Does it look about right? One way to test it is to stick your cell phone into a plastic baggie and then put it into the pouch. Does it fit? If it's too loose, send it back through another hot cycle in the washer. I usually find that it takes two 10-minute wash cycles to get my cell phone cases to the correct size.
Once you've shrunk this thing down to the right proportions, you can stuff your protected phone into it, or cram it full of plastic grocery bags, and let it dry in the correct shape. It will take a full day or two to dry.
Finishing
First, the buttonhole probably needs to be stretched some. Cram a pencil, your finger, or whatever through the buttonhole and stretch it out until your button will fit through it snugly. Then put your phone into the case, fold the flap over and mark where your button should be sewn on. Remove the phone and sew the button on tightly.
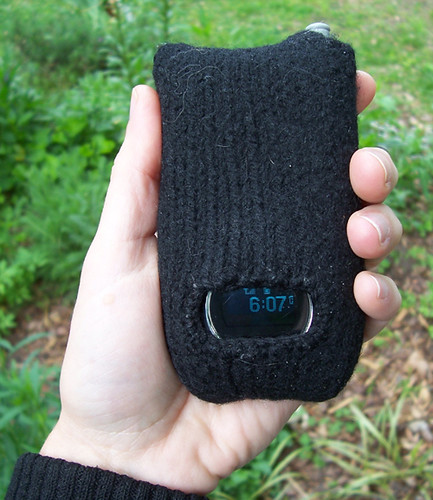
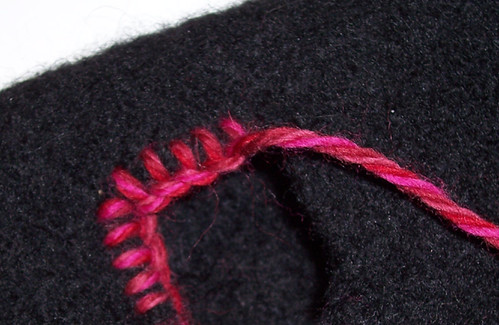 If your phone has caller ID, you may want to make a window in the case so that you can see who's calling. Just cut the window into the finished case with fabric scissors (be conservative in your cutting - the fabric is stretchier than you think. If the window is too small you can always trim away some more). Then go back with a piece of yarn & a tapestry needle and use a blanket stitch around the window to finish it off & keep it from fraying. I usually use the same yarn the case was made from, but you can use a contrasting yarn (like in the picture) to be fancy if you want to. You can make a fancy contrasting blanket stitch edging around the flap or the top case opening too, if you like to sew. I don't have the patience for that kind of thing, myself.
Now you're all done!
Customizing the cozy to fit your gadget
The finished size of this case is about 4 inches tall and 3 inches around. Your phone may be bigger or smaller than mine. But you can easily customize the case to fit any phone (or i-Pod, or whatever).
The yarn I use in this pattern, Cascade 220, shrinks predictably on a hot wash cycle. After two 10-minute cycles, items knit in stockinette stitch shrink 35% in length (top to bottom) and 21% in width (side to side).
So if your phone is 6 inches tall and 4 inches in circumference, you'd multiply 6 x 1.35 and 4 x 1.21, and you'd get a result of about 8 inches high by about 4.75 inches wide (this is not an exact science - rounding is just fine). You'd need to knit your case to be about 16 inches tall (because it gets doubled over). Since the pre-felt gauge is 4.5 st/inch, you'd multiply 4.75 (width) x 4.5 (gauge), and cast on approximately 22 stitches. Then knit until the piece is 16 inches long before starting your bind-off rows. See how simple the maths are?
You can use other yarns, but Cascade is my hands-down favorite for felting, and the color selection is unbeatable.
I hope you enjoy this project - it's a breeze knit, and they make terrific gifts.
important notice: This is a free pattern and you are welcome to use it for all the non-commercial purposes you like. However, you may not reproduce this pattern to sell, and you may not sell what you make with it. You may donate what you make with it to charity, and you may use it for charity fundraisers only if 100% of the proceeds are donated to the charity (and by charity I don't mean your kid's college fund). Thanks for understanding!
I am loving mine... and I have some cascade left over from momo's sweater - so I might have to make some christmas gifts!
ReplyDeletelol! *Protects it from shock when you drop it on the pavement* :-) If I had a dollar for everytime I did that! Guess it's a good thing I won one, huh?
ReplyDeleteThanks for your kind words, look, I'm a blogger now too! Hope all is well with you, keep knitting!
ReplyDelete-Laura