Showing posts with label knitterly ways. Show all posts

Tuesday, January 02, 2018

can we still be friends?

Hi there! Thanks for stopping by.

Sadly I don't seem to be keeping up with this neglected little knitting blog anymore, but I'm so glad you're here, knitter friend, and you're very welcome to poke around in the archives.

Free Knitting Patterns

Free Pattern FAQ (help page)

I'm afraid I can be a bit slow to respond to comments and questions, but I do get them and I do try to reply within a not-shameful period of time.

Also let's be knitting friends on Ravelry!

Happy knitting!

Thursday, May 14, 2015

cute cuter cutest!


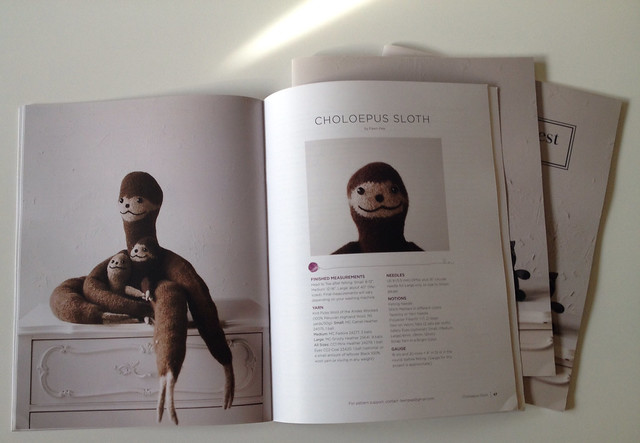
Imagine my delight when a little stack of these adorable new books of knit toys showed up at my house the other day from KnitPicks! But the real thrill was inside...


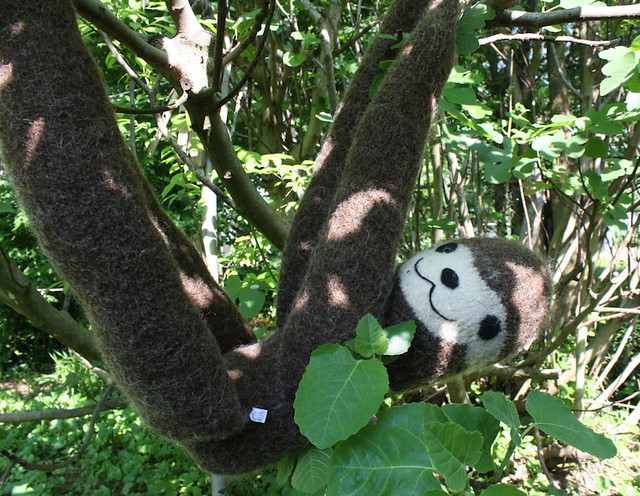
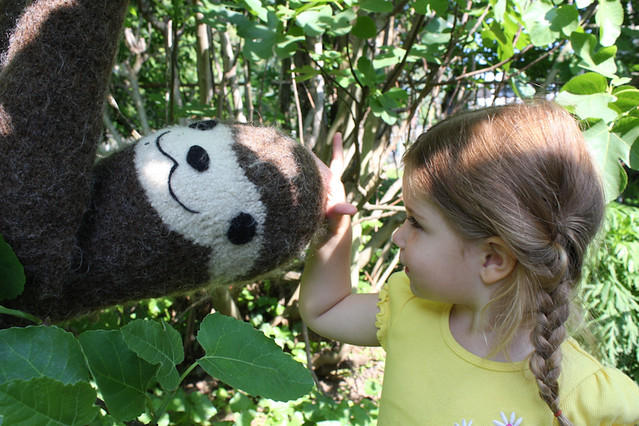
It's my sloth! I am so excited that my pattern for a trio of knitted & felted sloths was included in this ridiculously sweet collection of knit toys. If you've been a reader of this blog for a while (a long while), you may remember when I first got excited about the two-toed sloths and decided to knit a life-sized one. Sloth was born about six years ago (around the same time as the Little Pea), and has now made the big time as a knitting pattern - with two cute little friends.   


Sloth immediately became a beloved friend in our family. I hope he'll be one for lots of other knitters now, too! The pattern is available as part of the Cute Cuter Cutest book, as a stand-alone pattern to download, or as part of a kit made with KnitPicks Wool of the Andes worsted.  


Tuesday, May 05, 2015

Saturday, December 20, 2014

6 great last-minute gifts for knitters

Attention, spouses! You've got 5 days left til a major gift-giving holiday. Lucky for you, knitters and crocheters are easy to shop for. Here's my go-to list of last-minute gifts for the fiber lover in your life:

1. Keep their fingers flying all year with a subscription to a fiber arts magazine. Interweave Knits and Interweave Crochet are obvious choices. Is s/he a relative beginner? Try Knit Simple. Fashionistas love Vogue Knitting and KnitScene. Subscribe online, print out the gift coupon, and put it inside a lovely holiday card. Classy!


Ceramic yarn bowls from Kristina Chadwick
2. One of the knitting accessories I'd never ever buy for myself, but have always lusted after, is a yarn bowl. The yarn bowl functions both as tool and decor (it keeps the yarn ball from rolling away while you work with it), so pick a pretty one that matches her/his style. There are about a million of them on Etsy in every conceivable color and style, but shipping at this point is dicey. I guarantee you that your local yarn store has quite a few in stock right now too.


The Namaste Hermosa knitting bag... drool.
3. File this one also under Stuff I'd Probably Never Buy for Myself But Would Love to Have: A stylish knitting bag. Whether you want to spend $25 or $150, you can find a great bag online and choose express shipping, or pick one up at your LYS and have it under the tree by Thursday. 


DellaQ circular needle wallet
4. Have you ever seen your Beloved Knitter struggling to untangle a pile of tangled-up circular knitting needles? Does s/he curse loudly searching for the right sized needle while digging through a drawer full of bamboo and plastic cording? S/he just might love a needle organizer - they're often called needle wallets. My favorites are made by Lantern Moon and Della Q


5. Everybody who works with their hands needs a massage right about now. It's gift-making season, and those shoulders, arms and fingers are tired. Give her/him a gift certificate for a half-hour massage. In 30 minutes, s/he will walk away with mojo restored and a smile on her/his face. This is another easy one to buy online, stick the print out in a tiny gift bag and feel like a superhero.


6. Okay, maybe this is totally obvious, but you can't do better than a generous gift certificate to your local yarn store. Support a local business, make a knitter happy, and dress it up with a shiny bow. No local yarn store? I'm really, really sorry. But there are some great online retailers too... the Webs store, Jimmy BeansKPixie and KnitPicks are full of yarn and tools that your crocheter or knitter will be delighted to browse through. 

I hope this helps! And I hope that you and your yarn lover have a very Merry Christmas!

Tuesday, October 28, 2014

stepping out... into teaching! (gulp)

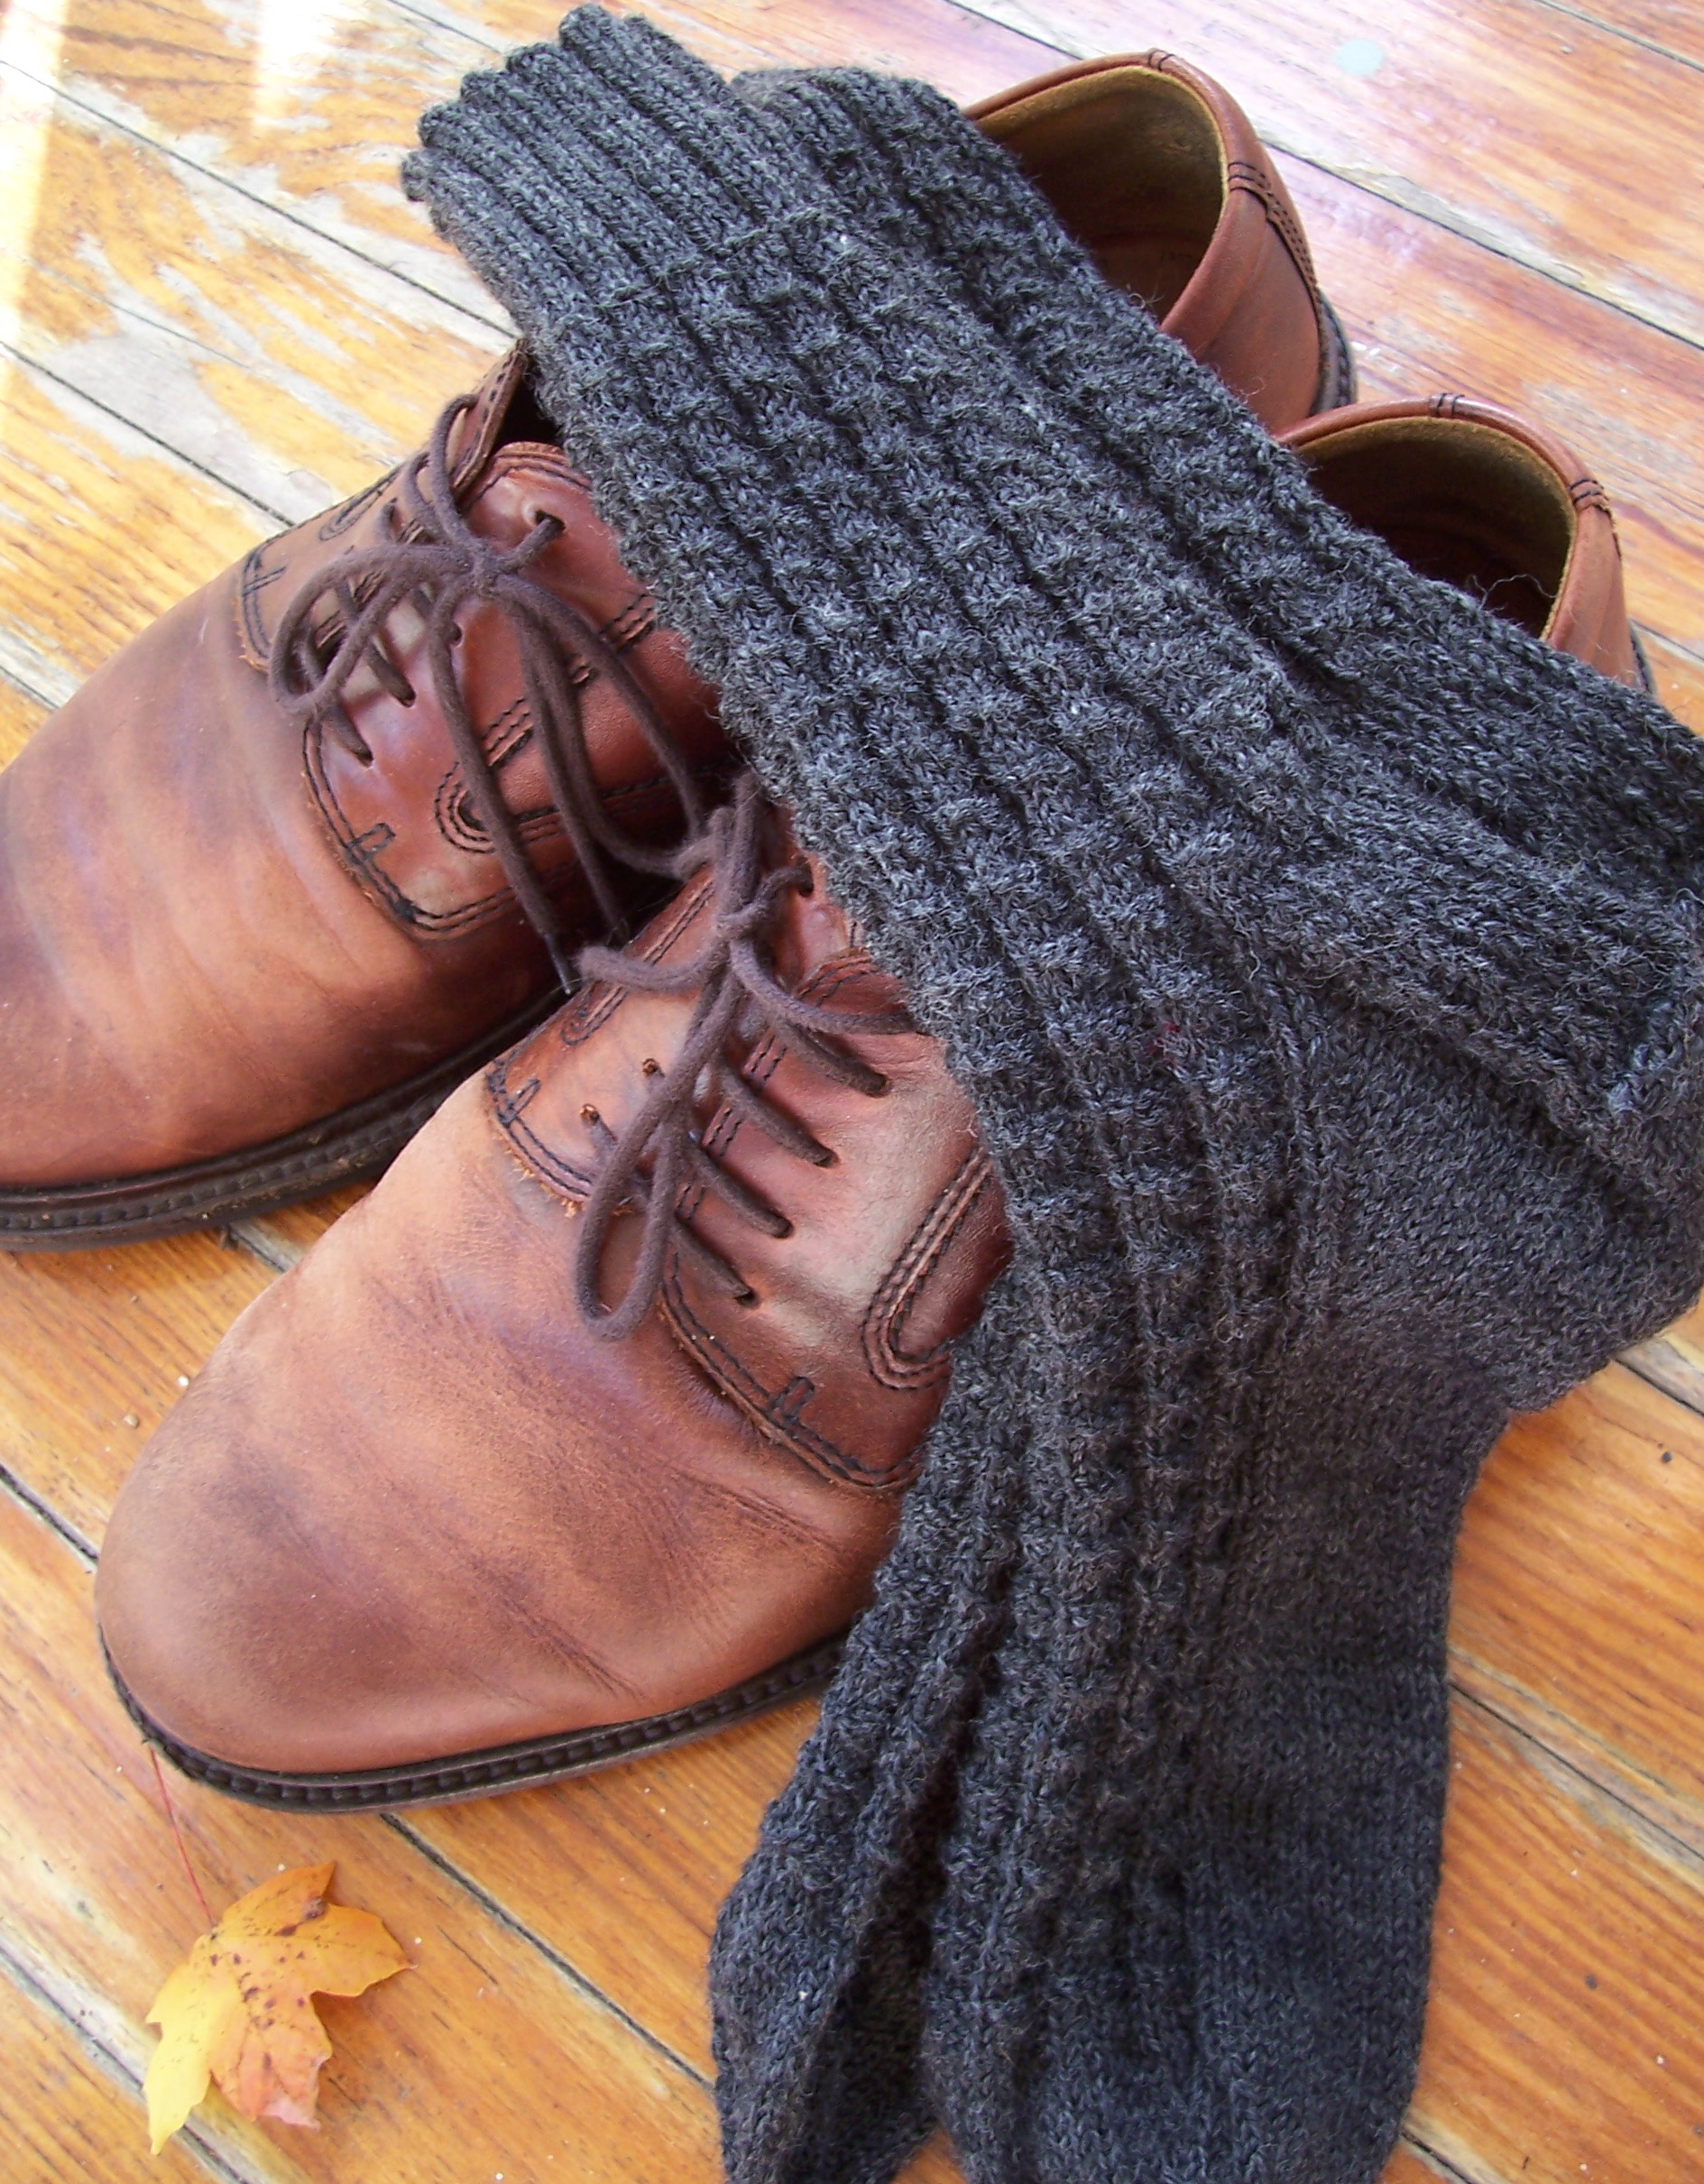
Gentleman's Shooting Stockings, ca 2006
Socktober might be almost over, but I'm not ready to move on just yet. I'd stepped away from sock-knitting for a while (get it? stepped..? nevermind) and it feels soooo good to be back.

Sock yarn! Oh man, sock yarn. For $25 you can buy yourself the goods for a spectacular, satisfying knitting project with amazing color, luxurious fibers and a guaranteed appreciative recipient (especially if you're the lucky recipient). Not to mention the portability, the relative speed, the fun of the Magic Loop....  okay, I know, I don't need to preach the Joy of Socks to y'all.

But I am going to be preaching the Joy of Socks to an unwitting group of new sock knitters in November, because I'll be teaching a sock-knitting class!!! Eep!

That's right, I'm going to be teaching my first knitting class. We're going to be knitting The Perfect Sock by Jo Torr, which is a perfect introduction to toe-up sock knitting. It's super duper exciting, and also completely terrifying. What if the students don't like me? What if I don't like them (though that seems unlikely)? What if they figure out that I ACTUALLY HAVE NO IDEA WHAT I'M DOING??? What if they hate sock knitting and spent their hard-earned money and time on a class that would have been better spent on cleaning the bathroom?!? I have all these fears and many more.

But also, I have the excitement! And also the Joy of Socks, which I really look forward to sharing. And I have the trust of Great Yarns to use wisely and not squander, so I better live up to it.

So here's what I want to know from you: Have you ever taken a knitting class? What class did you take? What did you love about it? What did the teacher do that made it a wonderful experience (or if it wasn't that, what would have made it wonderful)? What do you wish that the instructor had done differently?

Please share your wisdom... I'll be needing it!

Friday, October 24, 2014

how do your socks grow?

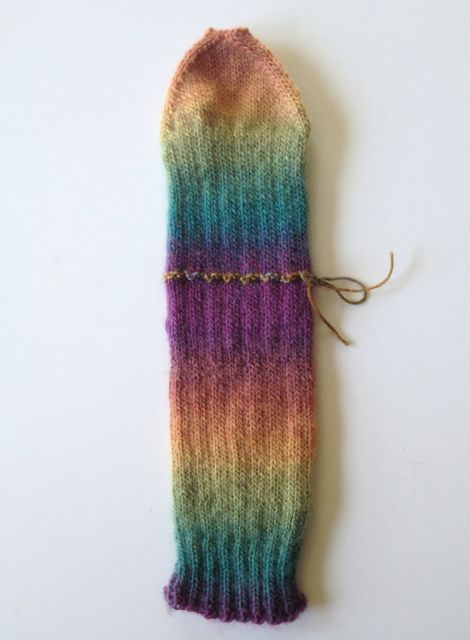
Child's sock / Ready to work an Afterthought Heel
So many ways to make a simple sock! I think it's time to widen my repertoire.

My standard recipe is a top-down sock with a standard heel flap. I've made them so many times that I don't need to follow a pattern at all. I have the formula in my head and I can make them in any size, any weight yarn, more or less through sheer muscle-memory. As you can imagine, I'm loath to knit socks any other way, because then I'd have to think about it, and in my experience thinking while knitting can be a really disastrous proposition.

I'm working on a pair of adorable rainbow socks right now for the Little Pea, the first pair of socks I've knitted in a while. They're made from Crystal Palace Mini Mochi, which has got to be the cutest name for the cutest sock yarn I've ever encountered. I'm loving this colorful, super-soft stripey sock yarn. It felts a little to itself, but I don't care. It's got a wonderful handle and drape, and I love the wide bands of color, each fading gradually into the next.

I really didn't want to disrupt the rainbow color pattern by knitting a heel flap, so I decided to work Afterthought Heels (or 'Forethought Heels' if you're a fan of Elizabeth Zimmerman). This is the method where you work a piece of scrap yarn into the row where the heel would start, leave it and just finish knitting the sock without a heel. Then you come back later, pull out the scrap yarn, and knit in a heel. Being a heel-flap enthusiast, I have some trepidation about my competence in this method, especially in placing the heel at just the right spot (this long and informative discussion of Afterthought Heels on Knit Better Socks boosted my confidence tremendously though). So I'm halfway through the second sock and already itching to put those heels in and see how they look (and whether they leave big gaping holes, as I fear they might).

So you toe-up knitters make lots of Afterthought Heels, right? Or do you prefer short-row heels? I've tried both and keep coming back to my tried-and-true heel flap. But I really do see the value in toe-up socks, particularly if you want to make the longest sock possible, and use up all your sock yarn without risking running out of yarn. And toe-up means no heel flap... so perhaps I really do need to make friends with a wider variety of heel-knitting methods.

I'm thinking about teaching a sock-knitting class this winter, and I'd love to know what y'all think. What's your favorite way to knit a sock? Are there any sock secrets or techniques you're dying to learn? And while we're talking about it, I'd love to know what your favorite patterns are for a great sock that's fun to knit. Please share your ideas in the comments! Thanks!

Thursday, October 16, 2014

be fancy :: eyelet stitches

Welcome back to FancyStitchLandia! Our last stop was Block Stitch & Friends, where we learned that the most basic combinations of knit and purl can yield beautifully-textured results.

You can knit and purl, so I know you’ve got those patterns down. Now… can you increase and decrease? Some yarn-overs and K2togs are all you need to get yourself started with sweet little eyelet patterns that can make your knitting look way fancier, way more feminine, and/or just way more interesting, depending on how you work them. [Don’t know how to work a yarn-over (YO) yet? Check out this simple how-to and then come right back!]

There are more eyelet patterns than you could possibly imagine. Adding just a few eyelets to a project can provide really useful features besides visual interest. You can use eyelets to make buttonholes, vents, or a track for a belt or ribbon. Eyelets are the foundation upon which the timeless dishcloth pattern is built, though I cannot endorse frittering one’s knitting time away on a project that encourages housework. Lace (also known as openwork) is just a pattern that features lots and lots of eyelets. Here are some eyelet patterns to get you started:

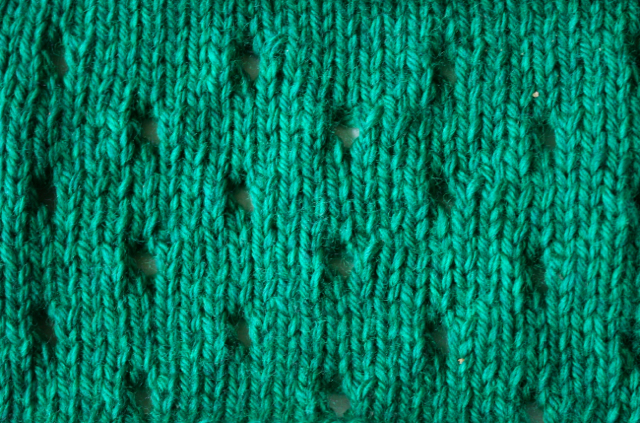
simple eyelet pattern (multiple of 8 sts)

simple eyelet pattern
The most basic eyelet is formed by using a repeating pattern of YO, K2tog. Here’s a lovely simple version, courtesy of Barbara Walker's first Treasury of Knitting Patterns:

R1 (RS): Knit
R2 and all WS rows: Purl
R3: *K6, YO, K2tog. Repeat from * to end.
R5: Knit
R7: K2, *YO, K2tog, K6. Repeat from * to end.
R8: Purl.
Repeat rows 1-8.

cloverleaf eyelet pattern (multiple of 8 sts + 7)

Lucky Clover Lace Wrap / Melissa Wehrle
I love this pretty stitch pattern on ladies tops and dresses. It’s featured in the popular Lucky Clover Lace Wrap from Stitch & Bitch Nation:  

R1 and all other WS rows: Purl
R2 (RS): Knit
R4: K2, YO, Slip 1, K2tog, PSSO, YO. *K5, YO, Slip 1, K2tog, PSSO, YO. Repeat from * to end. K2.
R6: K3, YO, SSK. *K6, YO, SSK. Repeat from * to end. K2.
R8: Knit
R10: K1. *K5, YO, Slip 1, K2tog, PSSO, YO. Repeat from * to end. K6.
R12: K7. *K6, YO, SSK. Repeat from * to end.
Repeat rows 1-12.

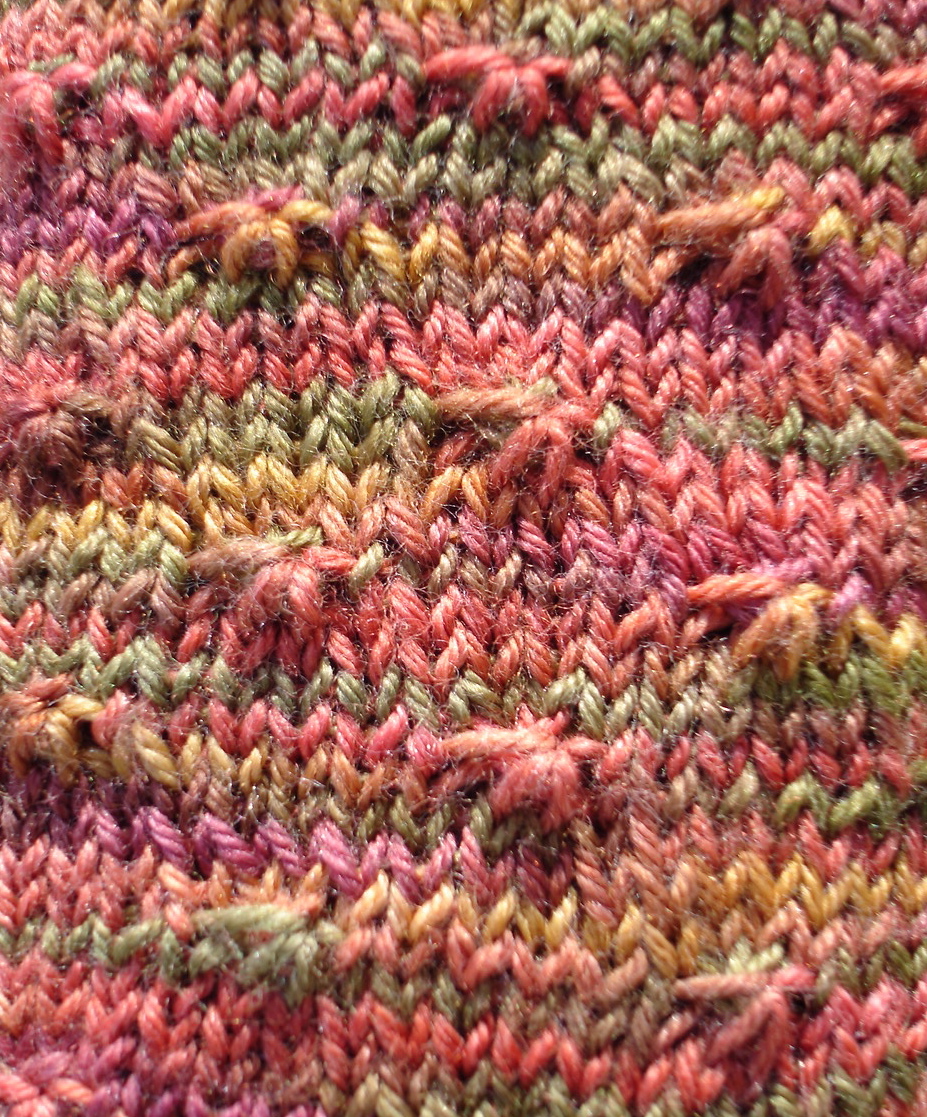
wildflower purl
wildflower purl
This wonderful pattern is just a little bit trickier, relying on a P3tog to create the cute little wildflowers. I love how this stitch pops on variegated yarn! Instructions for working this stitch pattern in the round are included in my Wildflower Socks pattern.

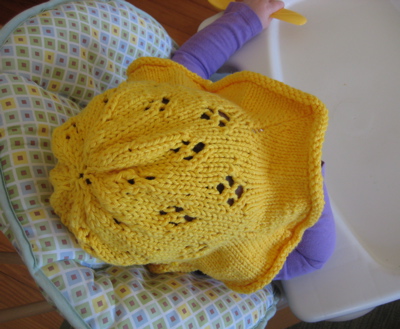
quatrefoil 
quatrefoil / sundrop hat
The quatrefoil makes a sunburst or flower design that looks great on garments and accessories alike. I used it to create both visual interest, and cooling vents, on this summer hat for babies and toddlers. Instructions for working this stitch pattern in the round are included in the Sundrop hat pattern.

Just these three variations on the simple eyelet open up a huge amount of possibility for your knitting. Even a single row of eyelet stitches at the lower hem or cuffs of a sweater add so much visual interest to a simple garment.

Check out how other designers are using eyelets in a few of these hot projects on Ravelry right now. Give them a try and let me know what you think!

clockwise from left: miette by andi satterlund | star anise by svetlana volkova | caramel frappe by monika sirna | dotted rays by stephen west


Wednesday, October 08, 2014

fall yarns to make you salivate

I've been fighting a yucky cold the last few weeks, which has made my brain dull. All my best ideas revolve around drinking tea and crawling into my nest on the couch. Not really worth writing about.

But I have been spending some QT at the LYS, and I just can't help noticing all the pretty, pretty new fall yarns coming in. Do you have your eye on anything special? Here's what's been piquing my curiosity (and making my wallet vibrate in anticipation):

Colinette Jitterbug / Mint Julep colorway
Colinette Jitterbug. There's no end to how much sock yarn I could buy, and new colors from this wonderful, bouncy favorite have me itching to make up some socks. Come to think of it, the Little Pea could use some warm winter socks... would she let me pick a color for her?? I know she'd pick Earth, Rose Garden or Peaches & Cream, but I adore Turquoise and Mint Julep (shown in the picture).

Dream in Color Smooshy / Deep Regret colorway
Dream in Color Smooshy - Don't touch it! If you do you'll have to buy it, and then you'll have to tuck it under your pillow and stroke it lovingly every night before you go to sleep. Even your cat will think you're weird. OMG Smooshy. I love the new colorways for this fall, though the emotional rollercoaster represented by the colorways' names give me pause (my favorite new colors are Vague Unease and Deep Regret). PS Cashmere!!!!!


Rowan Felted Tweed / Hedgerow colorway
Rowan Felted Tweed - If there's a more classic, British-Islesey fall comfort yarn out there, please show it to me. If you ask someone to close her/his eyes and imagine a beautiful fisherman's sweater, they're going to imagine something knit from Felted Tweed. Rowan has 4 new colors out for the season, and I love Jaffa (I have a thing about rusty reds...). I just want to knit myself a winter cocoon from it to just live in until spring comes.


Knit Picks Diadem / all colorways
KnitPicks Diadem - What an interesting new yarn. In theory I love it, this ultra-luxe alpaca/silk blend that comes in fingering and DK weights. The colors are solids, and a somewhat limited palette (maybe because it's new?). KP has a call out now for free pattern designs, and I'm scratching my head a little over what I'd want to do with this silky, silky yarn were I to get my hands on some. Any ideas? Is this one on your list?

So what are you yearning to add to your stash right now? I'm sniffling away but enjoying my fantasies of just wrapping myself in silky wooly goodness til I get better.

Friday, September 26, 2014

be fancy :: block stitch

Earlier this week I promised a series of posts on my favorite stitch patterns to help get you started on your journey to FancyStitchLandia. Here's the first one! Block Stitch.

Block Stitch / Blocks are 4 stitches wide by 4 stitches high
Block Stitch goes by other names, including Dice Stitch, Checkerboard and Basketweave (not to be confused with many other basketey stitches, like Basket Stitch, Basket Rib or Basket Welt). It's an incredibly simple stitch with many possible variations. Just a simple pattern that alternates blocks of knit stitches (stockinette stitch) with blocks of purl stitches (reverse stockinette). I love it because it's reversible (looks the same on both sides), and after blocking lays flat with no curling up at the ends or edges. So it's great for a scarf, and unlike many of the coolest stitch patterns, it's a bit on the manly side. 

Block Stitch is a great choice for a man's scarf, a men's or boys' pullover, or to add geometry and structure to a shawl, sweater or scarf for any gender. It also makes a great-looking bag!

Here's how to make it (directions are given for knitting flat, i.e. not in the round):

Multiple of 8 stitches / Worked over 8 rows.

R 1, 3 (RS): * K4, P4. Repeat from * to end.
R 2, 4 (WS): * P4, K4. Repeat from * to end.
R 5, 7 (RS): * P4, K4. Repeat from * to end.
R 6, 8 (WS): * K4, P4. Repeat from * to end.

The resulting fiber is a bit scrunchy (from the almost-ribbing), but just block it and press it, and it will flatten right out (unless you want the scrunchiness!). 

There are endless ways to vary this simple combination of alternating knit and purl stitches. You can make the blocks wider (such as K5, P5 or K10, P10...). You can make them taller by working the pattern over a larger number of rows. You can alternate the stockinette stitch blocks with seed stitch blocks or garter stitch blocks. Check out a few of the variations below.

Variations: 

Seed Block Stitch alternates stockinette stitch blocks with blocks of seed stitch. You could work blocks of any size, as long as they are at least 5 stitches wide. The pattern is shown here over blocks  5 stitches wide by 5 stitches high. Unfortunately this variation is not reversible, but it is really beautiful.
Seed Block Stitch / Blocks are 5 stitches wide by 5 stitches high
Multiple of 10 stitches + 5 / Worked over 10 rows 

R 1, 3 and 5 (WS): P5 *(K1, P1) twice, K1, P5. Repeat from * to end.
R 2 and 4 (RS): K5, * (K1, P1) twice, K6. Repeat from * to end.
R 6, 8 and 10 (WS): (P1, K1) twice, P1. *K5, (P1, K1) twice, P 1. Repeat from * to end.
R 7 and 9 (RS): (P1, K1) twice, P1. * P5, (P1, K1) twice, P 1. Repeat from * to end.  

Broken Block is my favorite variation on the Block Stitch. It takes the flat checkerboard and makes a wavy rib that adds depth and motion. It can be blocked and pressed to remove the ribbiness. It can be worked with just about any size blocks you like - here it is over 6-stitch blocks.

Multiple of 6 stitches / Worked over 8 rows

R1 and R3: *(K4, P2), Rep from * to end.
R5 and R7: *(P2, K4), Rep from * to end.
All even rows: Knit the K's and Purl the P's.

Broken Block Stitch as featured in the Cowgirl Butterfly Astronaut Vest
There are probably hundreds more variations on Block Stitch. Spend a little time fiddling around with your yarn, and you could probably invent some new ones! Have a great one to share? Please post in the comments section!

Want to learn more block stitches, not to mention thousands of other gorgeous stitch patterns? Find yourself a copy of Barbara Walker's A Treasury of Knitting Patterns (Schoolhouse Press, 1968). There are four volumes of these indispensable reference books. The Second Treasury is my absolute favorite, but I don't think I could be a knitter without any of them!


Tuesday, September 23, 2014

getting started with fancy stitch patterns

Waffle stitch in two colors (yarn: Blue Sky Alpacas Skinny Dyed cotton)
So you've made a few scarves, a great hat and even a baby sweater or two. You've got the stockinette stitch and the garter stitch down pat. Itching to try something a little more exciting?

Knitters have always used simple combinations of knit and purl stitches to add texture, beauty, and provenance to their work. Add in a yarn-over or a slipped stitch, increases and decreases, and a truly spectacular library of fascinating stitch patterns become possible.

Want to try your hand at a fancy stitch pattern? Now's the time! I'm going to lay out a few basics here, and then over the next few weeks I'll be sharing some of my favorite stitch patterns with you, with lots of photo's and step-by-step how-to's.

First, a little myth-busting:

Myth: Fancy stitch patterns are hard to knit.

Fact: You already know everything you need to! You know how to make a knit stitch, right? You can make a purl stitch? Okay, you're all set! There are literally thousands of stitch patterns based on combinations of just these two stitches.

Myth: Knitting fancy stitch patterns requires too much concentration. I won't be able to binge-watch Orange is the New Black while working on my project.

Fact: Nobody wants to interfere with your You Time, so please, don't try complicated lacework when your brain is elsewhere. But many many stitch patterns are actually quite simple. Once you've repeated K3 P1 five times, it's stuck in your brain forever, and you're free to get sucked into the viewing experience of your choice.

Myth: You can't use fancy stitch patterns for knitting top-down sweaters, and that's my favorite kind.

Fact: Uh-huh! Just about any stitch pattern can be easily adapted to the top-down technique. In fact, I wrote a whole blog post about that once with step-by-step instructions. Check it out!

If there are still any doubts in your mind about trying out some stitch patterns, please share them in the comments section so that I may obliterate them! Cast your inhibitions aside and get going. Here are a few tips:

  • Work loose stitches. I know this is easier said than done, especially for newer knitters who tend to knit more tightly. But stitch patterns often rely on twisting, slipping and otherwise manipulating your stitches after you've made them. Leave room for the fun by relaxing and knitting looser stitches.
  • Practice the stitch pattern before you start the project. The best time to do this is when you're gauge-swatching. (YOU ARE GAUGE-SWATCHING. NO ARGUMENTS!). Work a few extra rows so that you start to get it memorized. When you start your project, you'll have it right from the start.
  • Check your work against a photo. If your pattern doesn't have a clear photo of the stitch pattern, do a Google Image search to see how it's supposed to look. Sometimes the instructions aren't incredibly clear, and comparing what you've done to a good photo can help you get it right.

Ready to get started? A little added texture is a great way to show off the depth of colors in hand-dyed yarns, or to make a plain pullover suddenly elegant and far more fun to knit. Challenge yourself just a little - you'll be amazed at how much more sophisticated your knitting can become.


Friday, September 19, 2014

tutorial :: never weave in ends again!

Once the knitting is over, the party is over too, as far as I'm concerned.

Photo: mamichan via Flickr
I detest finishing projects: Sewing up seams, sewing on buttons, weaving in ends, neatening things up. Yuck. I've left absolutely wonderful projects lying around for months at a time just because there was still blocking to be done and a few buttons to sew - pathetic! This is why I knit top-down - no dreaded seam-sewing at the end.

Fortunately, weaving in ends is a finishing step you can dispense with, without waiting around for finishing time. You can weave the ends in as you go, while you're knitting the project. You don't even need a darning needle. Here's how.

This simultaneous tail-weaving technique is derived from stranded color knitting (sometimes called "fair isle"), and I have no idea where I picked it up. It's possible that I came up with this on my own at some point, but I'm sure that plenty of other knitters have been doing this for years too. Anyway, to make this easy to see, I'll show you with 2 different colors of yarn knit in stockinette stitch (all K stitches on the right side, all P on the wrong side).

[A note on the photos below: All the photos show the wrong side (WS) of the work, since that's where untidy yarn tails tend to hang out. The purple yarn is the main color (MC), and the yellow yarn is the contrast color (CC)].

1. Knit along in your main color (MC) until the place where you need to join a new yarn (we'll call this new yarn the 'contrast color' or CC for short). Join your CC, leaving a little tail of 6 inches or so. Finish knitting that row/round.


2. On your next row/round, you'll come back to where you left the little CC yarn tail before. Hello!


3. Instead of leaving the CC yarn tail to weave in later, grab it now! Lay the CC tail over your working yarn before working the next stitch. It becomes trapped behind the working yarn, on the wrong side of the work. Be sure to keep the tension even - you may need to give the yarn tail a very gentle tug to make sure that the first CC stitch doesn't get loose and floppy.


4. Repeat that step several more times. I like to trap the CC behind at least 5 stitches. That's it! You can trim your yarn tail now, or wait til finishing time.


Okay, now in the example I showed you above, there was just one yarn tail, because I was keeping the MC ball of yarn attached, perhaps for future rows. But what if that's the end of MC and you've got two yarn tails to deal with? You can do the same thing, but you do it both at the start of the join, and again when you run into the CC tail on the next round. Here's what that looks like:

1. Knit along in your main color (MC) until the place where you need to join a new yarn (we'll call it 'contrast color' or CC for short). Join your CC, leaving a little tail of 6 inches or so. Break the MC, leaving a tail of about 6 inches.

2. Keeping your tension even, twist the MC tail once around the CC and work one stitch. Again, be sure to keep the tension even - a very gentle tug on that MC yarn tail will keep your last MC stitch in shape.


3. Lay the MC tail over your working yarn before working the next stitch and trap it just as described before. Repeat a few more times. Finish knitting that row/round.


4. On your next row/round, you'll come back to the CC yarn tail. Now you'll trap the CC yarn tail behind your working yarn as you go, just as you did before with the MC yarn tail. About 5 stitches or so should do the trick!


So up til now, we've only been talking about how to use this technique for stockinette stitch, which is definitely the easiest stitch to use with this. But you certainly can use this trick to secure yarn ends in several kinds of stitch patterns. Here are some rules of thumb to help you:
  • Always keep the yarn tails on the wrong side (WS) of the work.
  • To work a purl (P) stitch when the right side (RS) of the work is facing you, lay the yarn tail over the working yarn before moving the yarn to the RS of your work. Don't bring the tail with you!
  • If you are going to work several P stitches on the RS, you can't trap the yarn tail on those. Forget about it. You're done. Just be happy with however much you were able to trap and move on.
Let's say you're going to work some K2 P2 ribbing. You can totally trap the yarn tail on those, you're just going to skip a stitch here and there. It will work out fine.

1. K2 P2 along in your main color (MC) until the place where you need to join a new yarn (we'll call it CC again). Join your CC, leaving a little tail of 6 inches or so. Finish working that row/round.


2. On your next row/round, you'll come back to where you left that little yarn tail before. Hi again!

3. Lay the CC tail over your working yarn before working the next stitch and trap it, keeping your tension even.


4. Repeat that step for the next stitch. Then lay the CC tail over the working yarn, move the working yarn to the RS, and work 2 stitches.


5. Bring the working yarn back to the WS and work 2 stitches, trapping the CC tail over the working yarn for those stitches as well. You can trap it again before working the next stitch, and there you are - a securely woven-in yarn tail in K2 P2 ribbing.


I love how tidy and secure this method is, and it eliminates the need to sit around with a darning needle hunting up yarn ends once your project is finished. While other knitters are polishing up their Chibis and fiddling with yarn tails, you can go block your sweater and plan the outfit you'll be wearing with it. It's particularly magical when knitting in the round. Try it and let me know what you think!

Do any of y'all already use this method, or some variation? Where did you learn it? And do you have other tricks for simultaneously weaving in ends when working longer stretches of purl stitches, or openwork?


Tuesday, September 16, 2014

cuddling season

It's cool and crisp outside this morning, and all I can think about are big, tweedy sweaters! I'm so happy that wool season is back. Summer in North Carolina is fun and all, but the steamy sticky months last way too long for me. Right now about half my friends are cussing the snap in the air and bemoaning the end of day trips to the beach, but I'm just making some more tea and getting drooly over new fall knitting patterns.

Check this sexy mess out!

Ondawa / Michelle Wang  |  Crosby / Julie Hoover
First of all, I can't stop looking at the new fall collection from Brooklyn Tweed. Anything in tweedy wool that says "mariner" is going to be a hit with me. The wide, highly-textured scarves in this collection are so dreamy, I want to make them all right now and wear them tomorrow. At a moment when the kids on the street are wearing neon one-shoulder crop tops and high-heeled sneakers, this new collection is a balm to my soul.

Rhiannon / Sue Lazenby
New in the Ravelry store this month is a wonderful traditional Celtic shawl by Sue Lazenby called Rhiannon. I don't wear shawls as well as some people, but they're so much fun to knit, and I can definitely see myself wrapped elegantly in this one. Sue Lazenby's work is new to me, and Rhiannon led me to check out her other designs... I love her old-world Celtic designs and Arianrhod is another shawl I'd just love to curl up with. I'm not sure if it's all the ugly 80's throwbacks or what, but I'm really digging the classics right now.

The big question is, where to start?? I want to make all this stuff!

Opus the Octopus / Cate Carter-Evans
And okay, this is not a garment but can we just stop for a minute and ogle Opus the Octopus? This is wonderful work from Cate Carter-Evans (Infinite Twist), and I'm so excited that she made this pattern free via Knitty. Opus is definitely the superstar of Knitty's Deep Fall issue this year IMHO.

I can't wait to dive into something warm and snuggly. Maybe this is the year I'll finally make myself a big cozy EZ Aran Coat - a project I've been sort-of planning for years. Is this cool fall air inspiring you, too? What are you excited about making?

Friday, September 12, 2014

top 5 ways to de-stash like a champ!

What to do with it all? Photo by The Bees via Flickr
You know who you are. You have a whole closet full of UFO's, impulse yarn buys and random leftovers that you can't even look at anymore.

Once upon a time you made an impressive effort to organize it all. You've tried big plastic bins, country-cute labeled baskets, one of those over-the-door shoe storage thingies, and a complicated system of shelving, ropes and pulleys you saw once in Real Simple magazine. But somewhere along the way, despite your best intentions, the system was overwhelmed. Now that once-gleaming organization system is nothing more than a wooly-ass pile of fiber clutter you shudder to contemplate.

So you want to regain your status as a responsible member of your household again. Some de-stashing is in order.  But where to start?? As an on-again off-again re-organizer, I say with all sincerity that I feel your pain. As a gesture of solidarity, please accept these 5 handy tips to help you down-size the yarn population of your dwelling:

1. Make a pledge to use what you have before you buy more. 

As someone who has gone through the belt-tightening purchasing restrictions of home-buying and multiple child-bearing in quick succession in recent years, I can attest to the character-building necessity of this pledge. You might need to join a support group. You might need a motivating factor, such as "no new yarn purchases until I pay off all credit card debt" or some other fiscal landmark worth striving for. Creating specific exemptions - I can only buy certified organic yarn, only on Tuesdays, only if I run 5 miles this week - might help you survive if it's a long-term commitment.

2. Make friends with the Ravelry Pattern Browser

Still don't know what to do with those 3 skeins of luscious yarn you bought on vacation five years ago? It's time to decide. Choose the filters that match your yarn purchase and see what you get! Be sure to tick a few important boxes to help you narrow your search:
  • 4 stars / 5 stars ratings only
  • Free patterns (or not!)
  • Has photo
  • Knitting OR Crochet project
  • Yarn weight, yardage and fiber
  • Level of difficulty
Then try something new! Let the pattern browser suggest some truly wonderful projects that you'd never have gone looking for yourself. It's a great way to not only use up stash yarn, but stretch your knitting wings a little, too.

3. Use up those yarn ends!

Why do we save those little balls of almost-finished yarn? Half-a-skein this and two-thirds-a-skein that. Because we don't want good yarn to go to waste. So what is it doing sitting there in your closet going to waste? Here are a few of my favorite patterns that use up those twiddly bits (they make such great gifts!):

Accessorize! Pretty Twisted by Cat Wong is my favorite for sock yarn leftovers. I've made oodles of these funky cuffs as gifts - and they're a great way to show off your vintage button collection.

Make yourself some hair accessories! Knit up an It's a Cinch headband (Elisa McLaughlin) or a versatile Wishbraid headband/bracelet/baby topper (Erika Neitzke) to wrap your crowning glory in the remainder of the most gorgeous yarn you've got in your stash.

For almost any leftover yarn, make some Anything Animals by Rachel Borello Carroll. They're adorable in color-coordinated groups.

Little Birds by Katie Startzman use a tiny amount of worsted-weight yarn, and make a lovely bit of new decor for your mantel or bookshelf.

4. Doll clothes

If there's a little one in your life, you could hardly do better than to make up a few sweaters, hats and booties for her/his favorite dolls. Teddy bears, Barbies, even action figures get chilly in cool weather and need a wooly new garment once in a while. Here's my doll dress pattern, but you can find many more by choosing the "doll" filter (find under Age/Size) in that handy-dandy Ravelry Pattern Browser.

5. Do-Gooder Knitting

Your local animal shelter would love a Jingle Mouse (Dooley and Spud) or Felted Kitty Bed (Wendy D. Johnson) for those sweet homeless loveys. And you know your closest hospital could always use more hand-made Preemie Hats (Carissa Browning) and Baby's First Blankets (by Lyn). Even injured baby birds and bunnies love hand knits. Check out Bev's Wildlife Rescue Nests project for some very snuggly sweet inspiration.

Ready to start the de-stashing? Don't forget to take a picture of the carnage first - and do share!


Friday, August 29, 2014

new free pattern!

Hi everyone!

Photo by KnitPicks.com
It's been much too long, but I am excited to share that I have a new free pattern out this week! Instead of being featured on my blog, this one is over at KnitPicks. I am really excited to have this little girls' jumper featured among their new collection of free patterns.

I've made three of these for adorable toddlers in my life, and can attest that it's a quick, fun knit in the round, with just enough sweet details to be interesting. The pattern calls for Comfy Worsted - a tough-wearing easy-care yarn that comes in a huge color range. But there's plenty in your stash already that might work, too!

This was a fun project, and I'm excited about working with KnitPicks on some more projects to come. Let me know if you try this free pattern & how you like it!

Tuesday, September 10, 2013

sizing up - you can do it!

How to get the size you want for a sweater knit in the round, a.k.a. pattern schmattern! Updated 9/25/13 with an important math correction!

I get lots of emails and comments from knitters asking me to please add size X to a particular pattern so that they can knit one to fit their grandson / neighbor's child / oversized dog / My Buddy doll. I may or may not agree that the design in question will work well for the size requested, but here's the thing... you don't have to listen to me! And also, who wants to wait around on a free pattern designer with a day job and little kids to get around to it anyway? You can do it yourself!

Learning how to size a pattern to fit the intended wearer is a really important skill for any knitter. You may be someone who falls somewhere in between the American Craft Yarn Council's idea of what a Medium and a Large are, but you still want your sweater to fit like it was made for you! You may have a baby who wears a size 4T. You may have a middle-schooler who's still in toddler sizes. That doesn't mean that they can't have garments that fit well.

For those of us who knit in the round, the oracle to consult is Barbara Walker's Knitting from the Top (For garments knit flat, the lovely knitter's reference book Stitch & Bitch Nation by Debbie Stoller has a great guide to customizing patterns to fit you better). But here's a basic how-to guide that will help you size any of my top-down sweater patterns to fit your intended wearer.

Step One: Measure the Wearer

This is such a bummer, right?!? Because you wanted the sweater to be a surprise. You wanted it to be something they never expected. Well, you can't make it a surprise and make it fit well. You have to pick one. And they will be surprised by the finished product, anyway - they will never have expected something so awesome. So here are the three basic measurements you will need:

1. The chest circumference. This is the most important! Every sweater size is based on this measurement. Get the person's torso naked (or just lightly clothed) and take an accurate measurement around the widest part of the chest. How loose do you want the sweater to fit? Most sizing guides assume 2 inches of ease, but if you want the Marilyn Monroe look, by all means don't add any ease.

2. The sleeve length. Measure from the person's armpit to their wrist. Or if you want short sleeves or 3/4 sleeves, measure to the point where you want the sleeve to end.

3. The back length. Measure from the neckline to the point at which you want the sweater to end. Is this a cropped sweater that just makes it to the waist? A tunic that lands mid-thigh? Find out how long that really is on the person who's going to be wearing it.

Get super advanced pointers on how to measure accurately from the American Craft Yarn Council.

OK, so now you have your measurements!

Step Two: Adjust the sweater's circumference

Warning: This is the part with a lot of paying attention and math and stuff.

Okay now, before you even go knitting, for heaven's sake knit a swatch and make sure your gauge is correct. I can't say this emphatically enough: Get the right gauge. Get the right gauge. Get the right gauge. If you haven't learned this the hard way yet, with much wailing and gnashing of teeth, please let me save you from such a hideous fate, and just knit a swatch to check your gauge.

So you've got gauge and you've cast on all the stitches starting at the neckline, and you're working your way down towards the chest, increasing on every other row as instructed. You're going to come to a really important point in the early development of this sweater, the point at which you divide for the sleeves. It looks like this:


Before you go separating out those sleeves, it's time for a little math. Very basic math, don't worry. But get a calculator out anyway.

Count up all the stitches in the front and back sections of the sweater (that's all the stitches on your needle, minus the two sleeve sections). Now you have a number of stitches. Let's just say it's 100. Now there are a few other stitches you need to think about.

  • How many stitches will be added on at each underarm when the sleeve sections are separated out? You need to add those in as well. Let's say there are 5 on each side. So now we have 110 stitches. 
  • And finally, will we be adding on any extra stitches in the front center? Say, for a button band? You may need to read to the end of the pattern to figure this one out. If so, add those in too. Important math note: If it's a button band, that probably means that you're going to be picking up selvedge stitches and knitting the band perpendicular to the direction of the sweater body stitches. If that's the case, don't add in the total number of button band rows. Add 3/4 of them. Let's say you'll be adding on a button band later, and that it's 8 rows wide. 3/4 of 8 is 6 stitches. So our grand total is 100 + 5 + 5 + 6 = 116.

Are you confused yet? This really is the hardest part, I promise.

Here's where your all-important gauge comes in. Just for the sake of this exercise, let's say we're knitting a sweater with a stitch gauge of 4 stitches to the inch. Divide your total 116 stitches by the gauge, 4 stitches/inch, and you get 29 inches. Is 29 inches the chest circumference you need? No?? Well, now here's where we do the adapting.

Let's say you need a chest circumference of 31 inches. That means you need to hit the pause button on dividing for those sleeves, and keep on knitting and increasing until you have enough stitches to get you to a 31-inch chest circumference. Just how many stitches is that? Well...

31 inches x 4 stitches to the inch = 124 stitches. From 124, subtract HALF of the underarm stitches, and then divide by two. 124 - 5 = 119 stitches. Now divide your answer by two = 59.5. SHAZAM! You will need 59.5 stitches in the back section. Well, okay let's call it 60. So keep on increasing until you have 60 stitches in the back section. Then divide for the sleeves as directed. Yawn, that wasn't so hard, was it?

WAIT A SECOND! What if I get an odd number, and I have an even number of stitches in the back section! What will I do????

Don't worry about it. Just increase to the next round number and call it close enough.

Step 3: Make the sweater body long enough for the wearer.

Nuf said.

Step 4: Make the sleeves long enough for the wearer.

Also self-explanatory.

This Lopi sweater fits me nicely thanks to my handy-dandy calculator!

So if I've posted a pattern and you don't see the size you want, you could wait around for me while I finish cleaning up from dinner, checking email and packing the kids' lunches for tomorrow, or you could just size it up yourself! Once you know how to do this, you'll be amazed at how you stop having to abide by the limits of the knitting patterns you like.