Showing posts with label craftastic. Show all posts

Thursday, May 14, 2015

cute cuter cutest!


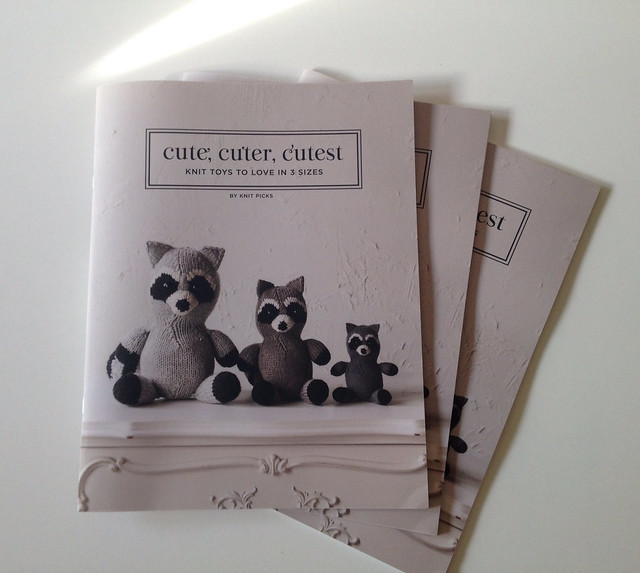
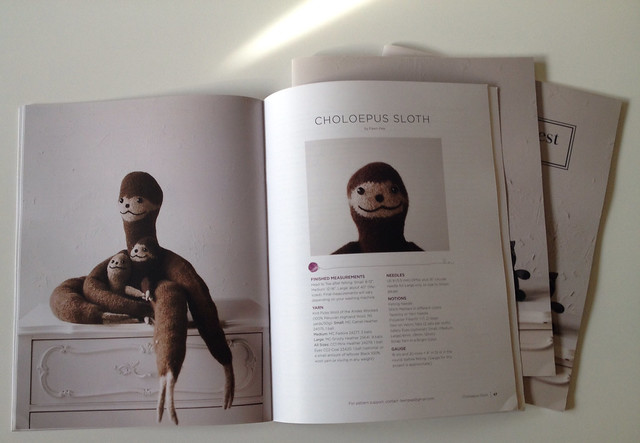
Imagine my delight when a little stack of these adorable new books of knit toys showed up at my house the other day from KnitPicks! But the real thrill was inside...


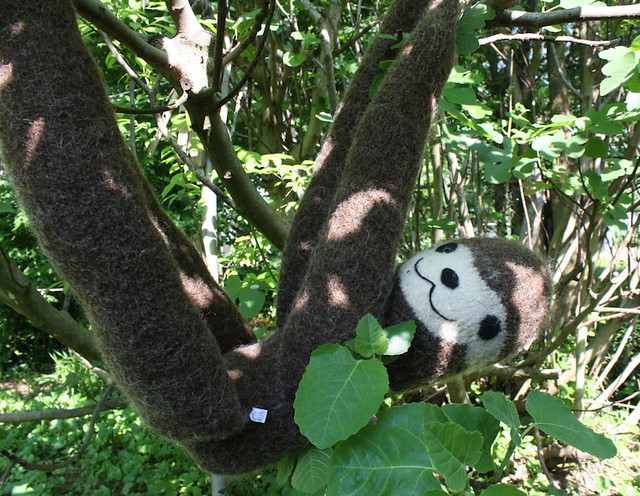
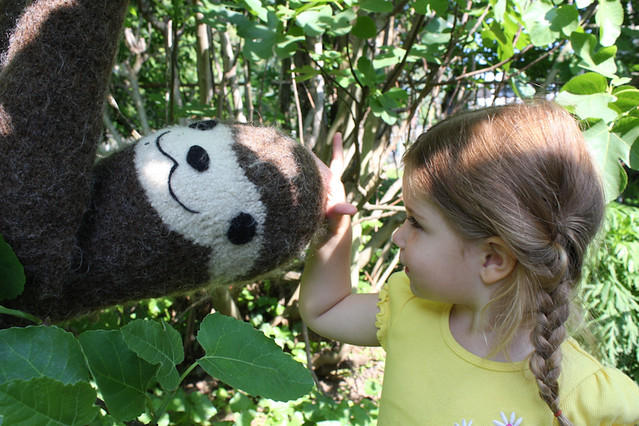
It's my sloth! I am so excited that my pattern for a trio of knitted & felted sloths was included in this ridiculously sweet collection of knit toys. If you've been a reader of this blog for a while (a long while), you may remember when I first got excited about the two-toed sloths and decided to knit a life-sized one. Sloth was born about six years ago (around the same time as the Little Pea), and has now made the big time as a knitting pattern - with two cute little friends.   


Sloth immediately became a beloved friend in our family. I hope he'll be one for lots of other knitters now, too! The pattern is available as part of the Cute Cuter Cutest book, as a stand-alone pattern to download, or as part of a kit made with KnitPicks Wool of the Andes worsted.  


Saturday, December 20, 2014

6 great last-minute gifts for knitters

Attention, spouses! You've got 5 days left til a major gift-giving holiday. Lucky for you, knitters and crocheters are easy to shop for. Here's my go-to list of last-minute gifts for the fiber lover in your life:

1. Keep their fingers flying all year with a subscription to a fiber arts magazine. Interweave Knits and Interweave Crochet are obvious choices. Is s/he a relative beginner? Try Knit Simple. Fashionistas love Vogue Knitting and KnitScene. Subscribe online, print out the gift coupon, and put it inside a lovely holiday card. Classy!


Ceramic yarn bowls from Kristina Chadwick
2. One of the knitting accessories I'd never ever buy for myself, but have always lusted after, is a yarn bowl. The yarn bowl functions both as tool and decor (it keeps the yarn ball from rolling away while you work with it), so pick a pretty one that matches her/his style. There are about a million of them on Etsy in every conceivable color and style, but shipping at this point is dicey. I guarantee you that your local yarn store has quite a few in stock right now too.


The Namaste Hermosa knitting bag... drool.
3. File this one also under Stuff I'd Probably Never Buy for Myself But Would Love to Have: A stylish knitting bag. Whether you want to spend $25 or $150, you can find a great bag online and choose express shipping, or pick one up at your LYS and have it under the tree by Thursday. 


DellaQ circular needle wallet
4. Have you ever seen your Beloved Knitter struggling to untangle a pile of tangled-up circular knitting needles? Does s/he curse loudly searching for the right sized needle while digging through a drawer full of bamboo and plastic cording? S/he just might love a needle organizer - they're often called needle wallets. My favorites are made by Lantern Moon and Della Q


5. Everybody who works with their hands needs a massage right about now. It's gift-making season, and those shoulders, arms and fingers are tired. Give her/him a gift certificate for a half-hour massage. In 30 minutes, s/he will walk away with mojo restored and a smile on her/his face. This is another easy one to buy online, stick the print out in a tiny gift bag and feel like a superhero.


6. Okay, maybe this is totally obvious, but you can't do better than a generous gift certificate to your local yarn store. Support a local business, make a knitter happy, and dress it up with a shiny bow. No local yarn store? I'm really, really sorry. But there are some great online retailers too... the Webs store, Jimmy BeansKPixie and KnitPicks are full of yarn and tools that your crocheter or knitter will be delighted to browse through. 

I hope this helps! And I hope that you and your yarn lover have a very Merry Christmas!

Monday, October 13, 2014

costumes by hand

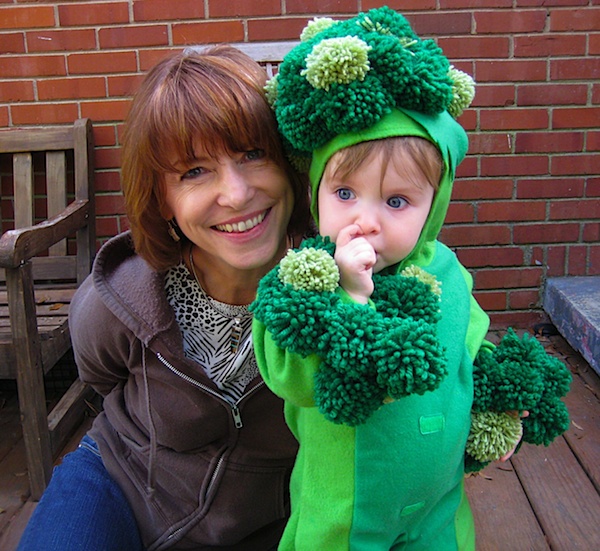
My mom & her handiwork: The broccoli costume, circa 2010
Halloween is just over two weeks away, which means that every day my five year-old daughter runs down a new list of costume ideas.

Monarch butterfly! Goldilocks! Mouse! Mouse and cheese! Anna! Elsa! The mama cat from Aristocats! Scarlet macaw! Lemur! Firefighter! Each one with as much passion and enthusiasm as the last.

Every year I eventually just stop her in the middle of a list and say "That's it! You've decide to be a _____ and I'll get to work on your costume right away!" As the days tick down to Halloween, she keeps listing ideas and I pretend to listen while mentally figuring out how to make a scarlet macaw costume.

I don't believe in store-bought costumes. I know, I know, they're so much easier... but please. I was put on this earth to try to do too much, and making Halloween costumes is just one of the many tasks I gleefully burden myself with out of a vague commingling of duty, pride and guilt that I inherited from my own mother. She worked more than full-time, but would sooner clean the grout with a toothbrush than let us go out in store-bought Halloween costumes.

And so the tradition continues. Though I don't really clean the grout at all, let alone with a toothbrush.

As kids, my sister and I usually went in thematically-grouped costumes. One year we were the aforementioned Mouse and Cheese. I don't remember which of us was the mouse, but the other went as a big cardboard wedge of cheese. One year we were hockey players, complete with blacked-out teeth. One year my sister wanted to be a Care Bear, and my mom sewed an incredible big pink fuzzy bear suit for her. I remember a lion costume with a big yarn mane, and an adorable sunflower costume. Thank goodness I have my mom to help with our family's costumes - she is an amazing seamstress, and sadly I did not inherit her sewing skills at all.

This year I'm trying to force a group costume on my family. HWWLLB (my man) is not big into costumes, so he will be a gardener, something he's typically dressed for anyway when not at work. Little Bee is recycling a costume we made out of 100+ pompoms a few years ago, and will go as broccoli. I'll be a packet of broccoli seeds, and Little Pea will be a caterpillar, though she's been lobbying for home-made wings, so in the end she may wind up as a butterfly. Not as thematically rigorous, but still cute and somewhat cohesive.

I've been collecting kids' costume ideas on Pinterest, and hunting for ingenious ways to make caterpillar legs. Mostly I'm finding people's various takes on the Very Hungry Caterpillar, which (while very cute) is apparently the only caterpillar most people are familiar with. Tragic, because there are so many cool real caterpillars out there to honor via costumage. Monarchs and Black Swallowtails and Wooly Bears are so wonderful, and I've always thought a parasitized Tomato Hornworm would make an amazing Halloween costume (cool nature + vampire all in one!). But I digress.

So I need to get to work on the caterpillar costume. Are you making your own costume this year, or some costumes for kids? What are you going to be for Halloween??

Friday, September 26, 2014

be fancy :: block stitch

Earlier this week I promised a series of posts on my favorite stitch patterns to help get you started on your journey to FancyStitchLandia. Here's the first one! Block Stitch.

Block Stitch / Blocks are 4 stitches wide by 4 stitches high
Block Stitch goes by other names, including Dice Stitch, Checkerboard and Basketweave (not to be confused with many other basketey stitches, like Basket Stitch, Basket Rib or Basket Welt). It's an incredibly simple stitch with many possible variations. Just a simple pattern that alternates blocks of knit stitches (stockinette stitch) with blocks of purl stitches (reverse stockinette). I love it because it's reversible (looks the same on both sides), and after blocking lays flat with no curling up at the ends or edges. So it's great for a scarf, and unlike many of the coolest stitch patterns, it's a bit on the manly side. 

Block Stitch is a great choice for a man's scarf, a men's or boys' pullover, or to add geometry and structure to a shawl, sweater or scarf for any gender. It also makes a great-looking bag!

Here's how to make it (directions are given for knitting flat, i.e. not in the round):

Multiple of 8 stitches / Worked over 8 rows.

R 1, 3 (RS): * K4, P4. Repeat from * to end.
R 2, 4 (WS): * P4, K4. Repeat from * to end.
R 5, 7 (RS): * P4, K4. Repeat from * to end.
R 6, 8 (WS): * K4, P4. Repeat from * to end.

The resulting fiber is a bit scrunchy (from the almost-ribbing), but just block it and press it, and it will flatten right out (unless you want the scrunchiness!). 

There are endless ways to vary this simple combination of alternating knit and purl stitches. You can make the blocks wider (such as K5, P5 or K10, P10...). You can make them taller by working the pattern over a larger number of rows. You can alternate the stockinette stitch blocks with seed stitch blocks or garter stitch blocks. Check out a few of the variations below.

Variations: 

Seed Block Stitch alternates stockinette stitch blocks with blocks of seed stitch. You could work blocks of any size, as long as they are at least 5 stitches wide. The pattern is shown here over blocks  5 stitches wide by 5 stitches high. Unfortunately this variation is not reversible, but it is really beautiful.
Seed Block Stitch / Blocks are 5 stitches wide by 5 stitches high
Multiple of 10 stitches + 5 / Worked over 10 rows 

R 1, 3 and 5 (WS): P5 *(K1, P1) twice, K1, P5. Repeat from * to end.
R 2 and 4 (RS): K5, * (K1, P1) twice, K6. Repeat from * to end.
R 6, 8 and 10 (WS): (P1, K1) twice, P1. *K5, (P1, K1) twice, P 1. Repeat from * to end.
R 7 and 9 (RS): (P1, K1) twice, P1. * P5, (P1, K1) twice, P 1. Repeat from * to end.  

Broken Block is my favorite variation on the Block Stitch. It takes the flat checkerboard and makes a wavy rib that adds depth and motion. It can be blocked and pressed to remove the ribbiness. It can be worked with just about any size blocks you like - here it is over 6-stitch blocks.

Multiple of 6 stitches / Worked over 8 rows

R1 and R3: *(K4, P2), Rep from * to end.
R5 and R7: *(P2, K4), Rep from * to end.
All even rows: Knit the K's and Purl the P's.

Broken Block Stitch as featured in the Cowgirl Butterfly Astronaut Vest
There are probably hundreds more variations on Block Stitch. Spend a little time fiddling around with your yarn, and you could probably invent some new ones! Have a great one to share? Please post in the comments section!

Want to learn more block stitches, not to mention thousands of other gorgeous stitch patterns? Find yourself a copy of Barbara Walker's A Treasury of Knitting Patterns (Schoolhouse Press, 1968). There are four volumes of these indispensable reference books. The Second Treasury is my absolute favorite, but I don't think I could be a knitter without any of them!


Tuesday, September 23, 2014

getting started with fancy stitch patterns

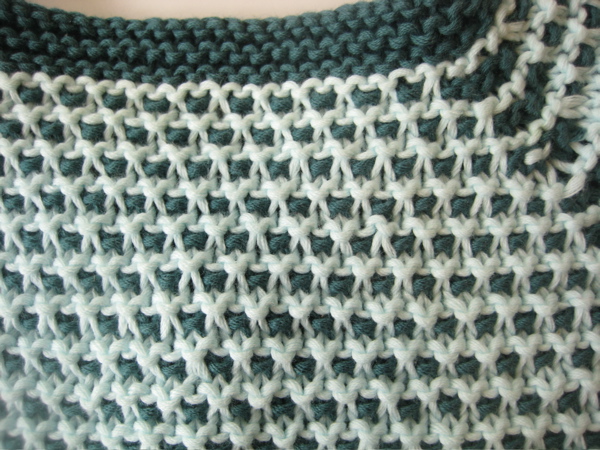
Waffle stitch in two colors (yarn: Blue Sky Alpacas Skinny Dyed cotton)
So you've made a few scarves, a great hat and even a baby sweater or two. You've got the stockinette stitch and the garter stitch down pat. Itching to try something a little more exciting?

Knitters have always used simple combinations of knit and purl stitches to add texture, beauty, and provenance to their work. Add in a yarn-over or a slipped stitch, increases and decreases, and a truly spectacular library of fascinating stitch patterns become possible.

Want to try your hand at a fancy stitch pattern? Now's the time! I'm going to lay out a few basics here, and then over the next few weeks I'll be sharing some of my favorite stitch patterns with you, with lots of photo's and step-by-step how-to's.

First, a little myth-busting:

Myth: Fancy stitch patterns are hard to knit.

Fact: You already know everything you need to! You know how to make a knit stitch, right? You can make a purl stitch? Okay, you're all set! There are literally thousands of stitch patterns based on combinations of just these two stitches.

Myth: Knitting fancy stitch patterns requires too much concentration. I won't be able to binge-watch Orange is the New Black while working on my project.

Fact: Nobody wants to interfere with your You Time, so please, don't try complicated lacework when your brain is elsewhere. But many many stitch patterns are actually quite simple. Once you've repeated K3 P1 five times, it's stuck in your brain forever, and you're free to get sucked into the viewing experience of your choice.

Myth: You can't use fancy stitch patterns for knitting top-down sweaters, and that's my favorite kind.

Fact: Uh-huh! Just about any stitch pattern can be easily adapted to the top-down technique. In fact, I wrote a whole blog post about that once with step-by-step instructions. Check it out!

If there are still any doubts in your mind about trying out some stitch patterns, please share them in the comments section so that I may obliterate them! Cast your inhibitions aside and get going. Here are a few tips:

  • Work loose stitches. I know this is easier said than done, especially for newer knitters who tend to knit more tightly. But stitch patterns often rely on twisting, slipping and otherwise manipulating your stitches after you've made them. Leave room for the fun by relaxing and knitting looser stitches.
  • Practice the stitch pattern before you start the project. The best time to do this is when you're gauge-swatching. (YOU ARE GAUGE-SWATCHING. NO ARGUMENTS!). Work a few extra rows so that you start to get it memorized. When you start your project, you'll have it right from the start.
  • Check your work against a photo. If your pattern doesn't have a clear photo of the stitch pattern, do a Google Image search to see how it's supposed to look. Sometimes the instructions aren't incredibly clear, and comparing what you've done to a good photo can help you get it right.

Ready to get started? A little added texture is a great way to show off the depth of colors in hand-dyed yarns, or to make a plain pullover suddenly elegant and far more fun to knit. Challenge yourself just a little - you'll be amazed at how much more sophisticated your knitting can become.


Tuesday, September 10, 2013

sizing up - you can do it!

How to get the size you want for a sweater knit in the round, a.k.a. pattern schmattern! Updated 9/25/13 with an important math correction!

I get lots of emails and comments from knitters asking me to please add size X to a particular pattern so that they can knit one to fit their grandson / neighbor's child / oversized dog / My Buddy doll. I may or may not agree that the design in question will work well for the size requested, but here's the thing... you don't have to listen to me! And also, who wants to wait around on a free pattern designer with a day job and little kids to get around to it anyway? You can do it yourself!

Learning how to size a pattern to fit the intended wearer is a really important skill for any knitter. You may be someone who falls somewhere in between the American Craft Yarn Council's idea of what a Medium and a Large are, but you still want your sweater to fit like it was made for you! You may have a baby who wears a size 4T. You may have a middle-schooler who's still in toddler sizes. That doesn't mean that they can't have garments that fit well.

For those of us who knit in the round, the oracle to consult is Barbara Walker's Knitting from the Top (For garments knit flat, the lovely knitter's reference book Stitch & Bitch Nation by Debbie Stoller has a great guide to customizing patterns to fit you better). But here's a basic how-to guide that will help you size any of my top-down sweater patterns to fit your intended wearer.

Step One: Measure the Wearer

This is such a bummer, right?!? Because you wanted the sweater to be a surprise. You wanted it to be something they never expected. Well, you can't make it a surprise and make it fit well. You have to pick one. And they will be surprised by the finished product, anyway - they will never have expected something so awesome. So here are the three basic measurements you will need:

1. The chest circumference. This is the most important! Every sweater size is based on this measurement. Get the person's torso naked (or just lightly clothed) and take an accurate measurement around the widest part of the chest. How loose do you want the sweater to fit? Most sizing guides assume 2 inches of ease, but if you want the Marilyn Monroe look, by all means don't add any ease.

2. The sleeve length. Measure from the person's armpit to their wrist. Or if you want short sleeves or 3/4 sleeves, measure to the point where you want the sleeve to end.

3. The back length. Measure from the neckline to the point at which you want the sweater to end. Is this a cropped sweater that just makes it to the waist? A tunic that lands mid-thigh? Find out how long that really is on the person who's going to be wearing it.

Get super advanced pointers on how to measure accurately from the American Craft Yarn Council.

OK, so now you have your measurements!

Step Two: Adjust the sweater's circumference

Warning: This is the part with a lot of paying attention and math and stuff.

Okay now, before you even go knitting, for heaven's sake knit a swatch and make sure your gauge is correct. I can't say this emphatically enough: Get the right gauge. Get the right gauge. Get the right gauge. If you haven't learned this the hard way yet, with much wailing and gnashing of teeth, please let me save you from such a hideous fate, and just knit a swatch to check your gauge.

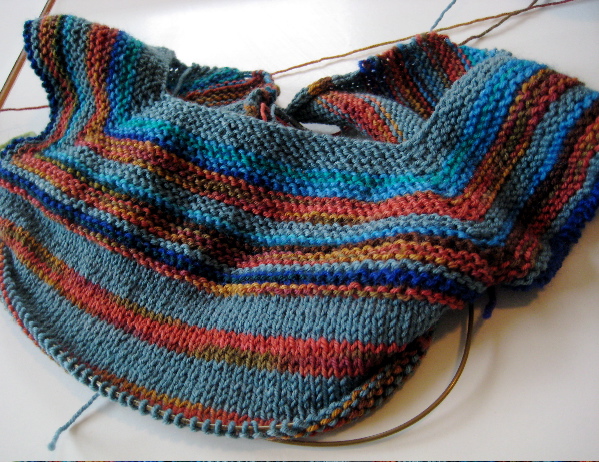
So you've got gauge and you've cast on all the stitches starting at the neckline, and you're working your way down towards the chest, increasing on every other row as instructed. You're going to come to a really important point in the early development of this sweater, the point at which you divide for the sleeves. It looks like this:


Before you go separating out those sleeves, it's time for a little math. Very basic math, don't worry. But get a calculator out anyway.

Count up all the stitches in the front and back sections of the sweater (that's all the stitches on your needle, minus the two sleeve sections). Now you have a number of stitches. Let's just say it's 100. Now there are a few other stitches you need to think about.

  • How many stitches will be added on at each underarm when the sleeve sections are separated out? You need to add those in as well. Let's say there are 5 on each side. So now we have 110 stitches. 
  • And finally, will we be adding on any extra stitches in the front center? Say, for a button band? You may need to read to the end of the pattern to figure this one out. If so, add those in too. Important math note: If it's a button band, that probably means that you're going to be picking up selvedge stitches and knitting the band perpendicular to the direction of the sweater body stitches. If that's the case, don't add in the total number of button band rows. Add 3/4 of them. Let's say you'll be adding on a button band later, and that it's 8 rows wide. 3/4 of 8 is 6 stitches. So our grand total is 100 + 5 + 5 + 6 = 116.

Are you confused yet? This really is the hardest part, I promise.

Here's where your all-important gauge comes in. Just for the sake of this exercise, let's say we're knitting a sweater with a stitch gauge of 4 stitches to the inch. Divide your total 116 stitches by the gauge, 4 stitches/inch, and you get 29 inches. Is 29 inches the chest circumference you need? No?? Well, now here's where we do the adapting.

Let's say you need a chest circumference of 31 inches. That means you need to hit the pause button on dividing for those sleeves, and keep on knitting and increasing until you have enough stitches to get you to a 31-inch chest circumference. Just how many stitches is that? Well...

31 inches x 4 stitches to the inch = 124 stitches. From 124, subtract HALF of the underarm stitches, and then divide by two. 124 - 5 = 119 stitches. Now divide your answer by two = 59.5. SHAZAM! You will need 59.5 stitches in the back section. Well, okay let's call it 60. So keep on increasing until you have 60 stitches in the back section. Then divide for the sleeves as directed. Yawn, that wasn't so hard, was it?

WAIT A SECOND! What if I get an odd number, and I have an even number of stitches in the back section! What will I do????

Don't worry about it. Just increase to the next round number and call it close enough.

Step 3: Make the sweater body long enough for the wearer.

Nuf said.

Step 4: Make the sleeves long enough for the wearer.

Also self-explanatory.

This Lopi sweater fits me nicely thanks to my handy-dandy calculator!

So if I've posted a pattern and you don't see the size you want, you could wait around for me while I finish cleaning up from dinner, checking email and packing the kids' lunches for tomorrow, or you could just size it up yourself! Once you know how to do this, you'll be amazed at how you stop having to abide by the limits of the knitting patterns you like.
Tuesday, August 27, 2013

what will I be?

Because I haven't wanted to admit it to myself, I haven't really said anything about this before: Arthritis is hurting my hands and I can't knit much anymore.

If you don't knit (or crochet, or carve wooden decoys, or hand-quilt or something), this probably doesn't sound like such earth-shattering news.

I'm 38 years old. I was diagnosed with arthritis around the time I turned 30, but I think I've had it since adolescence. It's in all my joints, but it seems to concentrate on certain joints at certain times.

Since having Baby #2 just about a year ago, the arthritis has been concentrating on my hands. Some days the finger joints ache terribly and keep me awake at night. Some days they just feel tired, like your legs will after a long day of walking.

There's lots of good and bad advice out there about arthritis remedies. I've lived with this for a while now, so I've tried lots of things (other than the prescription drugs, in which I have no interest). Some work. Fish oil helps me a lot. Eating less dairy and sugar help a lot. Other things haven't helped me much.

Last winter I made myself a beautiful Lopi sweater that felt very much like a swan song. I knit it from beautiful, undyed, handspun yarn that I'd brought home from Vermont years ago and saved for a very special project. Though my hands ached and I could only knit one row some nights, I kept pushing through it, because I hardly ever make anything for myself, because I really really wanted to make this sweater, and because in the back of my mind I suspected this might be my final knitting project.

Since then I haven't quit entirely. I've made a couple of little baby gifts. Small things that don't take too long, even when you can only knit one or two rows at a time.

I hope that this is temporary. I hope that this is a period of the arthritis focusing on my hands, and that with enough fish oil and diet modification and targeted yoga the pain will mostly disappear from my hands, perhaps go torment some other joints and humble me in some new way I had not imagined.

In the mean time, I read. I devour books. I inhabit other worlds, where my hands fall away along with all my other disappointments and I am only consciousness - perhaps someone else's - and new stories constantly unfold. Thank God for books.

My Great Aunt Ruth was a voracious reader. My mother told me that Ruth was also an accomplished seamstress, and that she had the most beautiful handwriting, but by the time I knew her, Ruth's hands were curled into tight claws and her poor finger joints were swollen knobs that gave her no peace. She always sent birthday cards, and you never had to read the signature to know who had written such gnarled-looking letters.

I don't remember ever hearing her complain about what she could not do, though clearly she had had to give up many of the things that had once made her who she believed herself to be. I knew her as kind, insightful, gentle, meticulous and always elegant. She always wore a stylish blouse and a jaunty scarf or necklace, even for the most mundane weekday cups of tea with my grandmother.

I think about Aunt Ruth's hands a lot and wonder whether mine will someday be like hers, whether I will have to give up knitting and sewing, writing, drawing and planting tiny lettuce seeds in perfect rows in my garden. Or will I just leave my hands behind, the way I do when I'm engrossed in a really good novel, leave my whole body behind and be first and foremost a consciousness, a sentient being whose physical shortcomings (and physical abilities, for that matter) are no more relevant than the whine of a mosquito in one's ear?

For a long time I didn't say anything about this out loud, or even to myself much, because it was just too sad. Who am I, without the being able to make things?

But you know, we go through many metamorphoses in our lives. I have gone from child to adult, from unattached to lawfully wed, and from individual to Mother, whose own heart walks around outside her body in the shape of two growing little girls. I have gone from daughter-who-takes-her-incredible-father-for-granted, to woman-without-a-father. One day all these will change again. Some of these future lives I am terrified to contemplate. Some will bring more joy than I can imagine now. I'd always thought knitting would be at hand throughout. Perhaps not.

I will be here, I myself. You too, will be yourself still. That's all I really know for sure.

Thursday, October 04, 2012

build a backyard sand table


The Little Pea loves to dig in the sand. When we go to the playground, she often spends the whole time sprawled barefoot in the sandbox, happily building and destroying towns, castles and farms.

With a new baby on the way, we decided we needed to make our backyard more fun, since trips to the playground and the museum might slow down a bit this fall. So we built our own sand table. It was really easy and cost us less than $20 total. A retail sand table starts at $30 for a very small & chintzy model, and I've seen them sell for more than $100. I think the Pea especially loves hers because she helped us build it.   

Here's what you'll need:

- An under-the-bed storage box with a lid (about $7 at the store, or you might already have one).
- A wooden crate or small coffee table to mount it on (we had one sitting in the garage).
- Four large, flat screws with washers (about $1.50 from the hardware store).
- An electric drill with a small drill bit (we used a 1/16-inch bit).
- Two 50-lb bags of play sand ($5 each at the hardware store).
- Assorted sand toys (repurposed yogurt containers work great if you don't have beach toys).

Mount the storage box on the crate or table


First I positioned the storage box on the crate just the way I wanted it to go, and then drilled holes for each of the four screws. 


Then I screwed each one in place with a washer in between, which I thought might help the plastic last longer without cracking.

Drill some small drainage holes


I drilled lots of tiny drainage holes all over the bottom of the storage box so that if (when) the Pea dumped water into the sand table, it would have a way to drain out. I wanted the holes to be large enough to let water through, but not so large that sand would leak out. We used a 1/16-inch drill bit. If I had it to do over, I would probably go one size larger.

Fill the play table with sand


This part was fun for all of us! Two big bags of sand were plenty. The storage box was quite full, but that's okay because it wasn't long before sand started migrating all over our yard.

Keep it covered


We were sure to get a box with a tight-fitting lid to keep out the rain. Make sure to cover it up whenever your child is done playing - nothing worse than an unexpected thunderstorm to turn your sand table into a mud pit. If it does get very wet, just leaving the lid off on a couple of sunny days dries it out pretty well.

Have fun!


The Little Pea and her friends spend a lot of time at this table. It's fun to watch how they combine the sand play with other activities in the backyard, like garden digging, restaurant, and "beach" play with the wading pool. I'm looking forward to seeing what else they do with it, with the onset of lovely fall weather and more time outside.

Monday, September 24, 2012

tutorial :: sewing a button very very securely


So you've made a beautiful little baby cardigan and all it needs is five adorable buttons to finish the job.  But buttons are a choking hazard on baby clothes! Oh dear. One good solution is to use a zipper or ties instead, but if buttons are your closure of choice, you need to make sure that you sew them on for dear life (Find more tips for making great baby gifts here).

You may also be one of those knitters who loves buttons, as I do, and invests real time and money in finding beautiful and vintage buttons and buckles to finish your projects. The last thing you want is for them to fall off in the wash!

There are just as many right ways to sew buttons as there are wrong ways. This is my favorite. I begin with a visualization: the wearer of this sweater has just fallen off a cliff. The button catches on a branch, and that one little button is the only thing standing between the wearer and the abyss. Will the button hold?? The outcome is entirely up to you. Now start sewing:

Thread the needle


This may be a completely obvious step, but choose a short, thin, sharp sewing needle. Tapestry needles are much too thick to fit through most button eyes. Pull a length of thread about the length of your arm (I use polyester/cotton blend thread). Thread the needle, and pull the thread length until the two ends meet - so that your thread is doubled. 

Set up and positioning


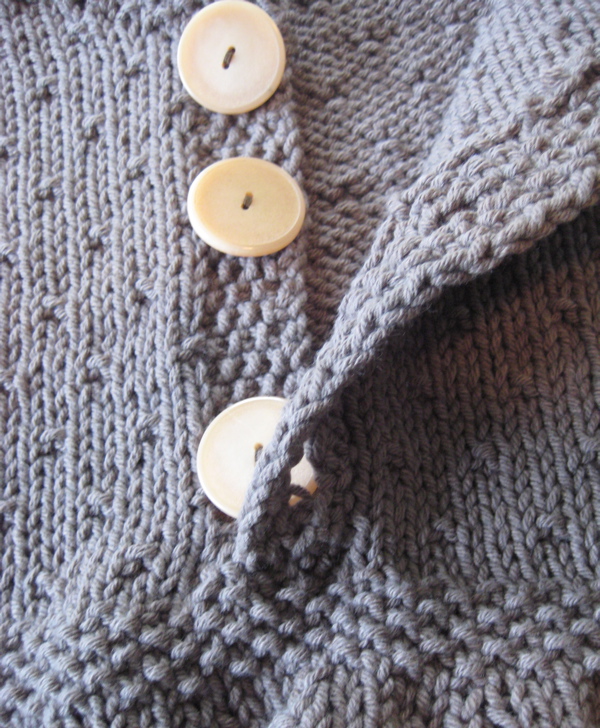
Find the right spot for your button by laying out the garment and lining up the button bands. Then flip to the wrong side of the garment and run the needle through a short length of garment to hide your ends. I like a little extra thread end beyond a knot, but you need to hide it inside some knit stitches so that it's not hanging loose (I don't leave long ends hanging like in the example photo above - that's just to make it easier to see). 

Now knot your thread twice. To sew a knot, put the needle through a small amount of garment to make a tiny loop. Stick the needle through the loop and gently pull taut. Voila! A nice secure knot. Once you've made two of these, put your thread through to the front side. On the front side, get your position just right by running the thread through a couple of knit stitches once or twice. Then put the button into place. When you sew the button on, you will take the thread all the way through to the wrong side of the garment, and then bring it back to the front through the button's eye. 


If your button has only two eyes, then take the thread back & forth through the garment & button eyes at least 8-10 times, or more if you still have room and it doesn't look too wonky. 


If your button has four eyes, then take the thread through 6-8 times for the first half of the cross, then another 6-8 times for the second half of the cross. 

Wrapping the button firmly


Once your button is sewn into place, you will wrap it up tightly with the remaining length of thread. Bring the thread from the wrong side to the front of the button band through the button eye one last time. Now take the needle back through the button eye, but not the garment. Your thread should be sticking out from under the button, on the right side of the garment.  Wrap the thread firmly around your stitch-work about ten times. Now take the needle through to the wrong side of the garment again. On the wrong side, knot it twice and then run your needle through a few stitches to hide the thread ends.


Trim your thread ends (don't leave long tails like in my example photo), and admire your tidy, life-saving button work. I like to button up the garment after every button just to super-duper double-check the position before moving on to the next one.

Hopefully this little tutorial will make you a more confident knitter of baby garments. Do you have other tips and tricks for button sewing? Please share them in the comments! 

Tuesday, October 25, 2011

fiber fun weekend

PR Llama
seymour the PR llama

I had a lovely time at S.A.F.F. 2011, the Southeastern Animal Fiber Fair! Snuggling with cute llamas and alpacas (like Seymour here) was one of the unexpected treats of my weekend.

This was my first time at SAFF, since normally our family camping trip falls on the same weekend. I've been looking forward to this event ever since the spring, when the camping trip date was announced and I realized I'd be able to go! YAY!

SAFF Schwag 2
sock yarn from Kitchen Sink Dyeworks

In the past, sheep & wool festivals have been all about yarn shopping for me. At SAFF this year I decided to spend my money on workshops instead (well okay I did buy some yarn and stuff). But mostly it was learning. I took a workshop on steeking with Aimee Abernathy, which was lots of fun. I learned how to steek! I loved it! Now I'm dying to cut up all the knitting I can get my hands on! Almost! As soon as I got home I unraveled half of the vest I made recently for the Little Pea and started reworking the top half to have steeked armholes. That's how much fun steeking is!

But even better than steeking... Spinning!

Robyn
Robyn shows us the wheel

Oh, spinning. It's so wonderful. The instructor, Robyn Josephs, was amazing. First we learned how to spin with a drop spindle. Then we got on the spinning wheels and went crazy. After three hours, I was completely hooked. I left the class walking on air, and grabbed some roving and a drop spindle to take home.

SAFF Schwag 3
merino top dyed by Lunabud Knits

Spinning lit up some very primal neurons way down deep in my brain. It was such a meditative, all-encompassing activity. You can't think too much, or you'll mess it up. You have to let your fingers think for themselves, your feet pedal by themselves, and get your thinking part of the brain out of the way so that the intuitive part can take over. I need more of that kind of serenity in my life.

Now I just need to save up for a spinning wheel.

And I'm thinking that maybe when I grow up I'll get a little farm and populate it with adorable Jacob sheep. Really, could they be any cuter??

SAFF critter 1

Monday, May 17, 2010

on the merits of toy knitting

snuggle buddy 2
batty cuddles

This charming face belongs to a little bat. He is a bat snuggle buddy who has been washed and blocked and is waiting patiently to go and meet his new best friend. In the mean time, the Little Pea took him for a test flight:

flying snuggle buddy

Last week's toy was a bear made from organic cotton, using a Jess Hutch pattern. I'm still planning to combine the organic cotton and the basic snuggle buddy pattern to make some more floppy little snugglers for one or two of the other babies in my life.

I'm all the time downloading cute toy patterns and then finding myself dissatisfied with the finished product because the stuffing shows through no matter how tightly I try to knit it (last week's bear being a case in point). The instructions always say "knit tightly!" and tell you to use needles smaller than the ball band recommends, but pull and strain as I might, my stitches are never tight enough to hide the stuffing. And you know, getting carpal tunnel is not the reason that I took up toy-knitting. It's really not that fun to strain your finger tendons - and toys are supposed to be fun, not to make you mutter and curse under your breath.

This bat was actually an exception, since the yarn I used (Berrocco Plush) is super-nubbly and the stuffing couldn't make itself seen if it tried. Despite the no-felting, I am happy with it.

But generally speaking, I really prefer a felted toy. I like knitting things that will be felted because you can knit easy-breezy big old sloppy loose stitches, and in the end not one smidgen of stuffing will show. I like felting because it's approximate - like cooking, which I enjoy, as opposed to crafts like book-making or carpentry which require precise measurements and straight lines and other skills that I will never master. Felting is an even more laid-back iteration of knitting, which is already a pretty approximate, don't-overthink-it kind of craft to begin with. And really, I think that's the sort of attitude you need when making a toy.

Lately I've been thinking about making some more birds' nests, a great felting toy. I hope to share some more birds in their nests in a few weeks (trying to be realistic about my pace at completing projects these days). It will be done, some time. I'm not going to strain my finger tendons over it.

snuggle buddy 1
naptime!

Thursday, February 18, 2010

veggie painting: fail

veggie painting 1

Over the weekend, the Little Pea tried her hand at arts and crafts. I had this great idea that she could try veggie painting and make valentines for her papa and her grandparents. To me, Valentine's Day is just another excuse for an art project.

At work we do veggie painting with bigger kids (by "bigger" I mean probably 3 and up). You lay a piece of unbleached muslin over top of some colorful veggies (carrots, kale, chard and beets are great choices), and then you use a blunt (safe) tool to smash and smash, and "paint" on the fabric. It's a lesson about veggie color - the more colorful the veggie, the better it is for you to eat. The paintings are very abstract, but kids always like them.

Anyhow, since we have plenty of ice-cube-sized lumps of pureed vegetables in the freezer, I thought we could try a variation on the smashing, and let the Little Pea try out finger-painting instead.

veggie painting 2
carrots and spinach

I can't say that this project was a success. The veggies didn't stain paper the way that they do with fabric. And even though I added some corn starch to try to make the "paints" goopier, they were much too liquidey, and the paper got mushy and tore.

Of course, torn paper was the best part of this project for the Little Pea, who didn't really understand why she was strapped into her high chair with food but nobody feeding her anything. At least she could tear paper and shove it into her mouth! Now that's fun.

She did get to try another art project the next day, when she was sitting on my lap while I colored a Valentine for HWWLLB. She grabbed the colored pencils and bashed them artistically on some paper. I added a heart, and presto! Baby's first valentine.

Monday, February 08, 2010

dyrrwurm

Many days on end of cold, wet, icy weather have led to short bursts of creativity around here with the materials we have on hand.

dyrrwurm

Dyrrwurm is now guarding our back door, keeping out the nasty, cold draft that was coming in under our vintage 1952 door (which really ought to be replaced with a more insulated model). He was made from two pairs of identical socks that HWWLLB gave me recently for the purposes of sock monster making. Before his reincarnation as two pairs of men's socks, Dyrrwurm lived at the back door of the land of the giants, in the far, far north, where his hobbies included writing epic poetry, collecting pictures of his idol, the Earth Serpent, keeping out the cold draft, and doing pedicures for his dragon friends.

You can make your own door dragon - it's quite easy, even for sloppy, inexpert sewers like me. This project was done in two bursts - it took me one naptime, and one visit from the Little Pea's favorite Auntie to complete. You will need:

- 2 pairs of heavy socks in a dragoney color
- matching thread
- sewing machine
- a few pins
- polyester fiberfill or some other stuffing (rags are fine too)
- something heavy for inside - I used sand, but you could use dry beans, rice or pebbles
- four or five repurposed plastic bags to hold the heavy stuff

My door dragon is only three socks long, since my door is narrow. But for a standard-width door, you will need to make the dragon four socks long.

door monster tutorial 2

Cut the toes off all the socks except one - this will be the head. Sew the socks together cuff-to-toe, right sides together. Try to keep them lined up so that all the heels are basically running in one line down the dragon's back. Turn right-side out and admire your long, wiggly new friend.

door monster tutorial 7

Starting at the head end, put a small amount of stuffing inside each heel, flatten and pin down. Then sew the heel shut to make a fin. You can add some decorative stitching as I did to make it more fin-like. Repeat for each heel.

door monster tutorial 1

Use one of your cut-off toes to make front flippers if you like. Lay the toe flat and cut it in half up the middle. Turn inside-out and sew it into a triangle, leaving an open gap for stuffing. Turn the flipper right-side-out and stuff with a small amount of stuffing. Smoosh flat and sew shut. Add some decorative stitching to flatten the flipper and make it fancier.


Turn the dragon inside-out again. Cut a hole on each side of the foremost sock. Stick the flipper through so that the flipper is now "inside" the dragon and the sewn-shut edge is facing towards you. Sew the flipper into place. Once you have the flippers in place, turn right-side-out again.

door monster tutorial 8

Stuff the head firmly with stuffing, but leave the body un-stuffed. Isn't he cute?

Get out your heavy stuff - sand, dry beans or rice, pebbles, whatever you have on hand - and put a bit inside four plastic bags (repurposed bread bags worked nicely for me). Tie them each tightly. Pull one into your dragon, all the way up to the head, and secure in place (you can sew it or be lazy like me and use a safety pin). Use your stuffing to lightly stuff and shape the dragon around that heavy bit. Repeat with each bag of heavy stuff until your dragon is fully stuffed (and heavy). Leave the heavy stuff out of the very end of the tail if you can. Now your dragon will lay heavily in place on the floor.

door monster tutorial 5

Stuff the tail end very lightly with stuffing. Sew the tail shut across the final sock cuff. Add some fancy stitching to make the tail flatter and more tail-like. Embroider on a face if you like. Enjoy the new absence of a draft under your back door!

door monster tutorial 4
honey, you need a pedicure!