Showing posts with label free pattern fridays. Show all posts

Friday, August 29, 2014

new free pattern!

Hi everyone!

Photo by KnitPicks.com
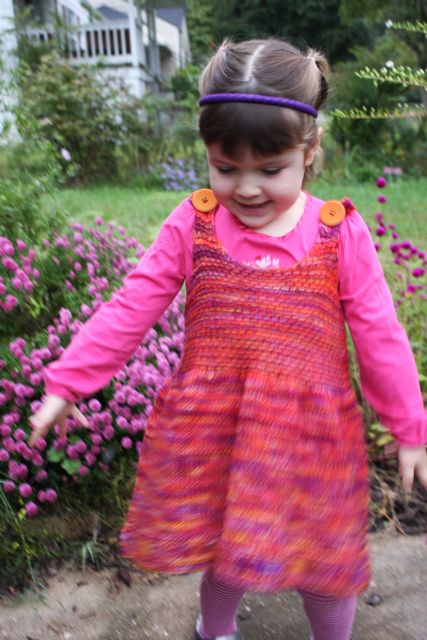
It's been much too long, but I am excited to share that I have a new free pattern out this week! Instead of being featured on my blog, this one is over at KnitPicks. I am really excited to have this little girls' jumper featured among their new collection of free patterns.

I've made three of these for adorable toddlers in my life, and can attest that it's a quick, fun knit in the round, with just enough sweet details to be interesting. The pattern calls for Comfy Worsted - a tough-wearing easy-care yarn that comes in a huge color range. But there's plenty in your stash already that might work, too!

This was a fun project, and I'm excited about working with KnitPicks on some more projects to come. Let me know if you try this free pattern & how you like it!

Tuesday, September 10, 2013

sizing up - you can do it!

How to get the size you want for a sweater knit in the round, a.k.a. pattern schmattern! Updated 9/25/13 with an important math correction!

I get lots of emails and comments from knitters asking me to please add size X to a particular pattern so that they can knit one to fit their grandson / neighbor's child / oversized dog / My Buddy doll. I may or may not agree that the design in question will work well for the size requested, but here's the thing... you don't have to listen to me! And also, who wants to wait around on a free pattern designer with a day job and little kids to get around to it anyway? You can do it yourself!

Learning how to size a pattern to fit the intended wearer is a really important skill for any knitter. You may be someone who falls somewhere in between the American Craft Yarn Council's idea of what a Medium and a Large are, but you still want your sweater to fit like it was made for you! You may have a baby who wears a size 4T. You may have a middle-schooler who's still in toddler sizes. That doesn't mean that they can't have garments that fit well.

For those of us who knit in the round, the oracle to consult is Barbara Walker's Knitting from the Top (For garments knit flat, the lovely knitter's reference book Stitch & Bitch Nation by Debbie Stoller has a great guide to customizing patterns to fit you better). But here's a basic how-to guide that will help you size any of my top-down sweater patterns to fit your intended wearer.

Step One: Measure the Wearer

This is such a bummer, right?!? Because you wanted the sweater to be a surprise. You wanted it to be something they never expected. Well, you can't make it a surprise and make it fit well. You have to pick one. And they will be surprised by the finished product, anyway - they will never have expected something so awesome. So here are the three basic measurements you will need:

1. The chest circumference. This is the most important! Every sweater size is based on this measurement. Get the person's torso naked (or just lightly clothed) and take an accurate measurement around the widest part of the chest. How loose do you want the sweater to fit? Most sizing guides assume 2 inches of ease, but if you want the Marilyn Monroe look, by all means don't add any ease.

2. The sleeve length. Measure from the person's armpit to their wrist. Or if you want short sleeves or 3/4 sleeves, measure to the point where you want the sleeve to end.

3. The back length. Measure from the neckline to the point at which you want the sweater to end. Is this a cropped sweater that just makes it to the waist? A tunic that lands mid-thigh? Find out how long that really is on the person who's going to be wearing it.

Get super advanced pointers on how to measure accurately from the American Craft Yarn Council.

OK, so now you have your measurements!

Step Two: Adjust the sweater's circumference

Warning: This is the part with a lot of paying attention and math and stuff.

Okay now, before you even go knitting, for heaven's sake knit a swatch and make sure your gauge is correct. I can't say this emphatically enough: Get the right gauge. Get the right gauge. Get the right gauge. If you haven't learned this the hard way yet, with much wailing and gnashing of teeth, please let me save you from such a hideous fate, and just knit a swatch to check your gauge.

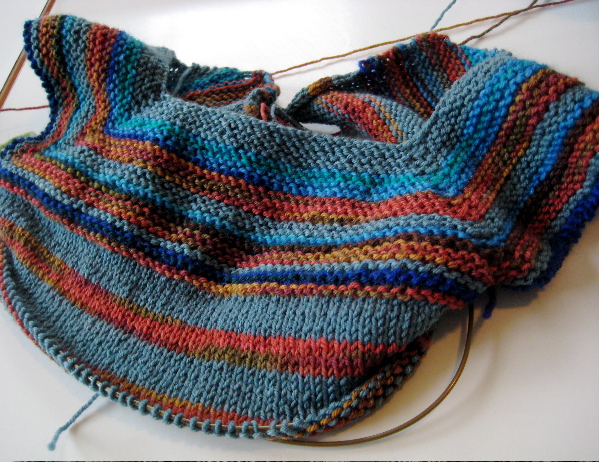
So you've got gauge and you've cast on all the stitches starting at the neckline, and you're working your way down towards the chest, increasing on every other row as instructed. You're going to come to a really important point in the early development of this sweater, the point at which you divide for the sleeves. It looks like this:


Before you go separating out those sleeves, it's time for a little math. Very basic math, don't worry. But get a calculator out anyway.

Count up all the stitches in the front and back sections of the sweater (that's all the stitches on your needle, minus the two sleeve sections). Now you have a number of stitches. Let's just say it's 100. Now there are a few other stitches you need to think about.

  • How many stitches will be added on at each underarm when the sleeve sections are separated out? You need to add those in as well. Let's say there are 5 on each side. So now we have 110 stitches. 
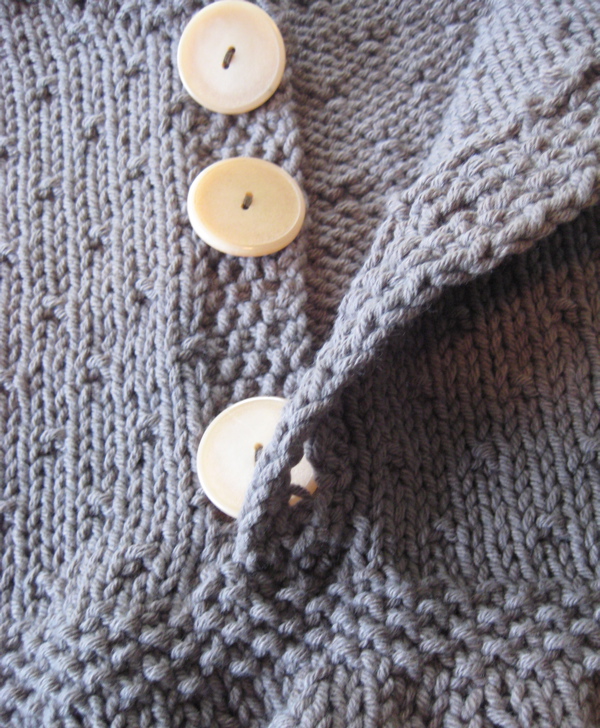
  • And finally, will we be adding on any extra stitches in the front center? Say, for a button band? You may need to read to the end of the pattern to figure this one out. If so, add those in too. Important math note: If it's a button band, that probably means that you're going to be picking up selvedge stitches and knitting the band perpendicular to the direction of the sweater body stitches. If that's the case, don't add in the total number of button band rows. Add 3/4 of them. Let's say you'll be adding on a button band later, and that it's 8 rows wide. 3/4 of 8 is 6 stitches. So our grand total is 100 + 5 + 5 + 6 = 116.

Are you confused yet? This really is the hardest part, I promise.

Here's where your all-important gauge comes in. Just for the sake of this exercise, let's say we're knitting a sweater with a stitch gauge of 4 stitches to the inch. Divide your total 116 stitches by the gauge, 4 stitches/inch, and you get 29 inches. Is 29 inches the chest circumference you need? No?? Well, now here's where we do the adapting.

Let's say you need a chest circumference of 31 inches. That means you need to hit the pause button on dividing for those sleeves, and keep on knitting and increasing until you have enough stitches to get you to a 31-inch chest circumference. Just how many stitches is that? Well...

31 inches x 4 stitches to the inch = 124 stitches. From 124, subtract HALF of the underarm stitches, and then divide by two. 124 - 5 = 119 stitches. Now divide your answer by two = 59.5. SHAZAM! You will need 59.5 stitches in the back section. Well, okay let's call it 60. So keep on increasing until you have 60 stitches in the back section. Then divide for the sleeves as directed. Yawn, that wasn't so hard, was it?

WAIT A SECOND! What if I get an odd number, and I have an even number of stitches in the back section! What will I do????

Don't worry about it. Just increase to the next round number and call it close enough.

Step 3: Make the sweater body long enough for the wearer.

Nuf said.

Step 4: Make the sleeves long enough for the wearer.

Also self-explanatory.

This Lopi sweater fits me nicely thanks to my handy-dandy calculator!

So if I've posted a pattern and you don't see the size you want, you could wait around for me while I finish cleaning up from dinner, checking email and packing the kids' lunches for tomorrow, or you could just size it up yourself! Once you know how to do this, you'll be amazed at how you stop having to abide by the limits of the knitting patterns you like.

Friday, October 12, 2012

free pattern friday :: apiary jumper


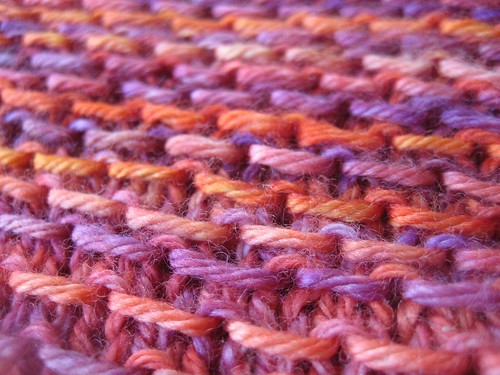
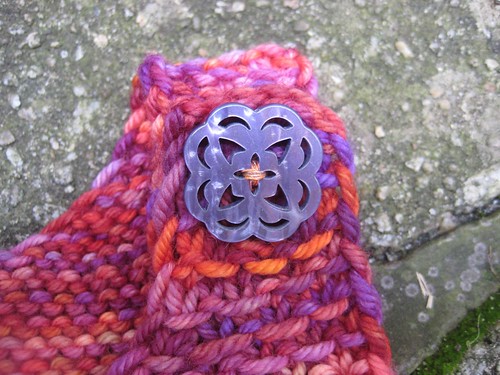
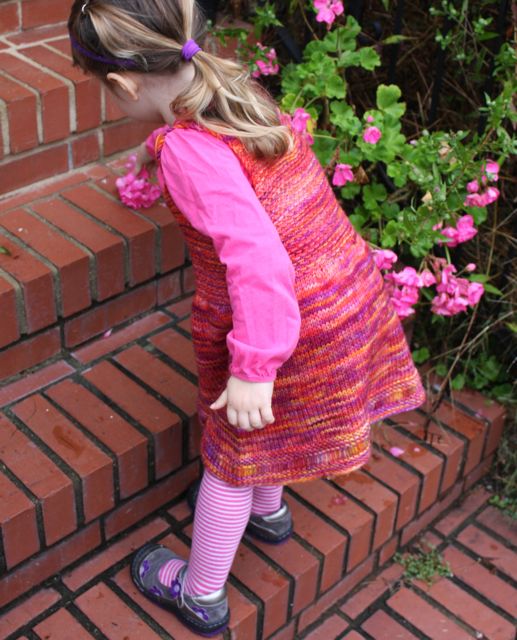
This little sweater dress is all about the yarn. Choose a variegated yarn in bold colors with medium-to-long color changes – the stitch patterns in this dress will really show them off. And choose superwash if this garment is going to be a gift! The jumper is designed to be worn over a top and pants or leggings. The straps are adjustable, so your child can get 2 years of wear out of this sweet three-season tunic.
Yarn suggestions: Malabrigo Ríos, Brooks Farm Solana, Creatively Dyed Yarn Woodbrook, or Lorna’s Laces Shepherd Worsted. The dress shown was knit in Malabrigo Ríos in color #103, Archangel.

sizes: 12-18 mos (2-3 years, 4-5 years, 6-7 years)

measurements:
12-18 mos size: chest circumference: 20 inches.  overall length: 16 inches.
2-3 years size: chest circumference: 24 inches. overall length: 18 inches.
4-5 years size: chest circumference: 26 inches. overall length: 19.5 inches.
6-7 years size: chest circumference: 28 inches. overall length: 21 inches.

materials:
Malabrigo Ríos, 2 (2, 3, 3) skeins
Size 8 (US) circular needle, 24 inches
Size 6 (US) circular needle, any length
2 buttons, about 1-1/8 to 1-3/8 inches / 28 to 34mm
Tapestry needle
Sewing needle
Sewing thread to match

gauge:  20 stitches / 4 inches on size 6 needles in stockinette stitch


slipped honeycomb stitch
work over an odd number of stitches
R1 (RS): Knit
R2 (WS): K1, *Slip 1 with yarn in back, K1. Repeat from * to end.
R3: Knit
R4: K1, *K1, Slip 1 with yarn in back. Repeat from * to end.

You will begin this dress at the lower edge and knit in the round on circular needles.
Note to the purl-averse: The first 14 rounds are based on garter stitch, so if you’re one of those people who can’t stand purling, knit the first 14 rounds flat and sew them up later.

Using larger needles, cast on 125 (151, 163, 175) stitches, place a stitch marker, and join to knit in the round. Knit the first 6 rounds in garter stitch (alternating knit and purl rounds).
Round 7: K1. Knit, wrapping three times for each stitch, to end.
Round 8: Purl, dropping all the extra wraps.
Knit 6 more rounds in garter stitch.
Change to stockinette stitch. Continue knitting in the round until dress measures 9 (10, 10, 11) inches from cast-on edge.


Decrease for bodice:
Change to smaller needles. *Knit 7, work a centered double decrease. Repeat from * to end. As you come to the last 5 (2, 3, 5) stitches, K2tog, K to end. 100 (120, 130, 140) st remain.

Centered double decrease:
Slip 2 stitches together knitwise. K1. Pass the slipped stitches over the knit stitch. 2 stitches decreased.

You will now divide the front and the back of the dress, and knit each side of the bodice flat in Slipped Honeycomb stitch. Just hold the back half of the dress on scrap yarn while you work the front.

Front:
R1: K 51 (61, 65, 71) place the remaining 49 (59, 65, 69) stitches on scrap yarn to hold. Turn, work row 2 of Slipped Honeycomb stitch.
Continue knitting this section in the stitch pattern for 2 (2, 3.5, 3.5) inches.

Make armholes

Note: Through the rest of the bodice and the straps, you will begin every row with a slipped stitch, with the yarn held in front (WYIF). This creates a very tidy, even edge for any garter stitch-based stitch pattern and eliminates the need for a border to be picked up & knit or sewn on later.

Note also: Throughout the remainder of the bodice, you will continue to work the honeycomb stitch pattern as established. Because of decreases at many row ends, you will sometimes need to work row 2 instead of row 4 of the honeycomb stitch, or vice-versa. The important thing is to keep the slipped stitches staggered as established when you began working the pattern – this is easy to follow with your eye.

Decrease row (RS): Slip 1 WYIF, SSK, SSK, K to the last 5 stitches. K2tog, K2tog, K1 (4 st decreased).
Next row (WS): Slip 1 WYIF, K to end (maintaining pattern).

Repeat the last two rows 2 (4, 4, 5) more times, until 37 (41, 45, 47) stitches remain on the needles.

Sizes 12-18 mos, 4-5 years:
Next RS row: Slip 1 WYIF, SSK, K to last 3 stitches. K2tog, K1. (2 st decreased)

35, (41, 43, 47) st remain.

Continue working in patt until the bodice section measures 3.5 (3.5, 5, 5) inches.

Work neckline:
* *You will still slip the first stitch of every row (RS and WS) with yarn held in front!**
Next RS row: K16, BO 3 (9, 11, 15), K16.

Right front:
Keeping the first section on a holder, work the second section of 16 stitches, maintaining the honeycomb stitch pattern and the first stitch slipped every row.
WS: Knit in patt to end of row (neckline).
RS: Slip 1 WYIF, SSK, SSK, patt to end. (2 st dec).
WS: Turn, patt to end of row (neckline).
Repeat these last 2 rows til 10 stitches remain.
Next RS row: Slip 1 WYIF, SSK, patt to end. 9 stitches remain.
Continue working these 9 st in honeycomb stitch pattern for 3 more rows.
Next RS row, work buttonhole: K3, BO 3, K3.
Turn, patt 3, cast on 3 st using backwards loop cast on, patt 3.
Work 2 more rows in patt.
RS: Bind off all stitches as follows: Slip 1 WYIF, SSK, BO all stitches to last 3, K2tog, BO.

Left front:
Join yarn to held stitches at the neckline to work the left side.
WS: Knit in patt to end of row.
RS: Slip 1 WYIF, patt to last 5 stitches, K2tog, K2tog, K1.
You will work the left front just as you did for the right, but working your neckline-edge decreases as K2tog’s (as instructed for previous 2 rows).
Work buttonhole and bind off as you did for the right front.


Back:
Join yarn and work the back as you did for the front, right up through the armholes. Work the armhole decreases until 35, (41, 43, 47) st remain.

When the back bodice measures 4.5 (4.5, 6, 6) inches, work the back neckline exactly as you did the front.
However, once 9 stitches remain on each side, do not work a buttonhole.
Instead, work these 9 st in patt until each shoulder strap measures 3.5 (4, 4.5, 5) inches from the point where you separated out the two sides. Bind off on the RS, using decreases to shape the ends just as you did on the front side.

Finishing:
Sew up the sides below the armhole.
Weave in all ends.


Button placement:
Wash and block the garment before sewing on buttons. Try the dress on the intended recipient if you possibly can, using safety pins to mark where you want the buttons to go. If you can’t try it on the child first, the default setting is to sew on the buttons such that the finished armholes measure about 5 (6, 6, 6.5) inches. Stretch the straps gently as you measure, since these straps will stretch a bit lengthwise during wear.

If the dress is to be given as a gift, wind a generous length of sewing yarn around a small card and present it with the dress, so that the buttons may be moved down the strap as the child grows (you may wish to offer to provide this service to the recipient’s parent, since many people today are unfamiliar with domestic arts like button-sewing).


Friday, November 26, 2010

free pattern friday::soxxy dress

soxxy dress

Here's a dress for the Scrappy Doll, made with some sock yarn leftovers. The pattern is knit from the bottom up, and quite simple, so you can adapt it for dolls of all sizes. Make one in each of your favorite sock yarn leftover colors!

size: one size (to fit a 10.5 inch doll)

gauge: 7.5 stitches/inch

materials:
small amount of leftover sock yarn (shown in Curious Creek Wasonga)
US Size 1 DPN's
stitch marker
tapestry needle

Cast on 124 stitches. Join to knit in the round, being careful not to twist. Place a stitch marker to mark the start of the round.

Knit 4 rounds in stockinette stitch.
R5: *K1, P1. Repeat from * to end. This ridge will stop the edge from rolling further.
Continue in stockinette stitch until the piece measures one inch.

Next round: K2tog every stitch to end. 62 stitches remain.
Continue in stockinette stitch until the piece measures 3.5 inches.

Next round: Knit 31, placing all stitches on one needle. Knit the next 31 stitches onto another needle - now your work is divided into 2 pieces.

You will knit flat from here up, working back & forth on one needle only, knitting every row (garter stitch). As you go, be sure to slip the first stitch of each row, with the yarn held in the front (wyif), in order to keep a tidy edge. You can hold your stitches for the front of the dress on a needle, scrap yarn or a stitch holder as you work the back.

soxxy dress 2

back of dress
Row 1: BO 3, K to end.
Row 2: BO 3, K to end.
Knit 4 rows.

Next row: Slip 1 wyif, K2tog, K to 3 stitches before end. SSK, K1.
Next row: Knit.
Repeat these last 2 rows until 21 stitches remain on the needle.

create the straps
Next row: Slip 1 wyif, K2tog, K1, BO 13, K1, SSK, K1.
Now you have 2 straps begun, each with 3 stitches. Hold one on your needle or a piece of scrap yarn while you knit the other. Work 21 rows on each strap, continuing to slip the first stitch of each row wyif. Once you have 21 rows, bind off all stitches, trim the end, rejoin the yarn and work the other strap the same way.

front of dress
Rejoin the yarn.
Row 1: BO 3, K to end.
Row 2: BO 3, K to end.
Knit 4 rows.
BO all stitches.

finishing
Weave in ends and trim. Fold the straps over from back to front and sew them down very firmly on the front of the dress (see photo).

Friday, October 29, 2010

free pattern friday::scrappy doll

scrappy doll

My grandmother liked to make dolls for us from hollyhock flowers: one bud for the head, one bloom for the skirt. Dolls are easy to make from whatever you have on hand, and fortunately children are easy to please when it comes to a new toy. This sweet felted doll is no different - she is made from leftovers and stashed bits. Find a handful of worsted-weight wool leftovers and you're ready to make a snuggly felted doll for your little one. Doll’s dress & sweater patterns from scrap sock yarn coming soon.

The doll is knitted all in one piece, from the top down, with minimal sewing up, and then felted. Her head and hands are made from less than half a skein of one skin-toned color, and her top and leggings from similar amounts in two different colors of your choice (you could also make a bodysuit in one solid color if you like). After felting, stuffing and sewing up, you'll make her hair and embroider her face. I made her hair from a small amount of heavy worsted merino, but almost any yarn can work for the hair, from Fun Fur to silk. Once you've embroidered her face, she's finished. Then you can make endless outfits from her with more of your leftover yarn - dolls just love new outfits.

and here's a dress for your doll.

size: one size

measurements
head-to-toe length: approximately 10 1/2 inches
head circumference: 10 inches
chest circumference: 8 inches

gauge
about 4.5 stitches = 1 inch. Gauge is not terribly important for this project.

materials
less than 1/2 skein of worsted-weight 100% wool in each of three colors:
color A (skin tone)
color B (top)
color C (leggings)
I used Cascade 220 – whatever you use, be sure that it will felt!
size 8 (US) double-pointed needles
stitch markers in at least 2 colors
less than 1/2 skein of yarn for hair
embroidery floss for eyes and mouth
embroidery needle
tapestry needle
sewing needle & thread in color to match hair
small amount of polyester fiberfill (or stuffing of your choice)
sewing machine (optional)

knit the doll’s head (starting from the crown)
Using Color A, CO 6, distribute evenly across 3 DPN’s. Place marker and join to K in the round, being careful not to twist.
Round 1: K1fb into every stitch. 6 st increased.
Round 2 (and all even rounds): Knit.
Round 3: *K1, Kfb. Repeat from * to end. 6 st increased.
Round 5: *K2, Kfb. Repeat from * to end.
Round 7: *K3, Kfb. Repeat from * to end.

Continue in this manner, increasing 6 stitches on every odd-numbered round, until you have 60 stitches on your needles.
Knit 9 rows even (without increasing).

Decrease round 1: [K8, SSK] 3 times. [K8, K2tog] 3 times. 6 st decreased.
Round 2 (and all even rounds): Knit.
Decrease round 3: [K7, SSK] 3 times. [K7, K2tog] 3 times.
Decrease round 5: [K6, SSK] 3 times. [K6, K2tog] 3 times.

Continue in this manner, decreasing 6 stitches on every odd-numbered round, until you have 24 stitches remaining on your needles.
Knit 8 rows even for the neck

body
If you have ever knitted a sweater from the top down, this section is going to feel very familiar (and if you haven’t – perhaps you should try it!)

Round 1: K8, place marker, change to Color B, K4, place marker, K8, place marker, K4 to end.
Round 2: * Kfb, K to 1 st before next marker, Kfb, slip marker. Repeat from * to end. 8 stitches increased.
Round 3 (and all odd-numbered rounds): Knit.
Round 4: Repeat round 2. 8 stitches increased.

Continue in this manner, increasing 8 stitches on every even-numbered round, until you have 16 stitches between the back two markers (that is, in the largest section).

divide for arms
Without increasing any more, knit across to the first marker, remove the marker, and place the next 12 stitches on a piece of scrap yarn – this will become the doll’s left arm.
Remove the next marker. Using the backwards loop method, cast on 2 stitches to your needle and join to knit across the back 16 stitches. Remove the next marker, and place the next 12 stitches on a piece of scrap yarn to create the dolls’ right arm. Remove the next marker. CO 2 stitches again, join to the remaining stitches and knit to the final marker (leave this marker in place to mark the start of your rounds).

Now you will simply knit the torso in the round, continuing in st st until the torso measures about 3 inches.

leggings
Next round: Change to Color C. Knit 1 round in the new color.

Now we’re going to use some short rows to give the doll some booty:
K 20. Place a marker. K 14. Place a marker. Wrap the next stitch and turn your work. Purl back to the first marker. Wrap & turn.
K to 1 st before marker. Wrap & turn.
P to 1 st before marker. Wrap & turn.
K to 2 st before marker. Wrap & turn.
P to 2 st before marker. Wrap & turn.

Knit across this row, knitting the wraps together with their stitches as you go and removing all the markers. Continue knitting to the end of this round. Now your doll has a cute little heiney.

divide for legs
Next round: *K 4, K2tog. Repeat from * to end. 6 st decreased. 30 stitches remain on your needles.
Next round: K 5, bind off 3. Using a new needle, K 12. Bind off 3. Place a new marker and join to knit the next 12 stitches in the round as one leg, leaving the remaining 18 stitches behind on a stitch holder or a piece of scrap yarn.
Continue in st st until leg measures 3 inches.
Next round: Decrease 3 st evenly. 9 st remain.
Knit 4 rounds even.

make a foot
This will feel very familiar if you’ve ever made a sock.

Knit across 7 stitches. Turn your work.
Slip one, P2, turn.
Slip one, K2, turn.
Slip one, P2, turn.
Slip one, K2.
Pick up and knit 2 stitches down the selvedge of the heel flap you’ve just made. Place a marker. Knit 6. Place a marker. (Be sure to remove the original marker that marked the start of the round – it’s just in the way now).
Pick up and knit 2 stitches up the other selvedge of the heel flap.
K 3, K2tog. Slip marker, SSK. K2, K2tog. Slip marker, SSK. 9 stitches remain.
Knit 5 rounds even.

Next round: K2tog 4 times. K1. 5 st remain.
Cut the yarn, leaving about a 6-inch tail. Pull the end through the remaining 5 stitches, securing the yarn end inside the foot and weaving in a bit before you trim it.

second leg
Rejoin your yarn to the held stitches, and knit the 12 held stitches. Place a marker and join to knit in the round. Make this leg just as you did the first one, all the way to where the heel starts.

second foot
To begin this heel, Knit across 4 stitches, turn your work. Now continue exactly as you did for the first foot. Complete as before.

arms
Go back to the shoulder and place the held stitches from one of the arms onto your needles, removing the scrap yarn. Join your yarn (Color B) and knit the 12 held stitches. Pick up and knit the 2 armpit stitches from the torso, and place a marker to mark the start of the round.
Knit 3 rounds even.

Next round: Decrease 2 st evenly. 12 st remain.
Knit 1 round.
Next round: Decrease 2 st evenly. 10 st remain.
Knit 2 more rounds in Color B.

Change to Color A. Knit 4 rounds.

hand
Increase round 1: * K1, Kfb. Repeat from * to end. 5 st increased.
Knit 5 rounds even.

Next round: K2, K2tog. K to 2 st before marker, K2tog. Slip marker. Leave the next 2 stitches on a holder to make the thumb. Join your needle to the third stitch, and continue knitting these 11 stitches in the round.
Knit 3 more rounds.

Next round: [K1, K2tog] 5 times. 6 st remain.
Next round: K1, K2tog, K2tog, K1. 4 st remain.
Cut the yarn, leaving about a 6-inch tail. Pull the end through the remaining 4 stitches, securing the yarn end inside the hand and weaving in a bit before you trim it.

To make the thumb, rejoin your yarn to the 2 held stitches and knit a two-stitch I-cord for 4 rows. Break your yarn and pull the tail through these two stitches to secure them.

Repeat this whole process for the second arm.

doll, unfelted

finishing & felting
Once you’ve finished knitting your doll, go back to weave in ends and trim them up. You’ll have a big gap in the doll’s crotch for stuffing.

Carefully felt the doll to size. Need help felting? Here's a great tutorial.

Once she’s ready, stuff her very firmly with plastic bags. Push, pull and tug her into shape – don’t be too shy. Felted fiber is tough stuff, and the shape she dries in will be the final shape you get, so make her look just the way you want her to.

Allow the doll to dry for a couple of days. Once dry, remove the plastic bags and stuff more gently with polyester fiberfill (or your stuffing of choice). I like to stuff the head, hands and feet rather firmly, and the arms, legs and torso more softly. I am careful to stuff the joints (shoulder and hip) only lightly, to allow her to bend and sit. Stuff to the firmness that you prefer. Once you’re done, use your Color C yarn to sew up the stuffing hole.

hair
There are as many ways to make hair for a doll as there are home-made dolls. You can make yours however you like.

after winding

I made my doll’s hair by sewing the yarn down to a piece of paper, removing the paper and then tacking the hair into place on the doll (I thought it was kind of ingenious until I discovered that plenty of other people already did it this way). Here’s a great step-by-step tutorial from the Crafty Sheep.


Instead of using yarn to sew the hair into place, I sewed my doll’s hair along the scalp line with matching sewing thread. Then I neatly gathered the doll’s hair into a ponytail on each side, and secured those in place with sewing thread as well. Finally, I braided the hair, tied a piece of yarn to finish the braid, and trimmed to my desired length. Style your doll’s hair however you like! To make wavy or kinky hair, use yarn that has been unraveled from another knitted item.

doll with hair

here are a few other ways you can make hair:
Make a fringe
Sewn-on loops
Crocheted hair

embroidering the face
Here I’ll just say, I am horrible at embroidery. After unsuccessfully begging my sister to embroider the face for me, I finally sat down with the embroidery floss (two strands) and needle, and dove in. I think it came out OK. I marked the eye and mouth locations with a pencil first, and I think I held my breath the whole time. Good luck.

So, now hopefully your doll has a sweet face and is ready to play! Have fun, and don’t forget to make her some clothes! But she looks just as cute in her long johns.

playing outside

Friday, July 16, 2010

free pattern friday::bear isle

bearisle

Poor bear. He was a bit chilly in July, stuck inside with the air conditioning on all the time. Some scrap yarn from the stash fixed him right up with a toasty new sweater.

If you've been wanting to try your hand at fair isle, or learn to knit a sweater in the round from the bottom up, here's a quickie to get you started! The sweater is knit in the round on circular needles, starting at the bottom edge and working up to the underarms. Then the sweater goes on hold while you knit each sleeve, bottom up. All three are joined together and worked as one piece in the round, with the fair isle design in the yoke. Once you've cast off the neck, the only finishing left to do is to graft the underarm stitches together. A one-day sweater -- and a happy kid with a freshly-outfitted bear.

materials
About 75 yards of worsted weight wool in the main color(I used Classic Elite Montera)
About 25 yards of worsted weight wool for the contrast color (I used Wisdom Yarns Poems)
16 inch circular needles, US size 8
double-pointed needles in US sizes 8 and 6
tapestry needle
stitch markers

gauge
4 inches = 18 stitches / 20 rows

size
One size. Feel free to lengthen or shorten as needed. The bear for which this sweater was knit is 15 inches tall (including legs) and has a 13 inch chest circumference.

measurements
circumference = 16 inches
length = 4.5 inches
sleeve length (from underarm): 2.75 inches

color chart
bearisle_grid

body
Using the circular needles, cast on 72 stitches. Place a marker and join to knit in the round.
Knit three rounds.
Round 4: *K1, P1. Repeat from * to end.
Round 5: Knit.
Continue knitting in stockinette stitch until sweater measures 2.5 inches from the bottom edge.
Next row, decrease 2 stitches evenly.
Next row, work row 1 of the color chart. Then leave your work on the needles and knit the sleeves.

sleeves
Using the larger double-pointed needles, cast on 24 stitches. Place marker, distribute the stitches evenly over three needles, and join to knit in the round.
Knit three rounds.
R4: *K1, P1. Repeat from * to end.
R5: Knit.
Continue knitting in stockinette stitch until sleeve measures 2.5 inches from the bottom edge.
Next row, work row 1 of the color chart. Then place your stitches on a piece of scrap yarn.
Work the second sleeve.

join the body to the sleeves
Return to the body of the sweater. You will be working the color chart, completing a decrease round, and joining the sleeves to the body, ALL AT THE SAME TIME. Ready?

Begin row 2 of the color chart. *(K4, K2tog) 5 times across the front of the sweater. You will have 25 stitches in this section.
Using the tapestry needle, place the next 5 body stitches of the sweater on a piece of scrap yarn.

Now join your working yarn to the sleeve, and knit around the sleeve while decreasing: *(K4, K2tog) 3 times around the sleeve. Put the remaining 5 sleeve stitches on a piece of scrap yarn.

Join the working yarn to the back section of the sweater (the next live stitches in line after the ones you first put on scrap yarn). Continue by working *(K4, K2tog) 5 times across the back of the sweater. You will have 25 stitches in this section. Put the last 5 body stitches onto a piece of scrap yarn.

Now join the working yarn to the second sleeve, just as you did before. *(K4, K2tog) 3 times around the sleeve. Put the remaining 5 sleeve stitches on a piece of scrap yarn. You should have 100 stitches on your needles.

Now you're back at the stitch marker and ready to begin round 3 of your color chart.
Work the next 6 rounds of the color chart. On the next round (the one that's all made up of the main color), decrease again.

Decrease round: K4, *(K8, K2tog) 10 times. K4. 90 stitches remain on your needles.
Work the final row of the color chart.
Knit one more round in the main color, decreasing again as you go: *(K7, K2tog). 80 stitches remain.

Change to contrast color and smaller double-pointed needles.
Knit one round in the contrast color, decreasing as you go: *(K6, K2tog). 70 stitches remain on your needles.
Next two rounds: *(K1, P1). Repeat from * to end.
Cast off loosely, maintaining the K1, P1 ribbing.

finishing
Use kitchener stitch to weave underarms together.
Weave in loose ends.

non-commercial bit: These are free patterns and you are welcome to use them for all the non-commercial purposes you like. However, you may not reproduce the patterns to sell, and you may not sell what you make with them. You may donate what you make with them to charity, and you may use them for charity fundraisers only if 100% of the proceeds are donated to the charity (and by charity I don't mean your kid's college fund). Thanks for understanding!

Sunday, June 20, 2010

cowgirl update


becky et al's C.B.A. vest

Hi knitters!

This is part update and part apology. I have finally corrected numerous errata in the Cowgirl Butterfly Astronaut Vest. Size 2 and size 4 had a few problems that involved my personal brain-block around simple arithmetic, and they have at last been remedied.

Many thanks to all of you lovely knitters who emailed or Ravelried me with your questions and workarounds (and your gentle "WTF??"s). You are much appreciated. If I were charging for these patterns, I could hire a technical editor. Alas, you are my technical editors, and your patience is a boon to all the other knitters out there who benefit from your trailblazing.

This little mash note really applies to all of my freebies. Knitters are really a kind and patient bunch. I can't tell you how much I appreciate your feedback on my designs, and I especially love when one of you not only finds an error, but tells me how you fixed it in your version. Open source knitting! If I can't sit around at the coffee shop (or the pub) and knit with you all, this is the next best thing.

Friday, May 14, 2010

free pattern friday::sundrop

sundrop hat 2
one day i'll take some better photos!

This sweet sun hat will take your baby or toddler from the playground to the beach and back again. The brim is worked in a tight gauge to give it some firmness, while the body is knit in a looser gauge with a simple but pretty eyelet lace design that adds a little ventilation. Add the optional ties if your little one likes to yank off hats (and who doesn’t?). This is a fun, quick summer knit. Find a bright summer color that you like, and use a firm, washable cotton or cotton/linen blend yarn.

materials
1 ball Lion Cotton or similar worsted-weight cotton yarn
US size 3 double-pointed needles (3.25 mm)
US size 7 double-pointed needles (4.5 mm)
US size 7 crochet hook (4.5 mm) – or whatever you have on hand that’s close
tapestry needle
stitch markers in 2 colors
Use whichever needle sizes you need to get the correct gauge!

gauge
larger needles: 15 stitches / 24 rows / 4 inches
smaller needles: 20 stitches / 29 rows / 4 inches

sizes
0-6 mos (6-18 mos, 18 mos – 3 years, 4-6 years)

measurements
0-6 mos: 14 inches
6-18 mos: 16 inches
18 mos – 3 years: 18 inches
4-6 years: 21 inches

sundrop1

brim
Using smaller needles, *cast on 19 (20, 21, 23) stitches, place a marker, repeat from * until you have 114 (120, 138, 150) stitches.
Place a marker in a different color to mark the end of the round, and join to knit in the round. Knit 4 rounds in stockinette stitch (K every round).
R5: K1, P1 to end (this ridge will stop the brim from rolling any further).
R6: Knit

Decrease round: *K2tog, K to 2 stitches before the next marker, SSK, slip marker. Repeat from * to end. 12 stitches decreased.
Next round: Knit
Repeat these last two rows until 54 (60, 66, 78) stitches remain.

hat body
Change to larger needles.
Knit one round, removing the markers as you go (leaving in place the marker that marks the start of each round).

Next round: Knit, adding the eyelets for ties as you go (optional!).

How to add eyelets: K 14 (15, 16, 19), YO, K2tog. K 24 (28, 30, 38), YO, K2tog. K to end.
Even if you’re not sure whether you will want to use the ties, I think it makes sense to go ahead and make the eyelets, so that they’re there if you need them. They won’t look funny if you don’t end up using them.

Knit 2 more rounds.

Next round:

For the 18 mos-3 yrs size: Knit this round, decreasing by 2 stitches, spacing the decreases evenly throughout the round.

For the 0-6 mos (6-18 mos, 4-6 yrs) sizes: Knit this round, increasing by 2 (4, 2) stitches, spacing the increases evenly throughout the round.

For all sizes: 56 (64, 64, 80) stitches remain.

Next round, begin Quatrefoil pattern.

quatrefoil pattern
Round 1 and all odd rounds: Knit
R2 and 3: Knit
R4: K3, *YO, SSK, K6. Repeat from * until 3 stitches remain in the round. K3.
R6: K1, * K2tog, YO, K1, YO, SSK, K3. Repeat from * until 2 stitches remain in the round. K2.
R8: Repeat round 4.
R10: Knit.
R12: K7, *YO, SSK, K6. Repeat from * until 1 stitch remains in the round. K1.
R14: K5, * K2tog, YO, K1, YO, SSK, K3. Repeat from * until 3 stitches remain in the round. K3.
R16: Repeat round 12.

For the 0-6 mos size, you will only knit the quatrefoil pattern once.

For the 6-18 mos and 18 mos-3 yrs sizes, repeat rows 1-8 of the quatrefoil pattern one time.

For the 4-6 yrs size, repeat the whole quatrefoil pattern one time.

Continue knitting in stockinette stitch until hat measures 4.25 (4.75, 5.5, 7.75) inches from the point where you changed to larger needles.

decrease for crown
R1: *K2, K2tog. Repeat from * to end.
R2: *K1, K2tog. Repeat from * to end.
R3: *K2tog. Repeat from * to end.
Repeat row 3 until there are 10 stitches remaining on your needles. Trim your yarn tail to about 6 inches and pull through the stitches, leaving a small eyelet open to top off the crown. Fasten securely inside and weave in the end.

sundrop hat 1

ties (optional)
Using the crochet hook and 2 strands of yarn held together, crochet a single-chain chain that measures about 28 (32, 36, 42) inches long. Tie off tightly, weave in and trim ends. The chain will run around the outside of the hat across the back, down through one eyelet and back up through the other, passing under the baby’s chin (it does not run around the front side of the hat). Tie it in a bow on the outside of the hat where baby can’t easily reach it – for a crafty baby, this may mean that you may need to tie the bow all the way on the back side of the hat rather than just above the eyelet on one side. Babies can be awfully crafty, can’t they?

finishing
Weave in any loose yarn ends. Wash and block your hat.

I have found through painful experience that many bright cotton yarns are not particularly color-fast, so do wash this separately the first few times to make sure the color doesn’t run and ruin the rest of your laundry. You might consider adding a small amount of white vinegar to the water when you block the hat, to help set the color (unless the yarn ball band gives you different instructions).

non-commercial bit: These are free patterns and you are welcome to use them for all the non-commercial purposes you like. However, you may not reproduce the patterns to sell, and you may not sell what you make with them. You may donate what you make with them to charity, and you may use them for charity fundraisers only if 100% of the proceeds are donated to the charity (and by charity I don't mean your kid's college fund). Thanks for understanding!

Friday, September 04, 2009

free pattern friday::bumpy jacket & hat

bumpyset1

Time for some fall knitting! This baby jacket and hat set uses an old-fashioned looking stitch pattern for an elegant look in a relatively simple pattern. Suitable for a boy or girl, the Bumpy Jacket uses organic cotton and is knit all in one piece for quick finishing. Use some vintage buttons for the perfect touch.

I called it "Bumpy" both because the stitch pattern has a bumpy surface, but also because it got off to a bumpy start. One of the mistakes I made was making the sleeve increases on the wrong side, but it actually looked pretty good with the stitch pattern and became a design feature. Once it got going, the jacket came together very quickly and was a pleasure to knit. Have fun making this sweet set as a special shower gift, or for your little one.

bumpy jacket

size
0-6 mos (6-12 mos, 18 mos, 2 yrs, 4 yrs)

materials
Blue Sky Alpacas Skinny Dyed Cotton, 150 yd / 137 m / 50 g per skein
Color A: 1 skein [shown in #301, Glacier]
Color B: 2 (2, 3, 3, 4) skeins [shown in #308, Mallard]
US size 5 needles, DPN and circular (or size to get gauge)
US size 3 needles, DPN and circular (or size to get gauge)
five 1/2-inch buttons
stitch markers
tapestry needle
sewing needle & thread

gauge
22 stitches / 28 rows / 4 inches in stockinette stitch on larger needles

measurements
chest circumference: 20 (21, 22, 25, 27) inches
back length: 10.5 (11.5, 13.5, 14.5, 16) inches
sleeve length: 6 (6.5, 7.5, 8.5, 10.5) inches

waffle check stitch pattern (even # of stitches) – 2 ways
knit flat:
Row 1 (WS): Color A: Knit
Row 2 (RS): Color B: *Slip 1 wyib, K1. Repeat from * to end.
Row 3: Color B: *K1, Slip 1 wyif. Repeat from * to end.
Row 4: Color A: Knit.
Row 5: Color A: Knit.
Row 6: Color B: *K1, Slip 1 wyib. Repeat from * to end.
Row 7: Color B: *Slip 1 wyif, K1. Repeat from * to end.
Row 8: Color A: Knit

knit in the round:
Row 1: Color A: Purl.
Row 2: Color B: *Slip 1 wyib, K1. Repeat from * to end.
Row 3: Color B: *Slip 1 wyib, P1. Repeat from * to end.
Row 4: Color A: Knit.
Row 5: Color A: Purl.
Row 6: Color B: *K1, Slip 1 wyib. Repeat from * to end.
Row 7: Color B: *P1, Slip 1 wyib. Repeat from * to end.
Row 8: Color A: Knit

wafflecheck

note
I strongly recommend knitting a swatch of the waffle check stitch pattern before you start, just to get the hang of it. It is quite simple, and once you’ve knit a couple of rounds of this pattern, it will become quite natural. You’ll be able to knit the sweater without having to read charts or refer to the instructions over and over. But since you have to knit it both flat and in the round, it pays to understand the stitch pattern before you begin working it in the sweater.

another note
For those who are familiar with sweaters knit top-down, this pattern is a bit quirky in that you will do the increases along the seams on the wrong side (rather than the right side, which is more common). I know it seems weird. I messed up while first designing this sweater, but I liked how it looked and decided to keep it.

bumpi model

cast on at the neckline
Using color A and larger circular needles, cast on as follows:
CO 2, PM, CO 6 (8, 8, 10, 10), PM, CO 20 (24, 24, 26, 28), PM, CO 6 (8, 8, 10, 10), PM, CO 2. You will have 34 (44, 44, 50, 52) st on your needle.

With row 1, you will also begin row 1 of the stitch pattern (following the instructions for knitting flat). You will start the stitch pattern over again in each section between the markers, in order to maintain the pattern across the increases at the shoulder seams (see this tutorial for a detailed explanation of this technique). You will never work the pattern on the stitch before or after each marker – these are the seam stitches. On right sides, simply knit the seam stitches and then start your pattern over. On wrong sides, work the increases as directed on the seam stitches, and then start your pattern over.

Row 1: *Kfb, K to 1 st before M, Kfb, slip M. Repeat from * to end. Kfb of last stitch. (10 st inc).
Row 2: Patt to end. [Here’s how to do this: Color B: *Slip 1 wyib, K1. Repeat from * to 1 st before next M. K1, slip M, K1. *Slip 1 wyib, K1. Repeat from * to 1 st before next M. Get it? Just start the stitch pattern over again in each section.
Row 3: *Kfb, Patt to 1 st before M, Kfb, slip M. Repeat from * to end. Kfb of last stitch. (10 st inc).
Row 4: Patt to end.

Continue in this manner, increasing 10 st on every WS row, and continuing the waffle check pattern, until you have 32 (40, 40, 44, 48) st between the back markers.

Next WS row, do not increase on the first and last stitches – you will increase only 8 stitches on this row. Continue increasing 8 st on every WS row until you have 50 (58, 60, 68, 76) st between the back markers.

divide for sleeves
Next RS row: Patt across the first section until you get to the first marker.
Place the stitches from the left shoulder section (between the first and second markers) onto a stitch holder or piece of scrap yarn.

CO 4 st across the gap and join to the back section.
Patt across to the third marker.
Place the stitches from the right shoulder section (between the third and fourth markers) onto a stitch holder or piece of scrap yarn.

CO 4 st across the gap and join to the last section. Patt to end.

You will have 104 (120, 124, 140, 156) st on your needle.

waffle_close

complete body
You will no longer be increasing on the WS rows. Simply carry the stitch pattern uninterrupted all the way around the garment as follows: K1, patt to 1 st before end, K1.
Work one full patt repeat for as many rows as that requires, ending with Row 1 of the stitch pattern.

Change to Color B and stockinette stitch (K all RS rows, P all WS rows).
Continue until the garment measures 10 (11, 13, 14, 15.5) inches from the back neck, ending on a RS row.

Change to smaller needles, and work 4 rows of garter stitch (K every row).
BO loosely.

sleeves
Place the held stitches from the first sleeve onto the larger DPNs. Using the appropriate color yarn for this point in the stitch pattern, pick up the four cast-on stitches from the underarm and place a marker. This marks the start of the round.

Work as many pattern rows as you did in the sweater body after dividing for the sleeves (be sure that you are following the instructions to knit the stitch pattern in the round – it is different from how you worked the body stitches!).

Change to Color B and stockinette stitch (in the round, knit every row).

Decrease row: K1, SSK, K to 3 st before marker, K2tog, K1. 2 st decreased.
Knit 4 rows even.

Continue in this manner, decreasing 2 st on every 5th round, until 30 (32, 32, 38, 40) st rem.
Knit even until the sleeve measures 5.5 (6, 7, 8.75, 9.25) inches from underarm.

Change to smaller DPNs. Work 4 rows in garter st (P 1 row, K 1 row).

BO loosely. Work the second sleeve.

button band / collar
Before you begin, use safety pins or stitch markers to mark the placement of your buttonholes along the right front selvedge of the sweater. Place the top button 1/2 inch below the start of the neckline. Place the bottom button 1 inch up from the bottom edge of the garment, and then space the remaining buttons evenly between them.

bumpy markers

Using the smaller circular needle and Color B, begin at the bottom right corner of the sweater front. Pick up and knit 3 out of every 4 stitches up the right front until you get to the point where the neckline angles in. Place a marker. Continue picking up 3 out of 4 selvedge st until you get to the cast on row. Pick up the 2 right front st, the 6 (8, 8, 10, 10) right shoulder st, the 20 (24, 24, 26, 28) back st, the 6 (8, 8, 10, 10) left shoulder st, and the 2 left front st. Then continue down the left neck picking up 3 out of 4 selvedge st. When you get to the point where the neckline ends, place a marker and continue down the left front, picking up 3 out of 4 selvedge st to the bottom left corner.

Row 1: Knit.
Row 2: K to 1 st before the first marker, Kfb, slip marker, Kfb. K to 1 st before the second marker, Kfb, slip marker, Kfb. K to end. You are using these double increases to create a neat mitred corner at the neckline.
Row 3: (make buttonholes): Knit until you reach the point where you would like each buttonhole to be placed. For each buttonhole, YO, K2tog. K to end.
Row 4: Knit.
Row 5: BO loosely.

finishing
Sew buttons on very firmly.
Weave in ends.

variation
Use Color A for the body instead of Color B (you would need less than one skein of Color B to complete the garment in any size).

bumpi_A1
variation in color A - see how the hat looks here


bumpy hat

bumpyhat1

size
0-6 mos (6-12 mos, 18 mos, 2 yrs, 4 yrs)

materials
Blue Sky Alpacas Skinny Dyed Cotton
Color A: 1 skein (for the 2 smallest sizes, sweater leftovers are enough)
Color B: 1 skein
size 5 needles, DPN and 16” circular (or size to get gauge)
stitch markers
tapestry needle

measurements
head circumference: 14 (15.5, 16, 16.5, 18) inches

a note on sizing
The waffle check pattern is based on garter stitch, which is not very stretchy. If your baby has a big noggin like mine does, you may want to go up a size (see measurements, above).

inner casing
In Color A, cast on loosely 78 (86, 88, 92, 100) stitches. Place marker and knit in the round in st st until section measures 1.75 (1.75, 1.75, 2.25, 2.25) inches from cast on edge.

Next row: K2, YO, K to 2 st before marker, YO, K2.
Next row: Knit across, increasing 0 (0, 2, 2, 2) st evenly as you go. You will have 80 (88, 92, 96, 104) stitches on your needle.

brim
Next row: Change to waffle check stitch pattern (be sure to follow the directions for knitting in the round). Knit 2.5 (2.5, 2.5, 4, 4) full repeats of the stitch pattern.

crown
Next row: Change to color B and st st. Work 1 round even.
Next row: Decrease 2 (2, 4, 4, 4) st evenly across this round.
Continue knitting in st st until hat measures 5 (5, 6, 6.5, 7.25) inches from the beginning of the waffle check pattern.
For the two smallest sizes, knit 1 round, decreasing 2 stitches this round, evenly spaced.

decreasing for the crown
Dec rnd 1: *K2, K2 tog. Repeat from * to end.
Knit 1 round even.
Dec rnd 2: *K1, K2 tog. Repeat from * to end.
Knit 1 round even.
Dec rnd 3: *K2 tog. Repeat from * to end.
Repeat this last dec round until 5 stitches remain. Cut the yarn, pull the tail through the remaining stitches and fasten securely on the inside of the hat.

finishing
Turn hat inside-out. Fold up the inner casing so that the first row of the waffle check pattern serves as the turning ridge. Sew into place, taking care that your sewing yarn does not show through on the right side.

Weave in loose ends.

important notice: This is a free pattern and you are welcome to use it for all the non-commercial purposes you like. However, you may not reproduce this pattern to sell, and you may not sell what you make with it. You may donate what you make with it to charity, and you may use it for charity fundraisers only if 100% of the proceeds are donated to the charity (and by charity I don't mean your kid's college fund). Thanks for understanding!

Wednesday, February 25, 2009

cardi revision

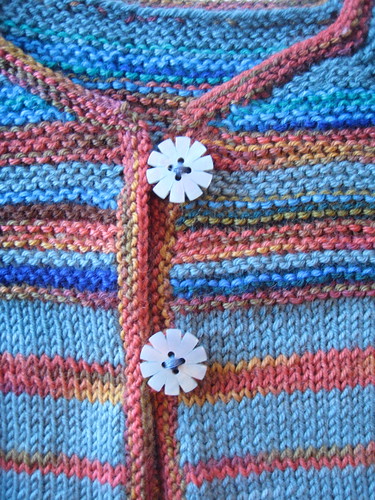
Just a quick note to say that if you're knitting the scrappy cardi, I posted a minor revision this morning.

Ever since I posted the pattern on Friday, something about the sizing had been bothering me. I had finished writing and editing the pattern on Wednesday and set it up to publish automatically on Friday morning, while I was away at a conference. The conference kept me distracted enough that I wasn't able to put my finger on what was bothering me until this week. But I realized eventually that it needed just a little more ease.

I hate when I do that. I know that they're free patterns and everything, but after a couple of years of this amateur designing, I am finally coming to realize that I should "finish" the pattern and let it sit for a week or two and marinate in my mind before I hit publish - just to let any kinks unravel themselves in the mean time.

Anyhow, in the shower I realized that the solution to the ease was very simple - all it needed was one extra increase round before dividing for the sleeves, and it would be just fine. Whew! That was a relief. Bad enough to have jumped the gun on publishing something, but at least it didn't need a major overhaul.

At any rate, in case anyone has already cast on for this project, you don't need to do anything differently, until you get to the final increase round before dividing for the sleeves. Just print the revised version of the pattern that went up this morning, and you're all set.

My apologies - and thanks to all of you for coming along on this bumpy ride learning to design cute things that other people can actually knit. I am always amazed that anyone else wants to knit the same things I do. Thanks for letting me experiment in such a supportive test lab!

Friday, February 20, 2009

free pattern friday: scrappy socky stripey cardi

socky

This baby jacket is a great way to use up leftover sock yarn and make a fun little sweater at the same time. This pattern uses three different leftover yarns – one is a solid, one is variegated, and one is self-striping. You can mix yours up however you like. I also varied the width of my stripes as I knitted – make yours as varied or as regular as you like (you don’t have to follow the charts provided below). You can hardly go wrong! Just make sure that your sock yarns are all the same weight and fiber content (more or less). Using superwash yarn is a good idea to keep this little garment easy-care.

[Revised 2.25.09 to add one increase row to body]

materials

leftover sock yarn in 3 colors
color A (solid) – up to 200 yd (shown: Tess Super Sock & Baby)
color B (self-striping) – up to 50 yd (shown: Regia Kaffe Fassett Landscape in color “Caribbean”)
color C (variegated) – up to 50 yd (shown: Lorna’s Laces Shepherd Sock Multi in color “Gold Hill”)
size 2 /3.0mm needles (circular and DPN)
size 1 /2.5mm needles (circular)
size 1 crochet hook (2.35 mm)
2 buttons (3/4 inch)
sewing needle & thread
tapestry needle

gauge: 7 stitches and 9 rows / inch

size: 0-6 (6-12, 12-18, 24) months

finished measurements:
chest circumference: 18.5 (19, 20.5, 21.5) inches
back waist length: 10 (11, 11.5, 12) inches
sleeve: 6.5 (7.5, 8, 8.5) inches

stripe patterns
(as shown in photos – make yours however you like!)

color key:
colorchart

yoke stripes:
yokestripe

body stripes:
bodystripe

sleeve stripes:
sleevestripe

knitting instructions

Using larger needles and color A, CO 2 (3, 3, 4), PM, CO 16 (17, 17, 18), PM, CO 24 (28, 30, 32), PM, CO 16 (17, 17, 18), PM, CO 2 (3, 3, 4).
You will have cast on a total of 60 (68, 70, 76) st.

Row 1: Kfb of first stitch, * K to 1 st before marker, Kfb, slip marker, Kfb. Repeat from * to final stitch. Kfb of final stitch. (10 st inc.)
Row 2: Knit across.

Repeat these last 2 rows until you have 34 (38, 40, 44) st between the back markers.

Next row: *K to 1 st before marker, Kfb, slip marker, Kfb. Repeat from * to final stitch. CO 1 (2, 3, 1) stitches to tip of needle.
Next row: Knit across. CO 1 (2, 3, 1) stitches to tip of needle. You will have 120 (130, 134, 146) st total.

Next row: Work as for previous increase row, without adding the cast on to the end. (8 stitches inc.)
Next row: Knit across.

Repeat these last 2 rows until you have 60 (62, 66, 70) st between the back markers.

divide for sleeves

K to first marker, remove marker, place shoulder st on a length of scrap yarn.
CO 6 (7, 7, 7) st to tip of needle, remove next marker, join to back stitches.
K to next marker, remove marker, place shoulder st on a length of scrap yarn.
CO 6 (7, 7, 7) st to tip of needle, remove next marker, join to remaining front stitches.
K to end.

Complete your color repeat in garter stitch.

Change to color A and stockinette stitch, knitting the body in varying stripes of colors A and C until the body measures 9.75 (10.75, 11.25, 11.75) inches. Change to color C and knit 4 rows in garter stitch. BO.

sleeves

Place the held stitches onto your DPN’s. Using the correct color to maintain your color repeat from the body stitches, pick up and knit the 6 (7, 7, 7) armpit stitches you cast on when dividing for sleeves. Place marker.

You will complete your color repeat in garter stitch, just as you did for the body. This time, when you change to stockinette stitch, you’ll be knitting in alternating rows of colors A and B, starting with color A.

At the same time:
K 3 rows.
Decrease row: K1, SSK, K to last 3 stitches, K2tog, K1. (2 st dec).
Next three rows: Knit.

Continue in this manner, decreasing 2 stitches on every fourth round until 40 (42, 44, 48) stitches remain. Do not decrease any further.

Knit until sleeve measures 6.25 (7.25, 7.75, 8.25) inches.
Change to color C, K 4 rows in garter stitch. BO loosely.

scrap cardi 2

button bands

Using smaller needles and color C, pick up 3 out of every 4 stitches along the right front selvedge (about 70, 78, 82, 86 stitches).
Knit 3 more rows in garter stitch. BO.
Repeat for left side.

collar

Starting at the right front, using color C and smaller needles, pick up and knit the collar stitches.

Pick up and knit 14 (16, 17, 18) stitches from the right front, 16 (17, 17, 18) stitches from the right shoulder, 24 (28, 30, 32) stitches across the back, 16 (17, 17, 18) stitches from the left shoulder, and 14 (16, 17, 18) stitches from the left front.

Turn work, K 3 more rows in garter stitch.
Final row: K2tog, bind off all stitches until 2 st rem, SSK, BO.

buttons

Sew first button onto right side of button band, 1/2 inch down from neck line. Sew second button 2 inches below first button (measuring from centers of buttons).

button loops

Using crochet hook and color C, attach the yarn to the left button band on the wrong side of the sweater, being sure to place the loop where it will line up with the first button.
Make a chain of 11 ch with your crochet hook (or the proper length to fit your button). Attach chain to back side of button band, secure and weave in ends.
Repeat for the second loop, lining up with the second button.

scrap cardi 3

finishing

Weave in loose ends. Block sweater into shape.


important notice: This is a free pattern and you are welcome to use it for all the non-commercial purposes you like. However, you may not reproduce this pattern to sell, and you may not sell what you make with it. You may donate what you make with it to charity, and you may use it for charity fundraisers only if 100% of the proceeds are donated to the charity (and by charity I don't mean your kid's college fund). Thanks for understanding!